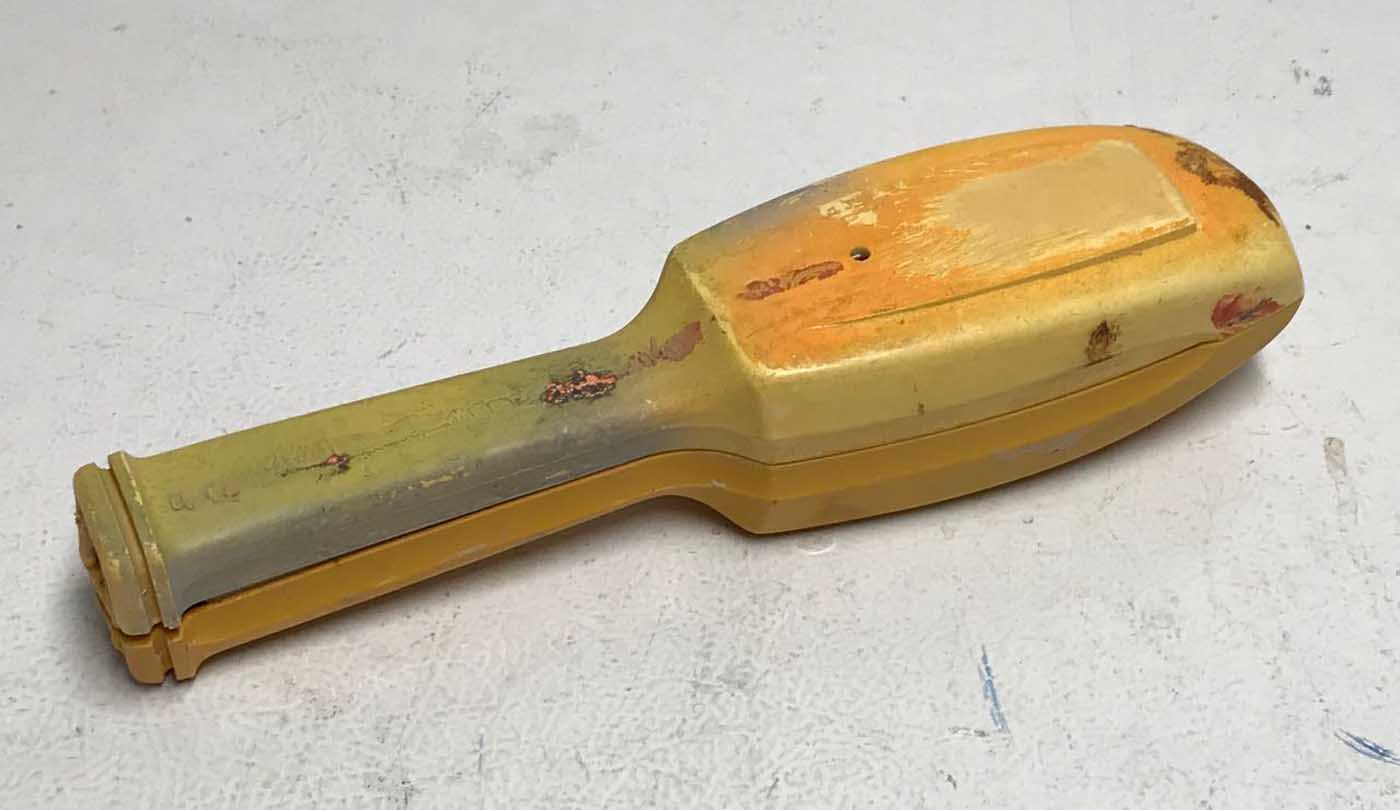
In the early 90s Bryan brought my 1989 PKE Meter to the set of a movie he was working on to show to his fellow crew members, and they were fairly impressed. A few weeks (or months?) later he brought me an Iona Shoe Polisher that one of his co-workers had found at a yard sale in Tucson. Bryan and his co-worker gave me permission to use it to build a new version of the prop.

references
A few years later, while working on some production in L.A., Bryan was sent to Modern Props to pick up something. Walking by the workshop he saw the PKE Meter sitting on the workbench. Not being the shy type, and armed with a 35mm SLR camera this time, he proceeded to snap 12 photos of the prop, both opened with the interior guts visible and closed up and working.
1994-early attempts
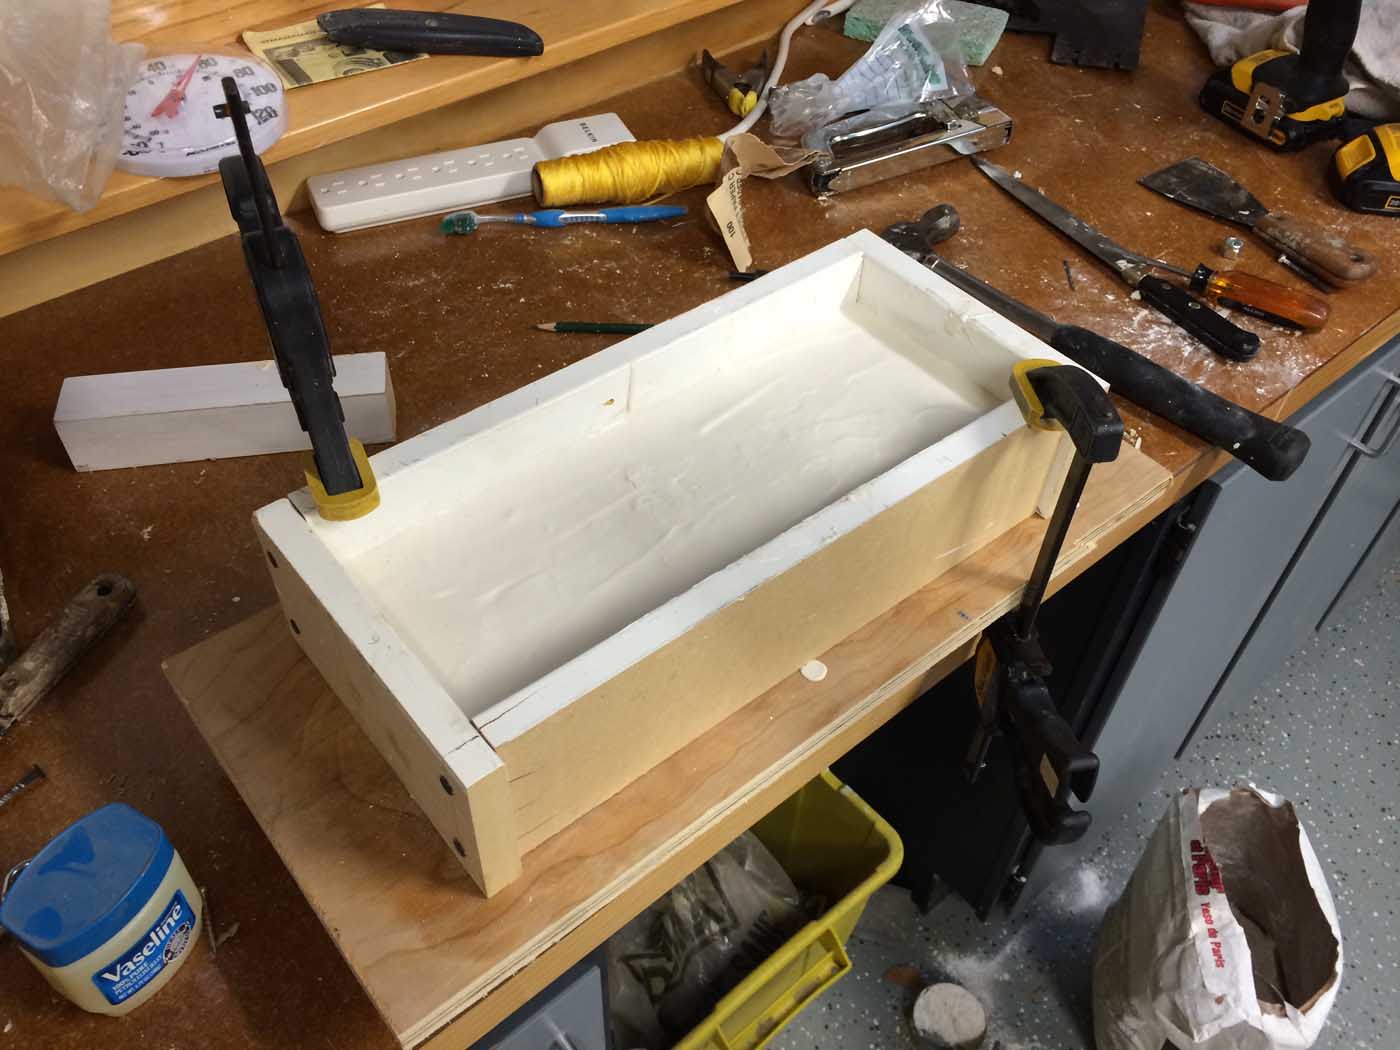
My original plan was to make molds of the unmodified Iona polisher and pour resin copies that I could then chop up and modify to create the PKE prop. I’d then return the shoe polisher to Bryan’s co-worker. By that time I had some experience creating flexible molds using RTV polyurethane rubber. In this pre-internet era the Polytek catalog offered good instructions on how to proceed.
I had never tried resin casting before, and despite Polytek’s instructions I wasn’t entirely satisfied with my casts of the unmodified Iona. It didn’t help that I was casting the resin in Tucson in August. My resin would solidify before I’d poured half the piece. Looking at the pieces now they don’t look horrible. They could probably be sanded and filled to make workable pieces. I guess at the time I wanted something near perfect on which to build the prop.
2001 - Iona modifications
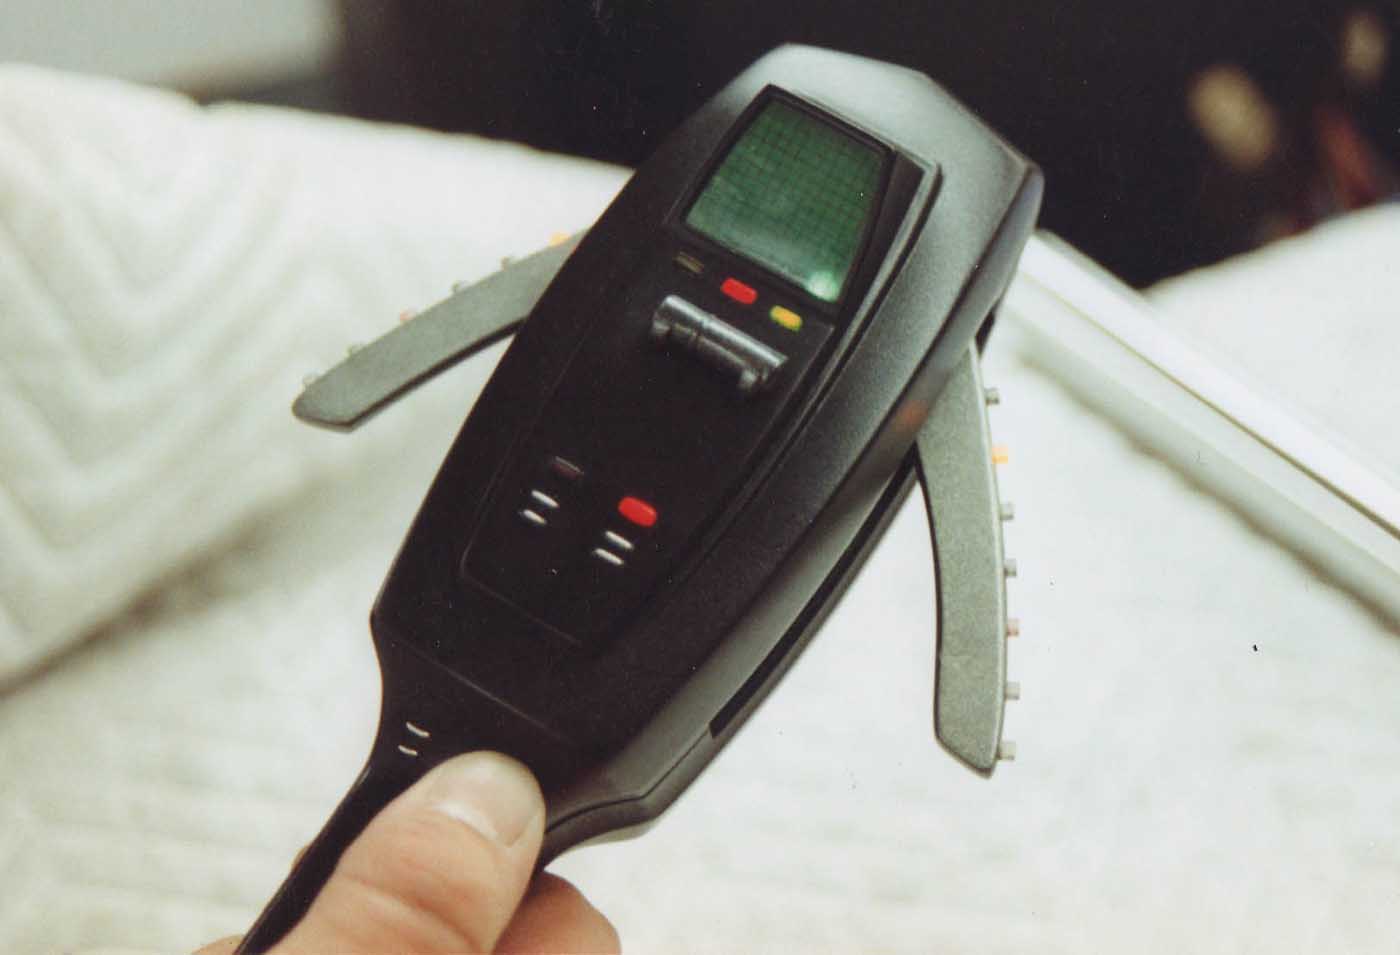
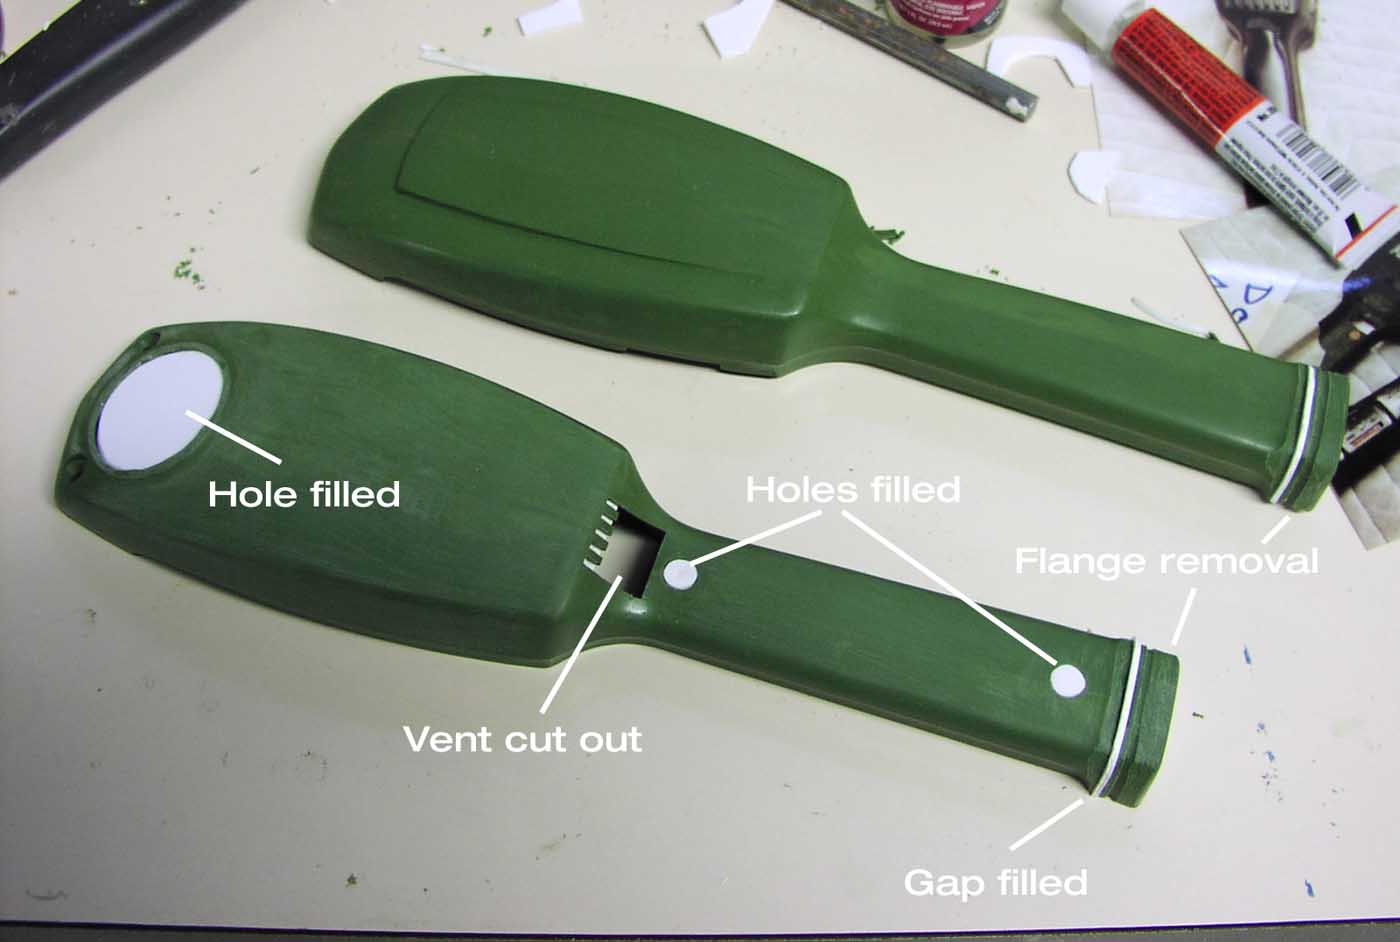
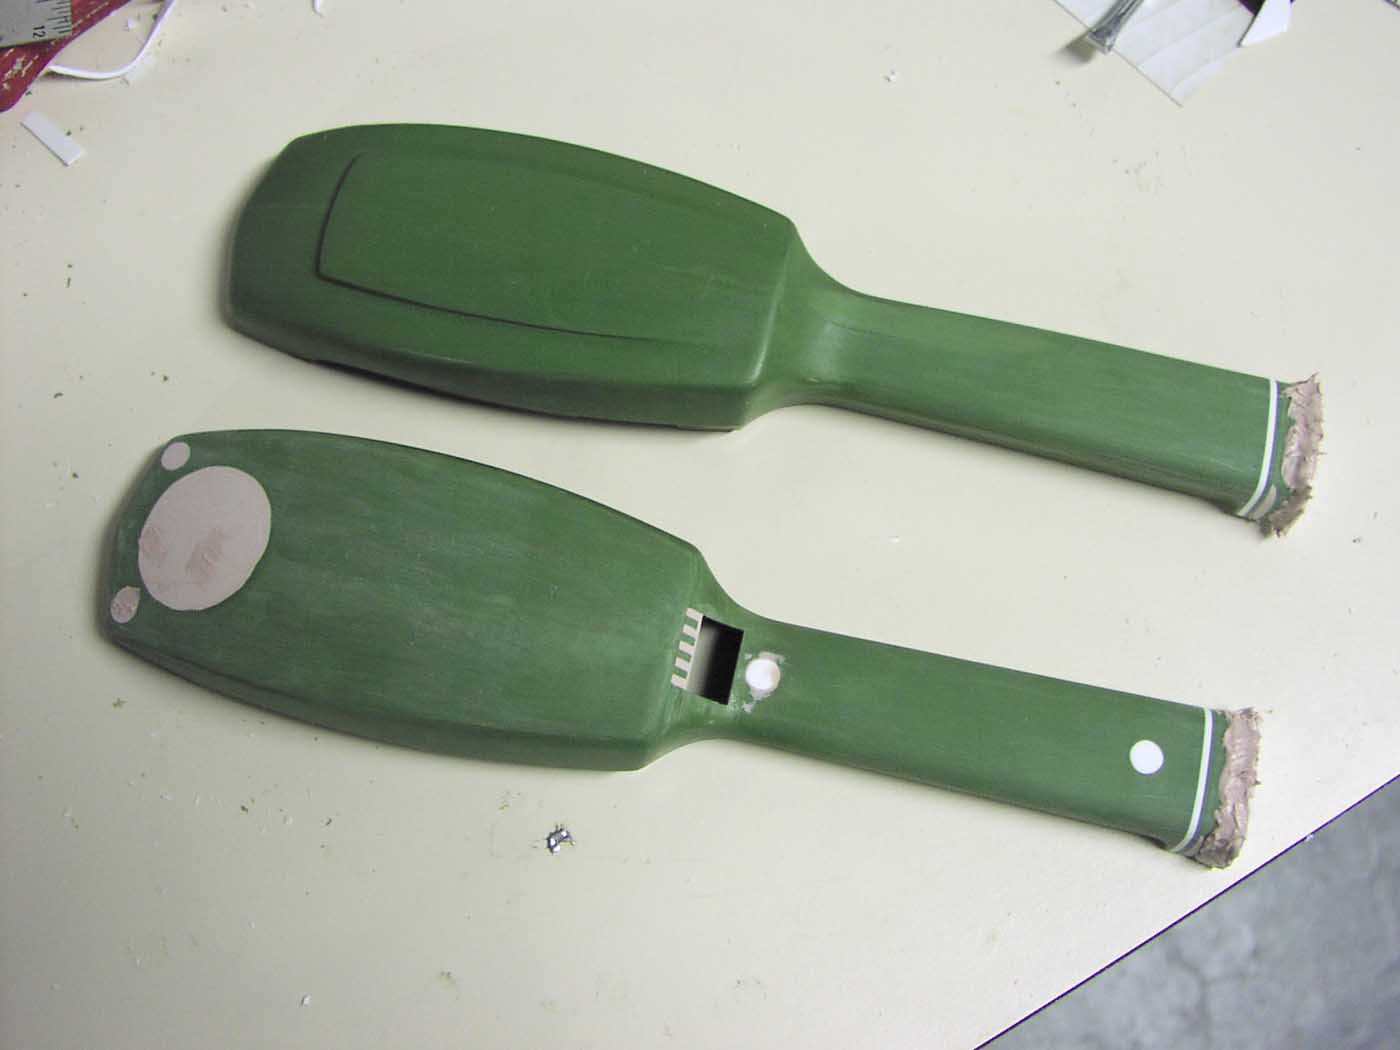
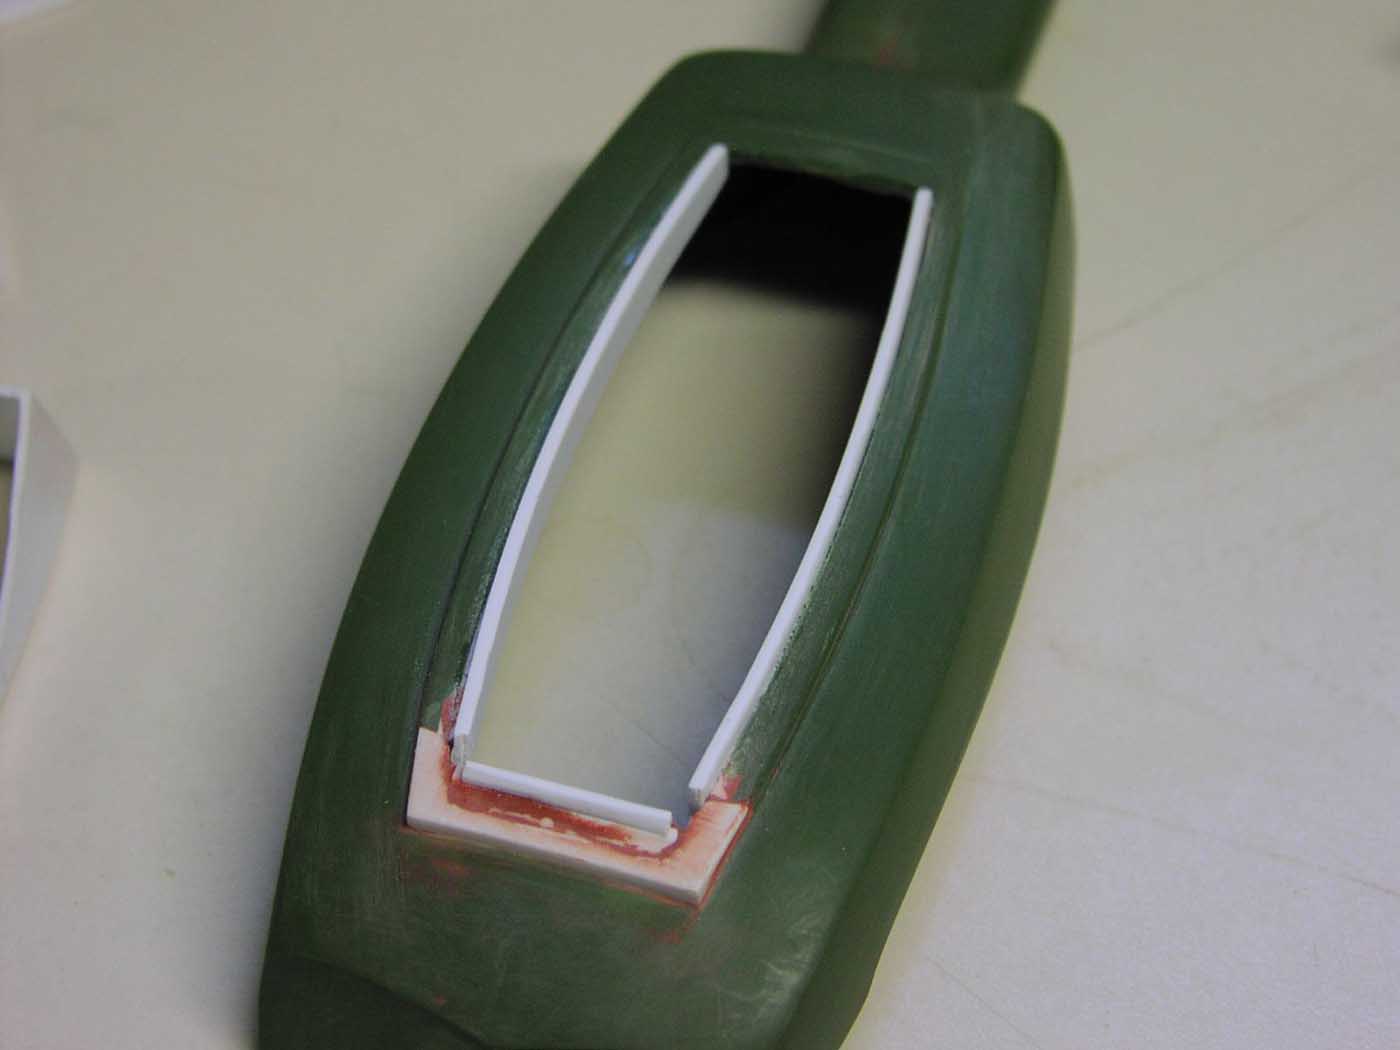
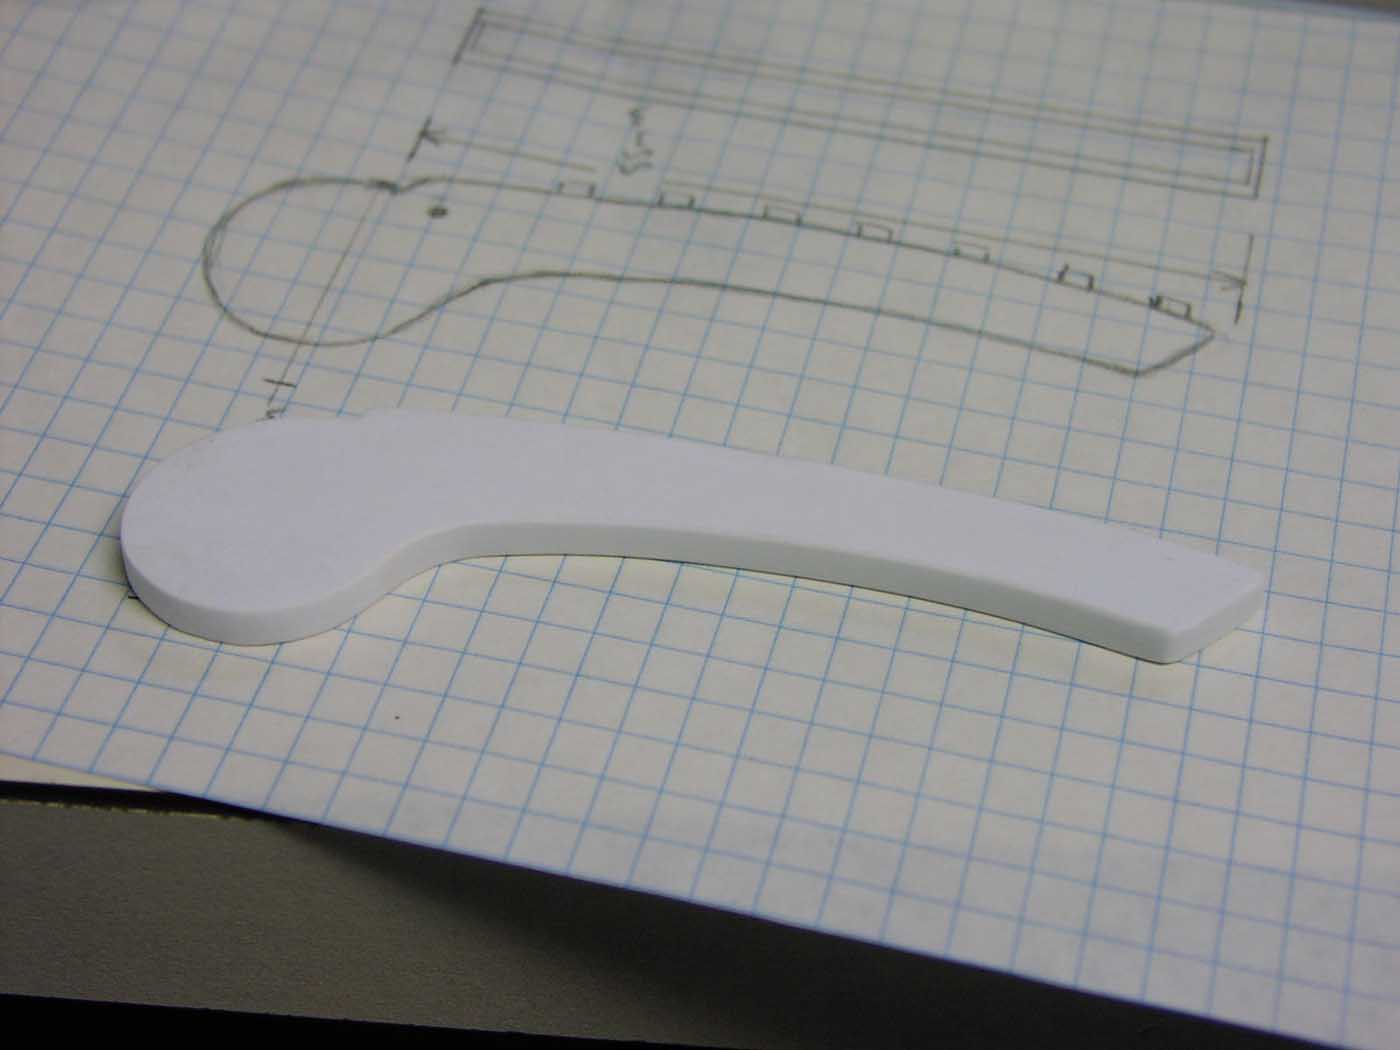
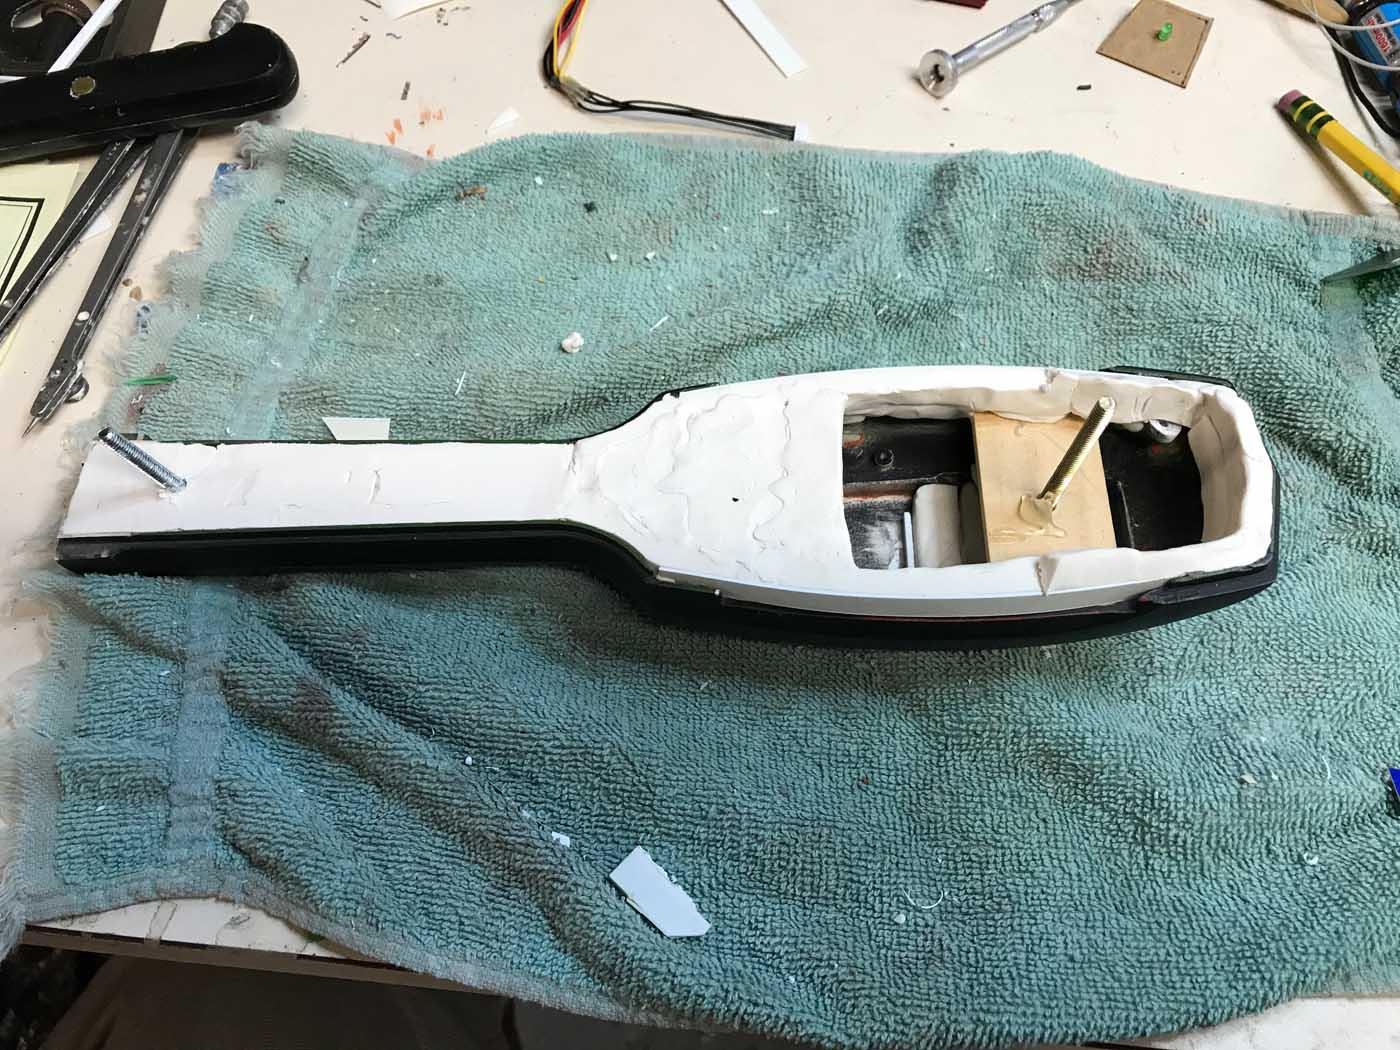
I set this project aside for 4-5 years after moving to Portland, Oregon; work and fixing up our house took up a lot of my hobby time (and would for many years). Bryan gave me permission to make direct modifications to the Iona shell, so that’s what I did. Using his photos for reference I employed various modeling skills I’d learned over the years to alter the shell and add the details required to make an accurate replica of the PKE meter.
2001 - Wings
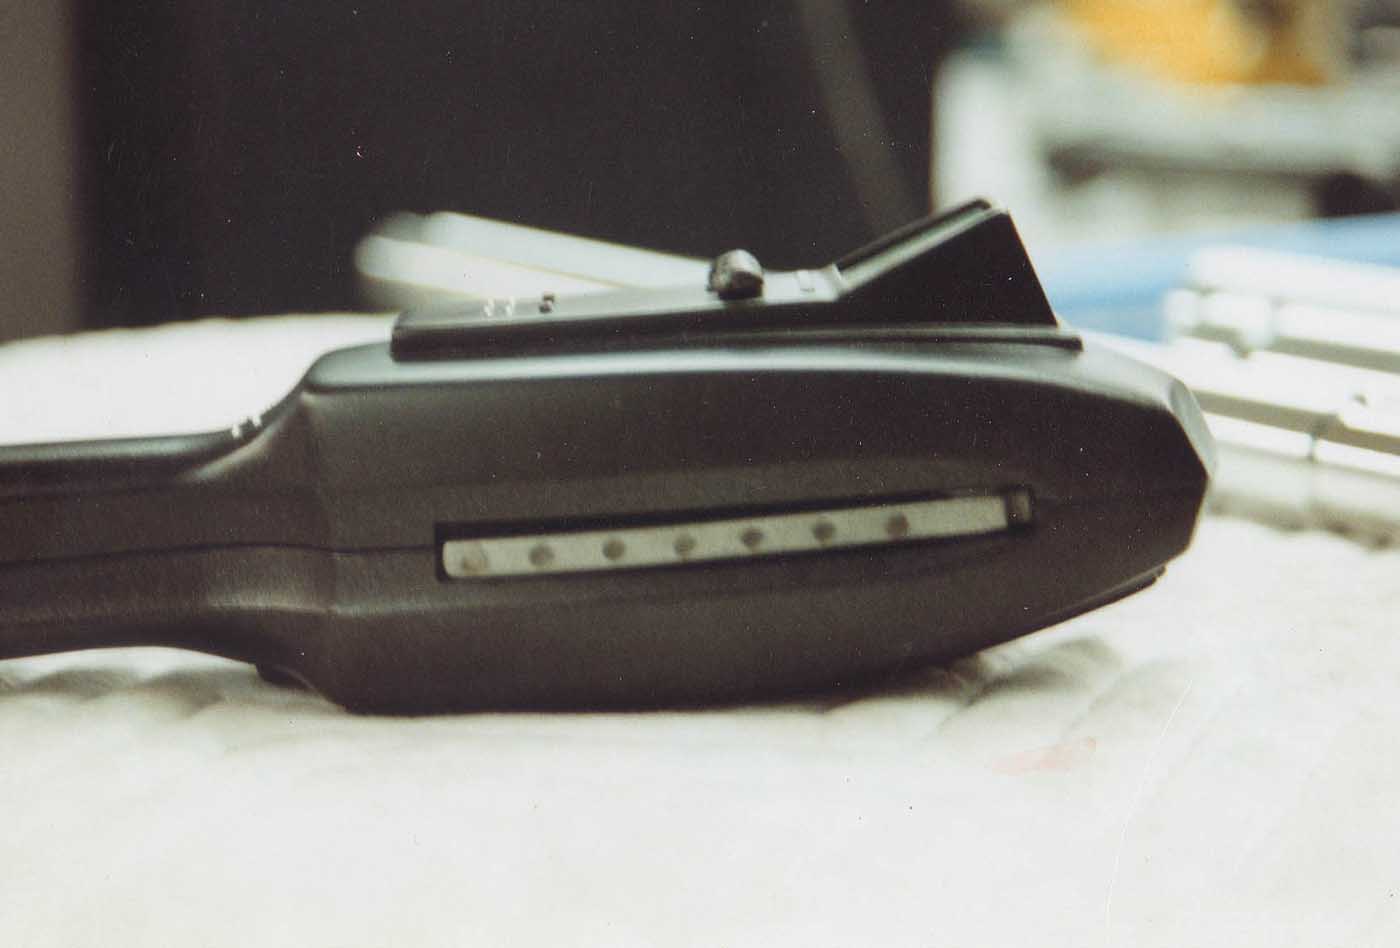
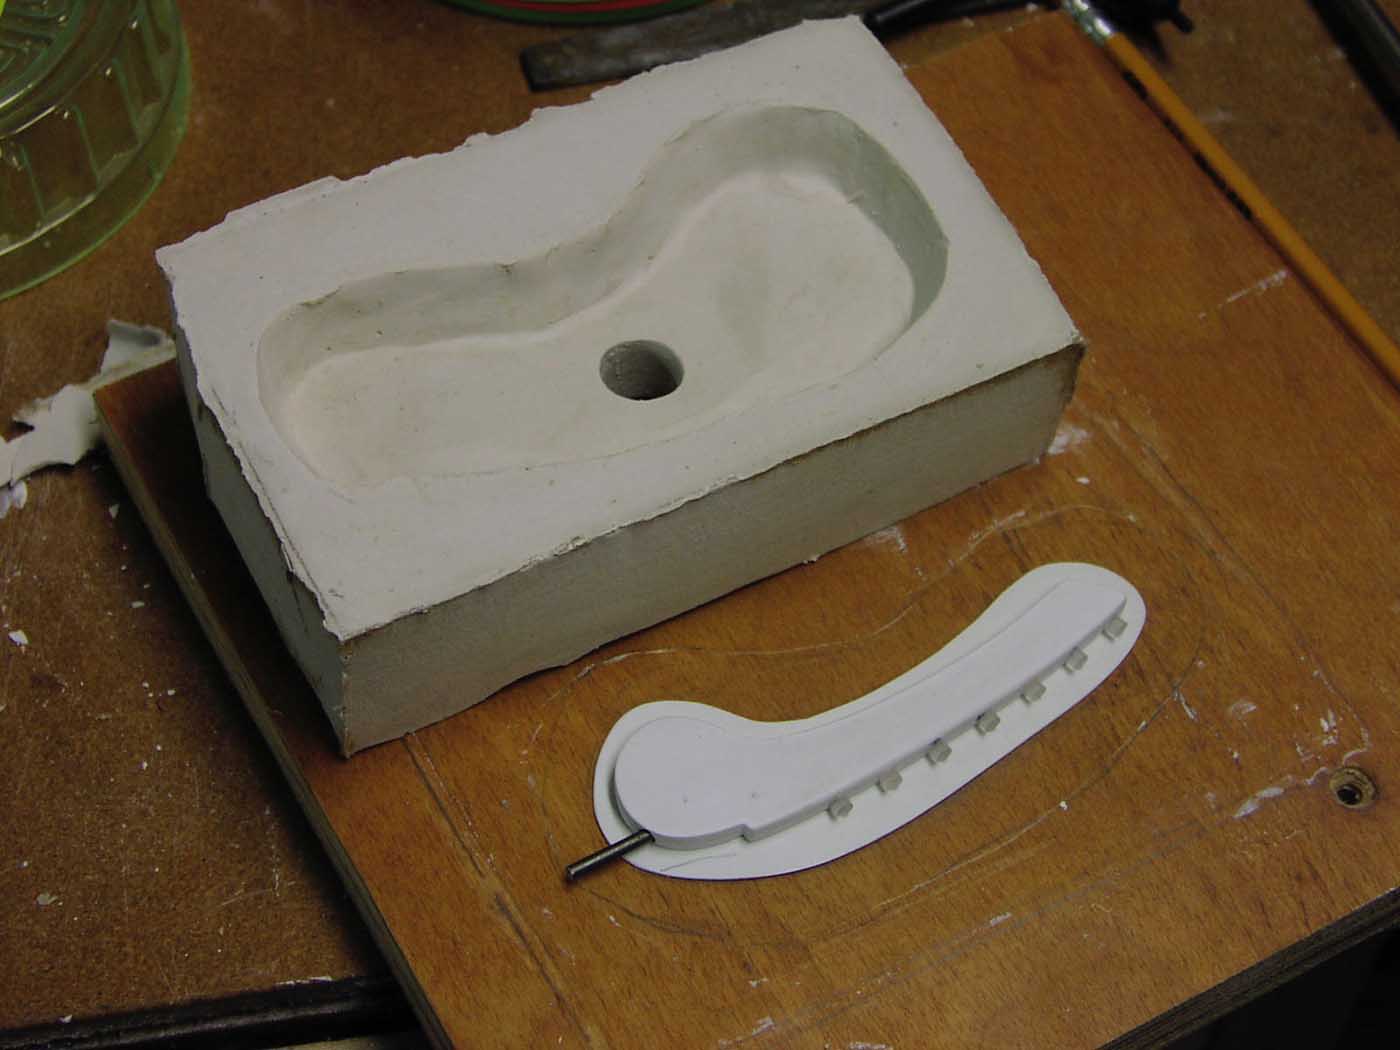
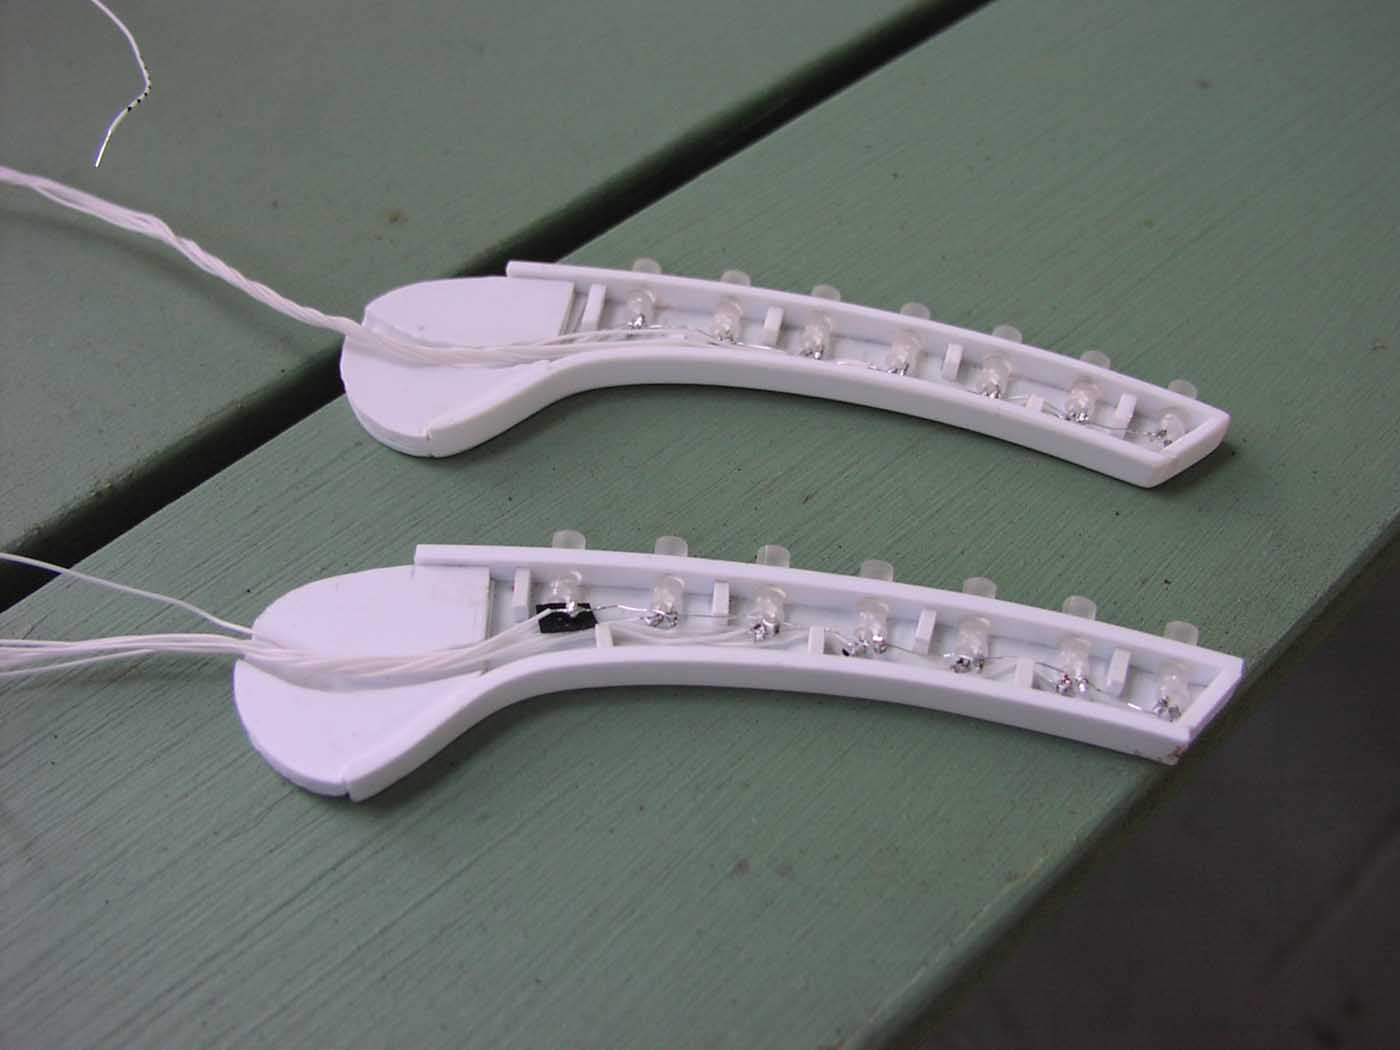
My initial hope was to build a buck and mold for the wings and cast the LEDs, wiring, and lenses within, but, again, my resulting resin casts weren’t very good. Most of my tests warped horribly after curing. At that point I opted to build the wings entirely from scratch using sheet styrene, filling the cavities with a bit of resin to lock things in. I used single-strand magnet wire which ends up being rather stiff.
2003 - Analog Electronics
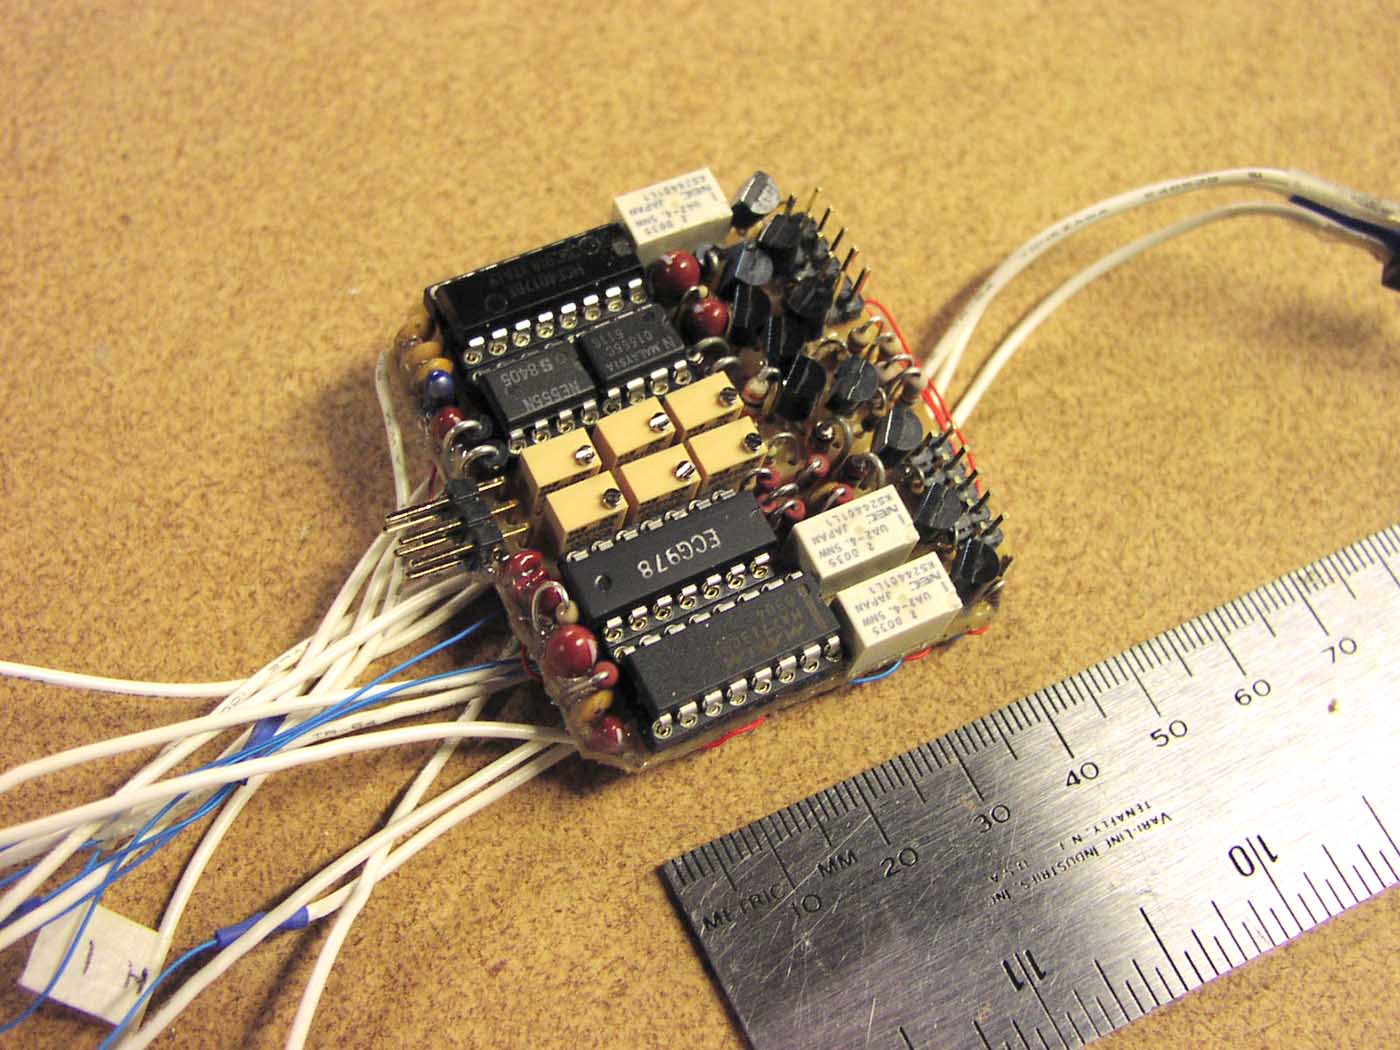
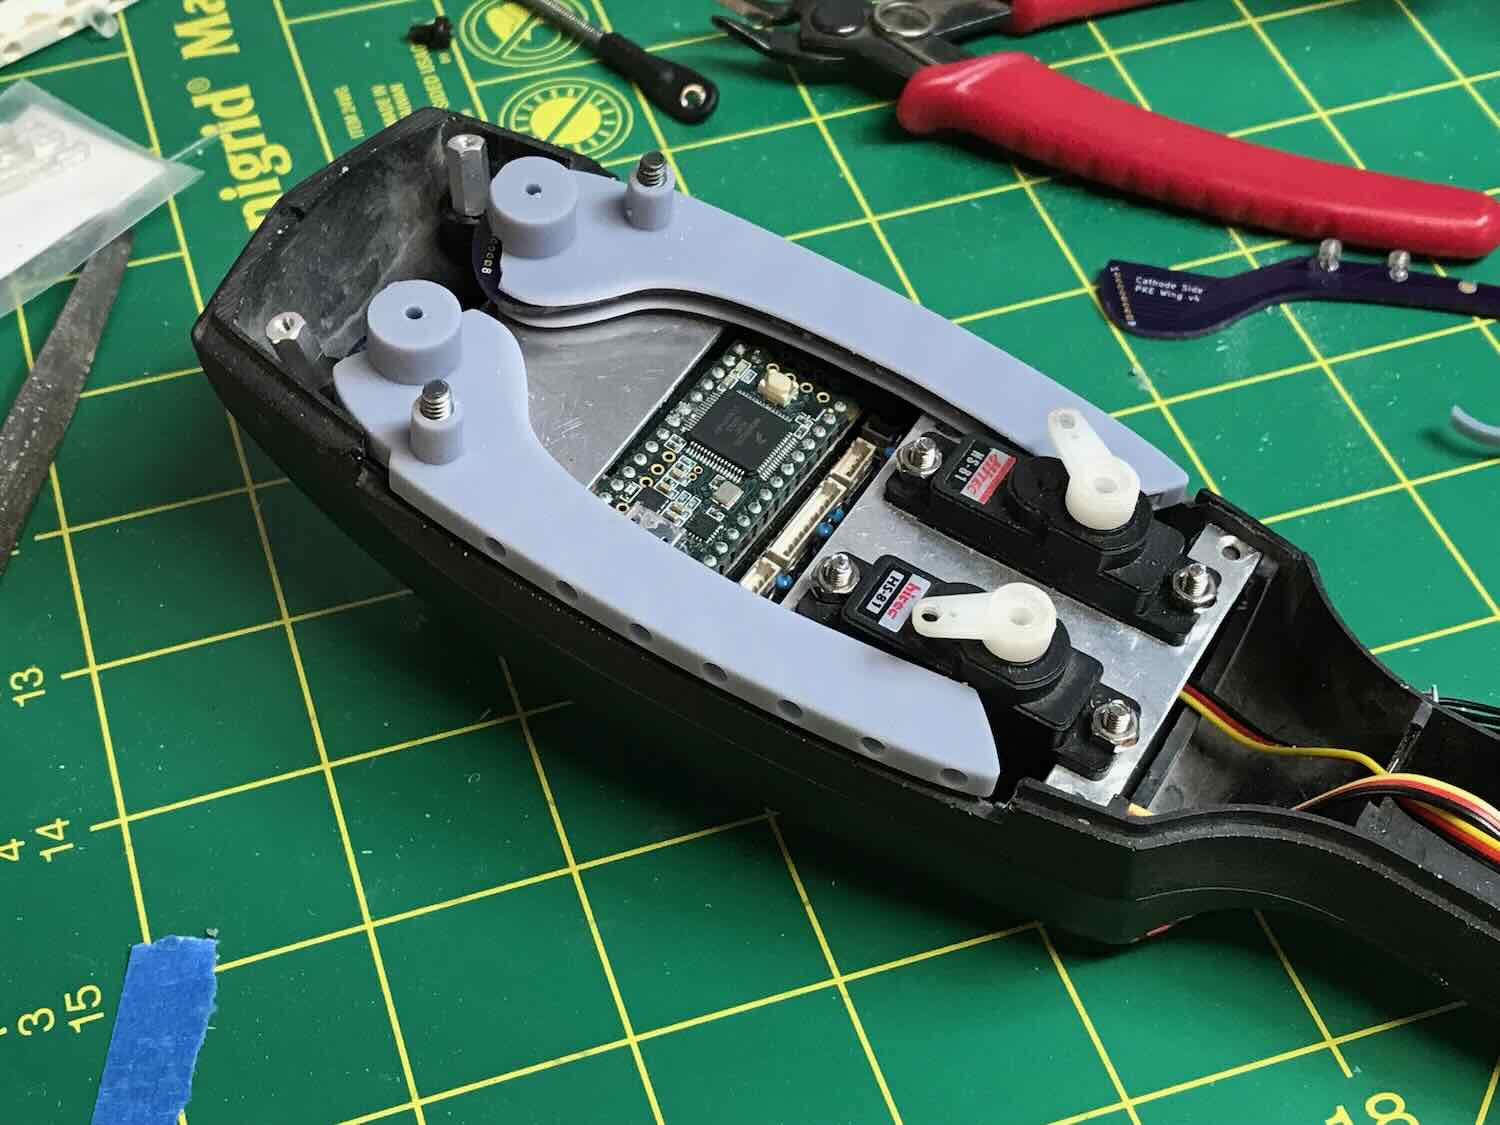
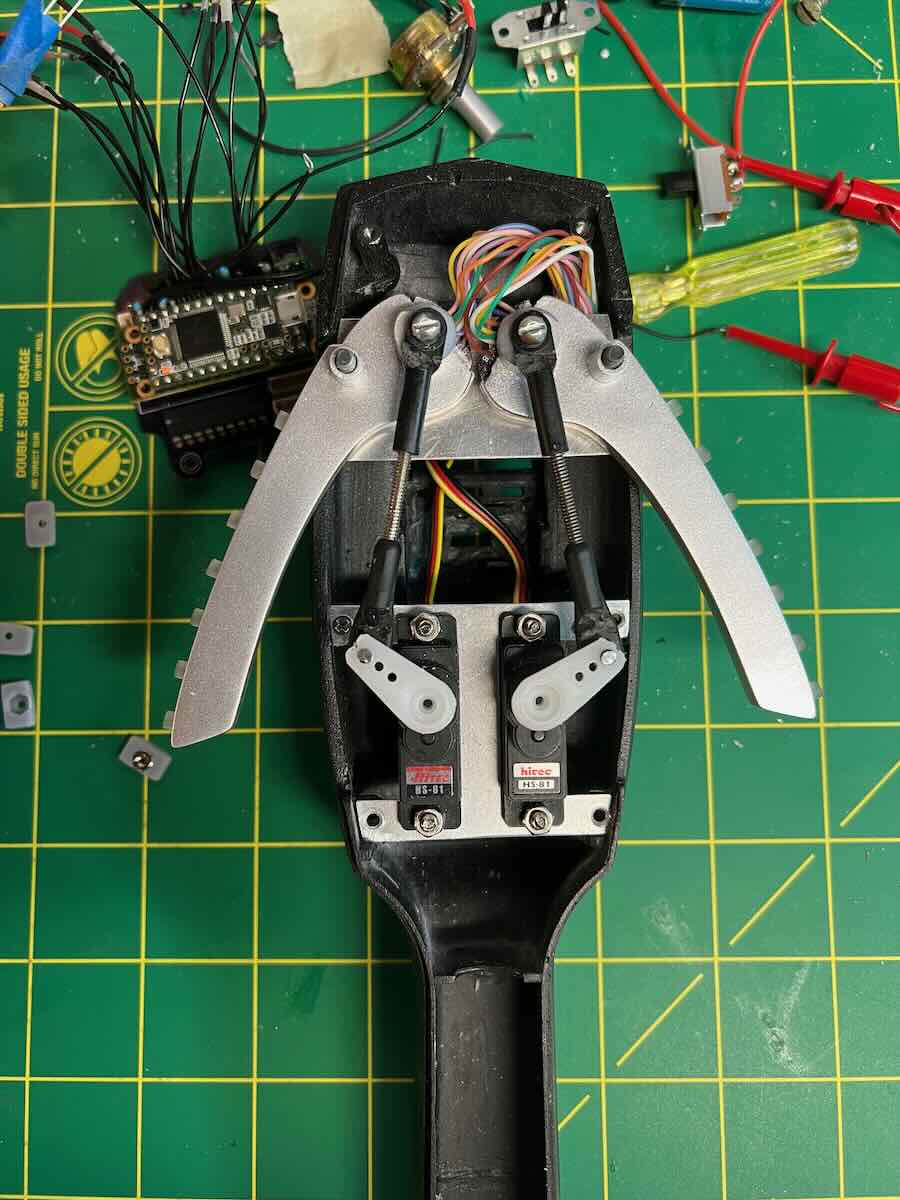
I wanted to use two servos as shown in Bryan’s reference photos. I found some schematics for servo drivers online and worked up a schematic to drive the servos and chase the lights, triggered by touch switches and relays. Unfortunately my hand-wired circuit board was too big to fit in the shell. I also had an issue I could never correct where the servos and wings would behave erratically. A single servo worked fine; two appeared to interfere with each other.
2014 - Arduino
In the fall of 2014 our new next-door neighbor, who’s a coder and electronics hobbyist, told me about this (new to me) thing called an Arduino that could be programmed to drive the servos and chase the lights, all in a simple package. With his advice and a lot of help from my friend Patrick Benton, who did almost all of the heavy lifting on coding the sketch for the Teensy 3.2 we’d be using I got a good prototype working on a breadboard. Once we (mostly he) got the basic functionality going we decided to add sound and program in the ability to switch how the speed of the light chase was controlled. In mode one the speed of the lights would be slow when the wings are halfway up and fast when they’re all the way up. In mode two the speed would be controlled by the potentiometer on the handle, as in the original prop. We also plan to program in two different light chase patterns as shown in Ghostbusters 1 and 2. We also added the Teensy Prop shield so we could play sound effects for the HALF and FULL states.
2014 - casting
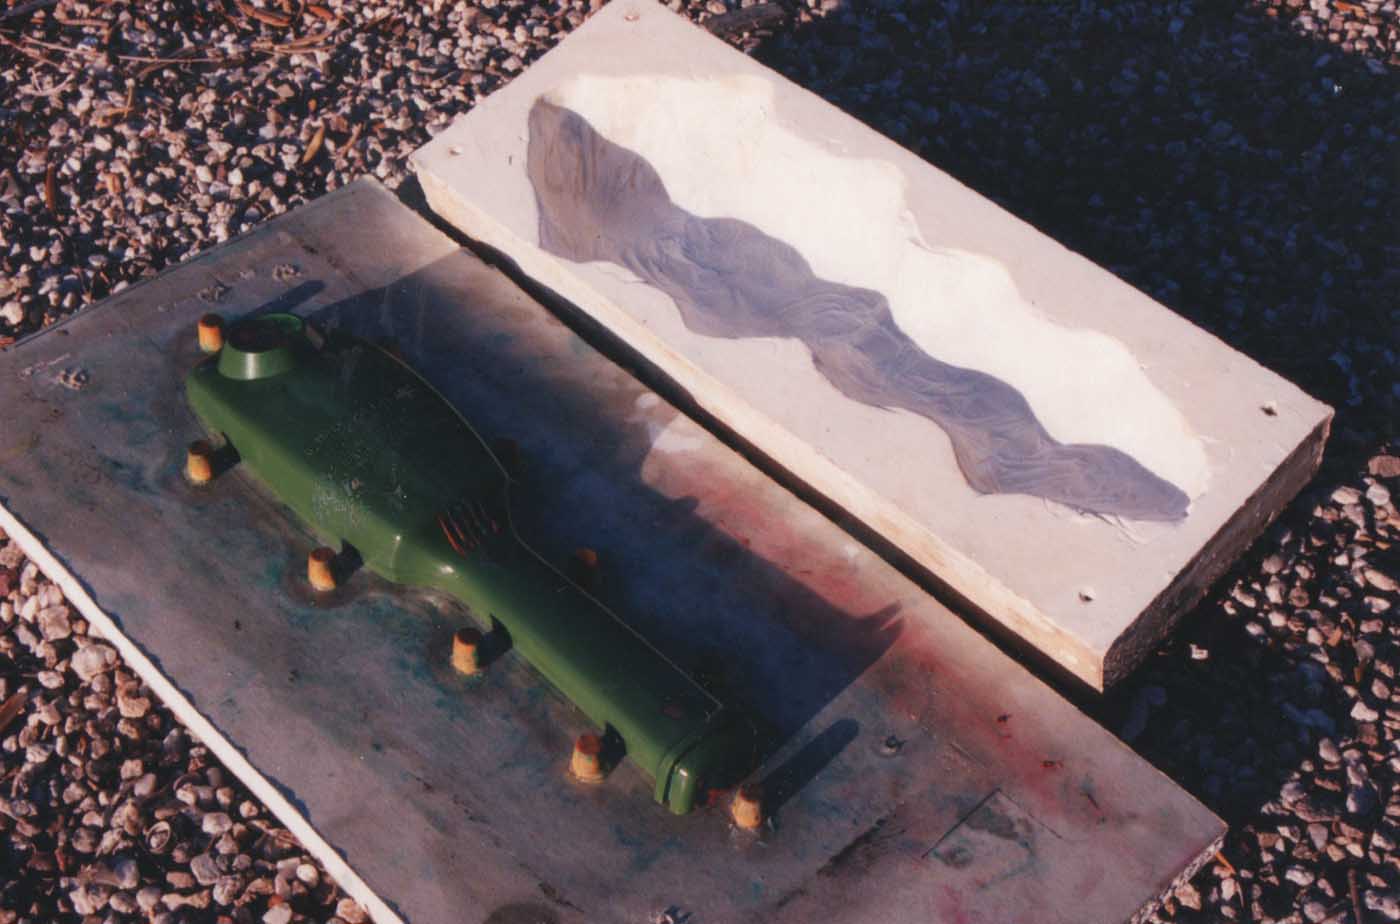
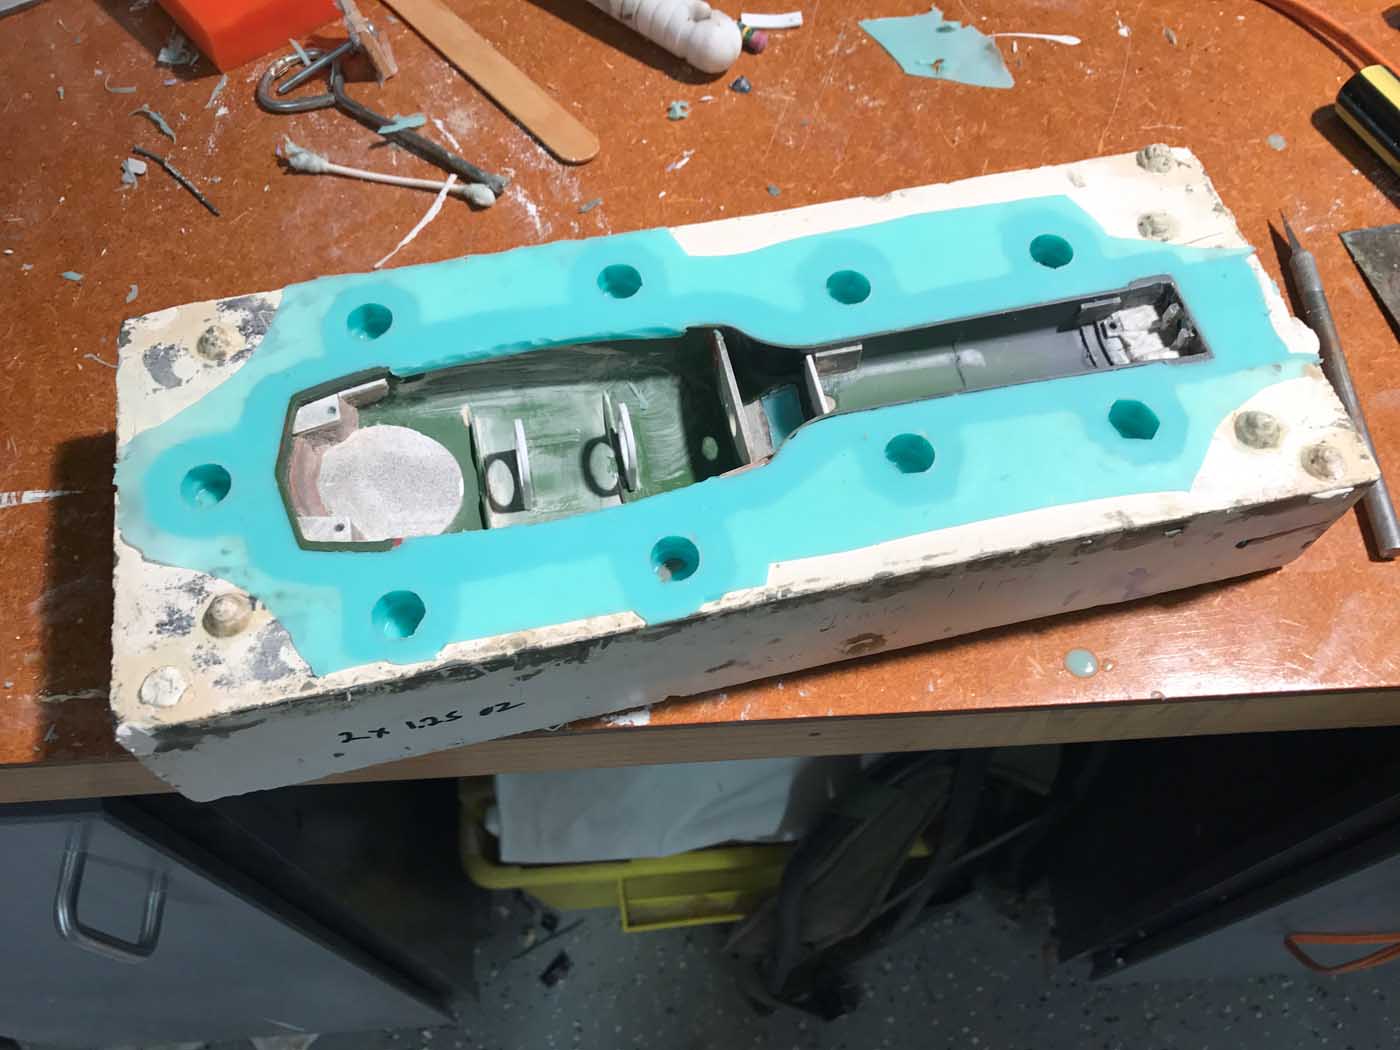
With my prototype complete I set out to create clean molds and resin casts. I wanted shells that could stand up to the rigors of conventions and other appearances; I didn’t want to risk having a styrene part pop off of my master. I also thought it might be worth offering kits of this at some point to offset my costs.
My first attempts using a polyurethane rubber for the molds produced poor results, so I tried again with low-cost Oomoo silicone rubber. These molds worked better, but they were somewhat fragile, and I had a lot of problems achieving clean pours with the resins I was using. I redesigned some of the interior structure of my master shells and made new casts with MoldStar 15 silicone molds. These molds held up well, but my resin yields are still poor as the thin walls of the prop make casting difficult.
2018-2022 - PCBs
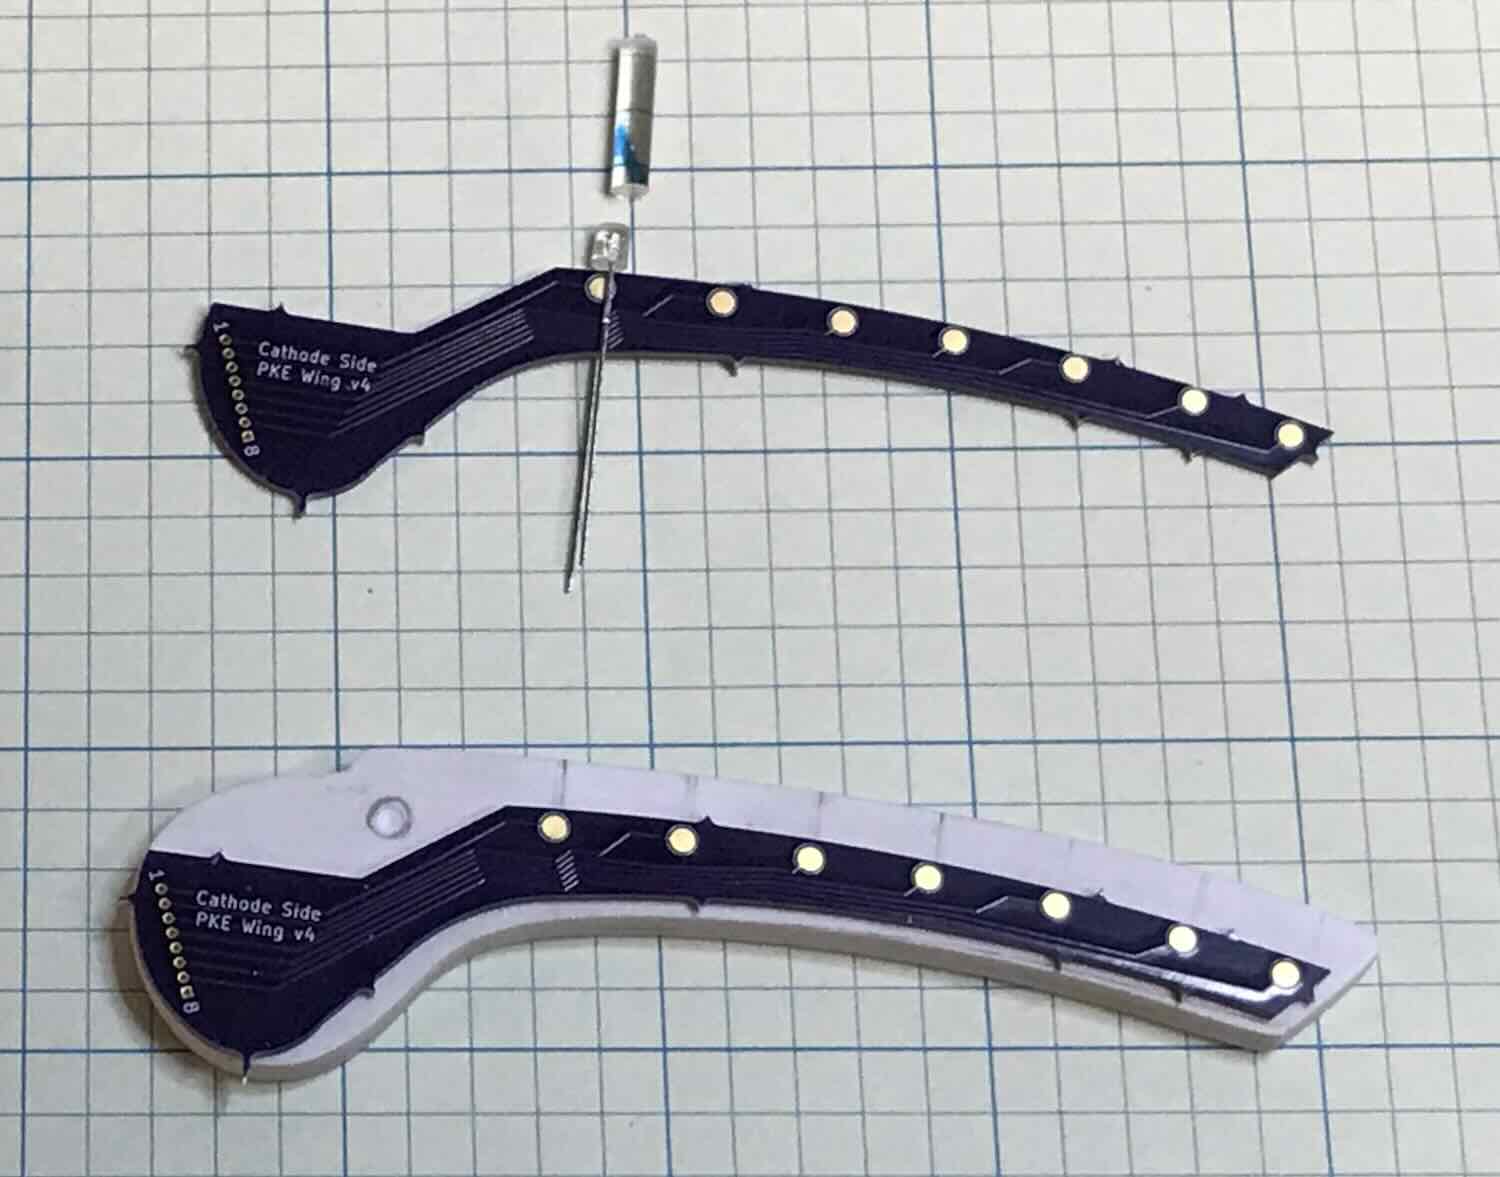
Following another suggestion by my next-door neighbor I turned to OSH Park to fabricate printed circuit boards for this project. I taught myself KiCad and used that to design a board that could fit in my shell. In 2020 I designed and had OSH Park fabricate PCBs for the display screen LEDs. In 2022 I designed and had the wing PCBs fabricated.
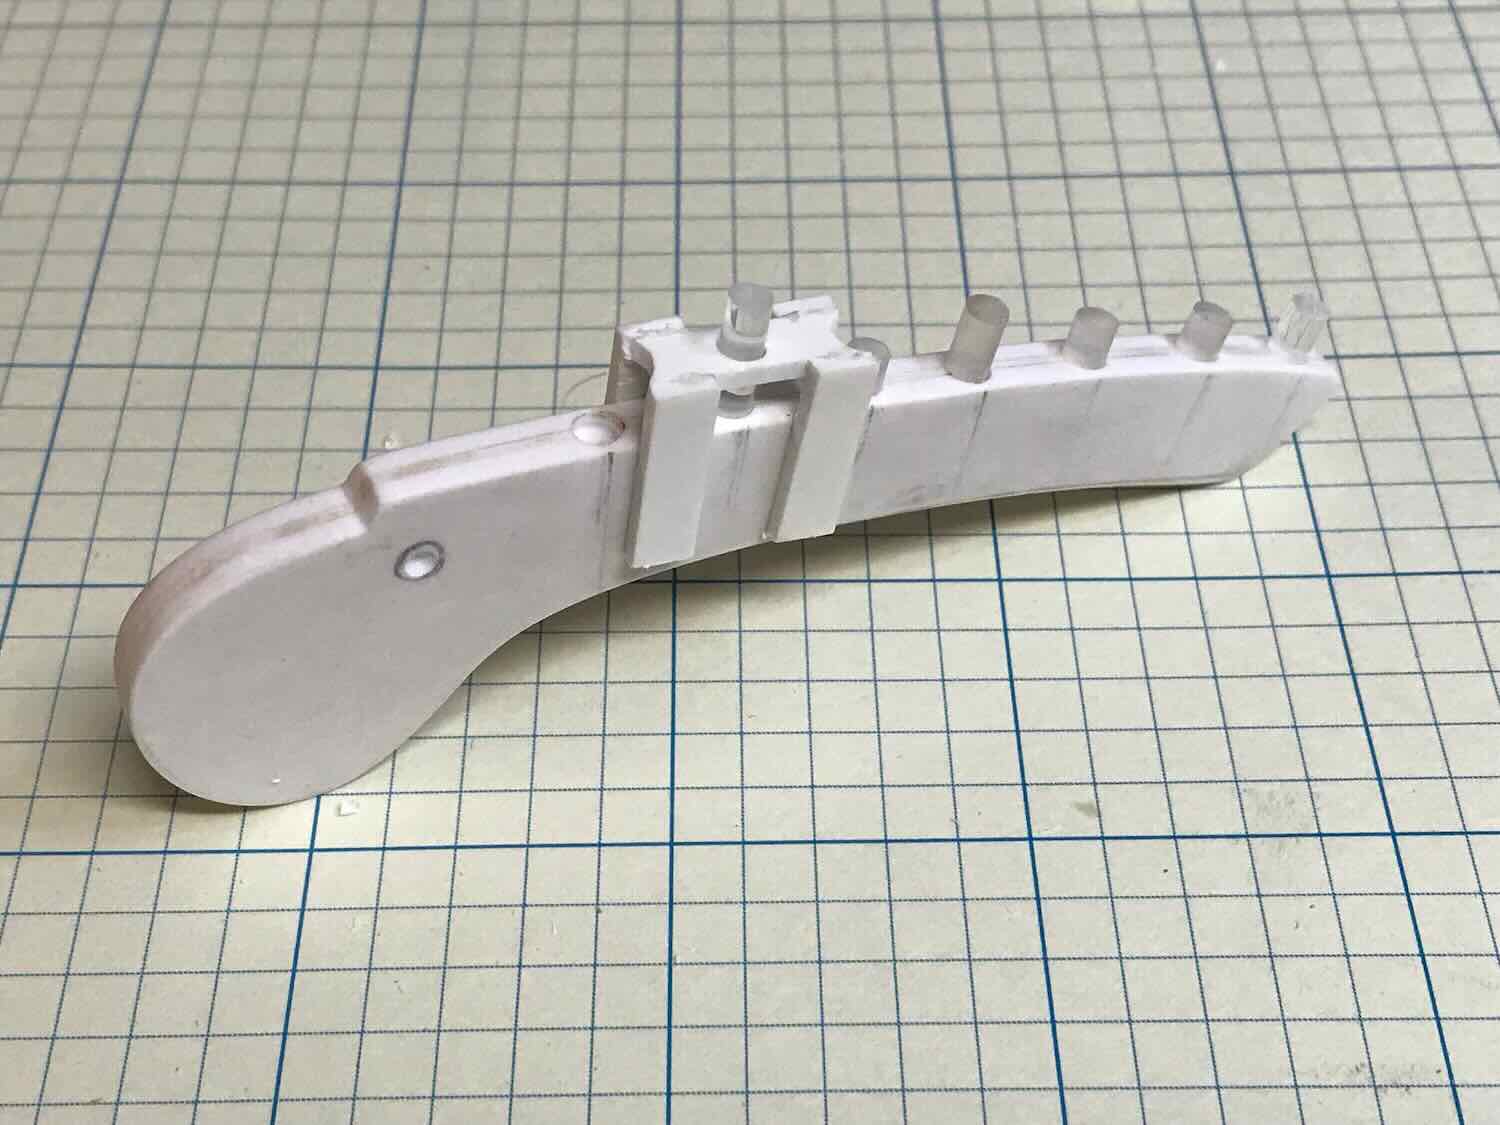
2022 - 3D-printed wings
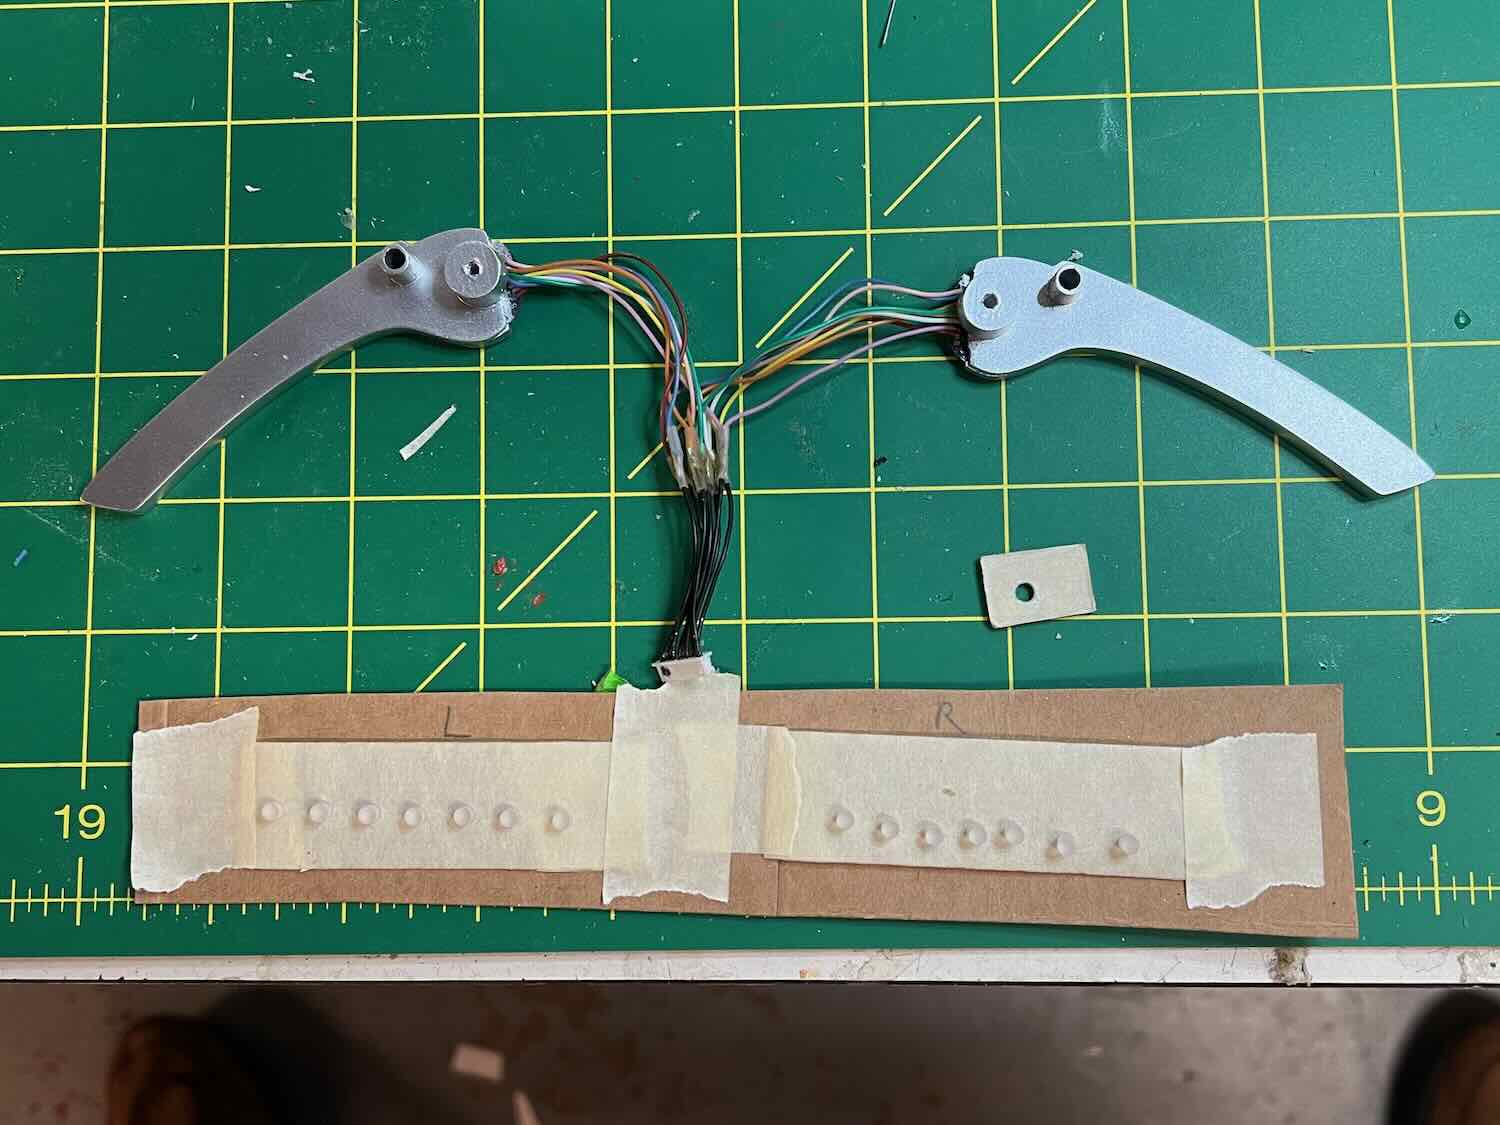
I turned once again to working out a way to efficiently make multiple copies of the wings. I didn’t want to have to hand-craft every wing from styrene. I revisited the idea of making a buck of a wing, pouring a silicone mold of that, and then cast resin around a wing PCB with the LEDs and acrylic lenses attached. Despite creating various jigs to help guide the attachments of the acrylic rods to create a buck, I couldn’t obtain clean placements.
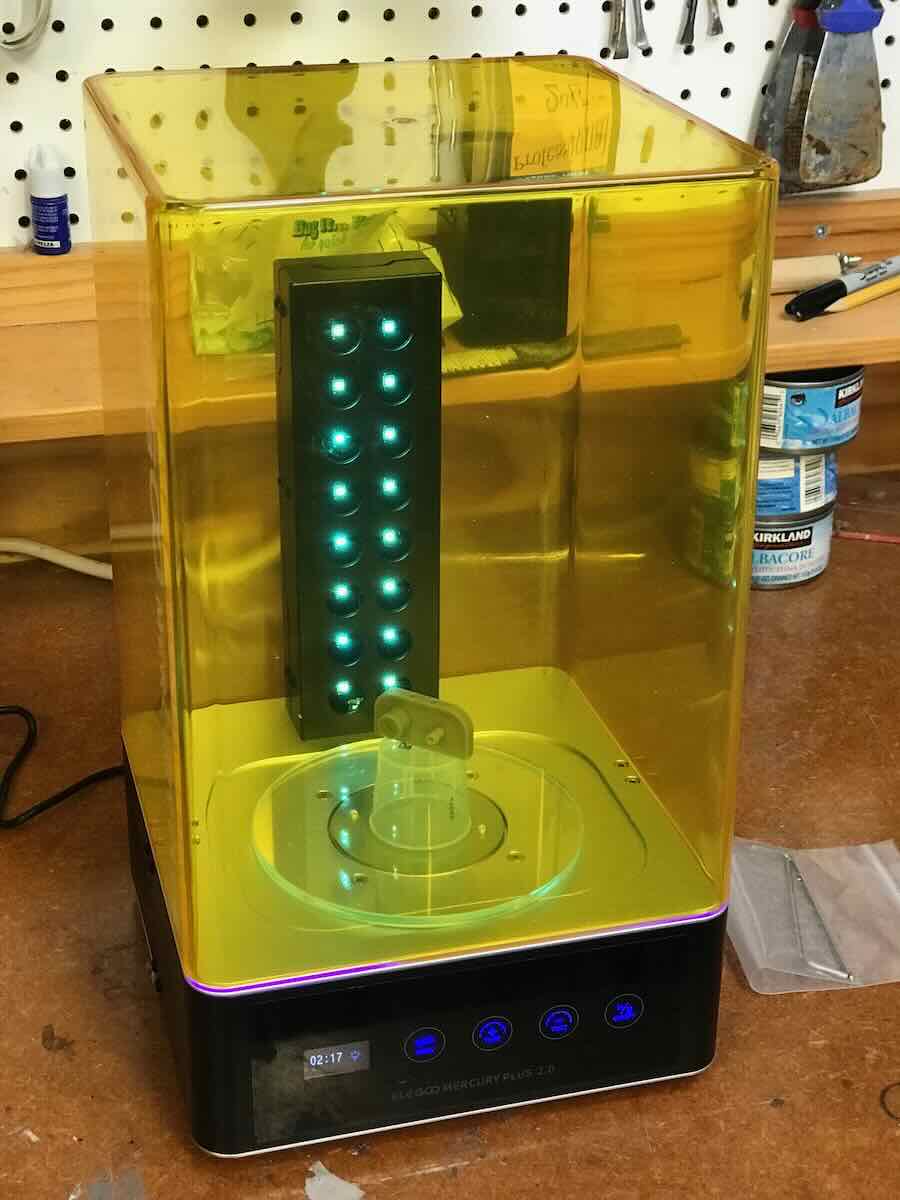
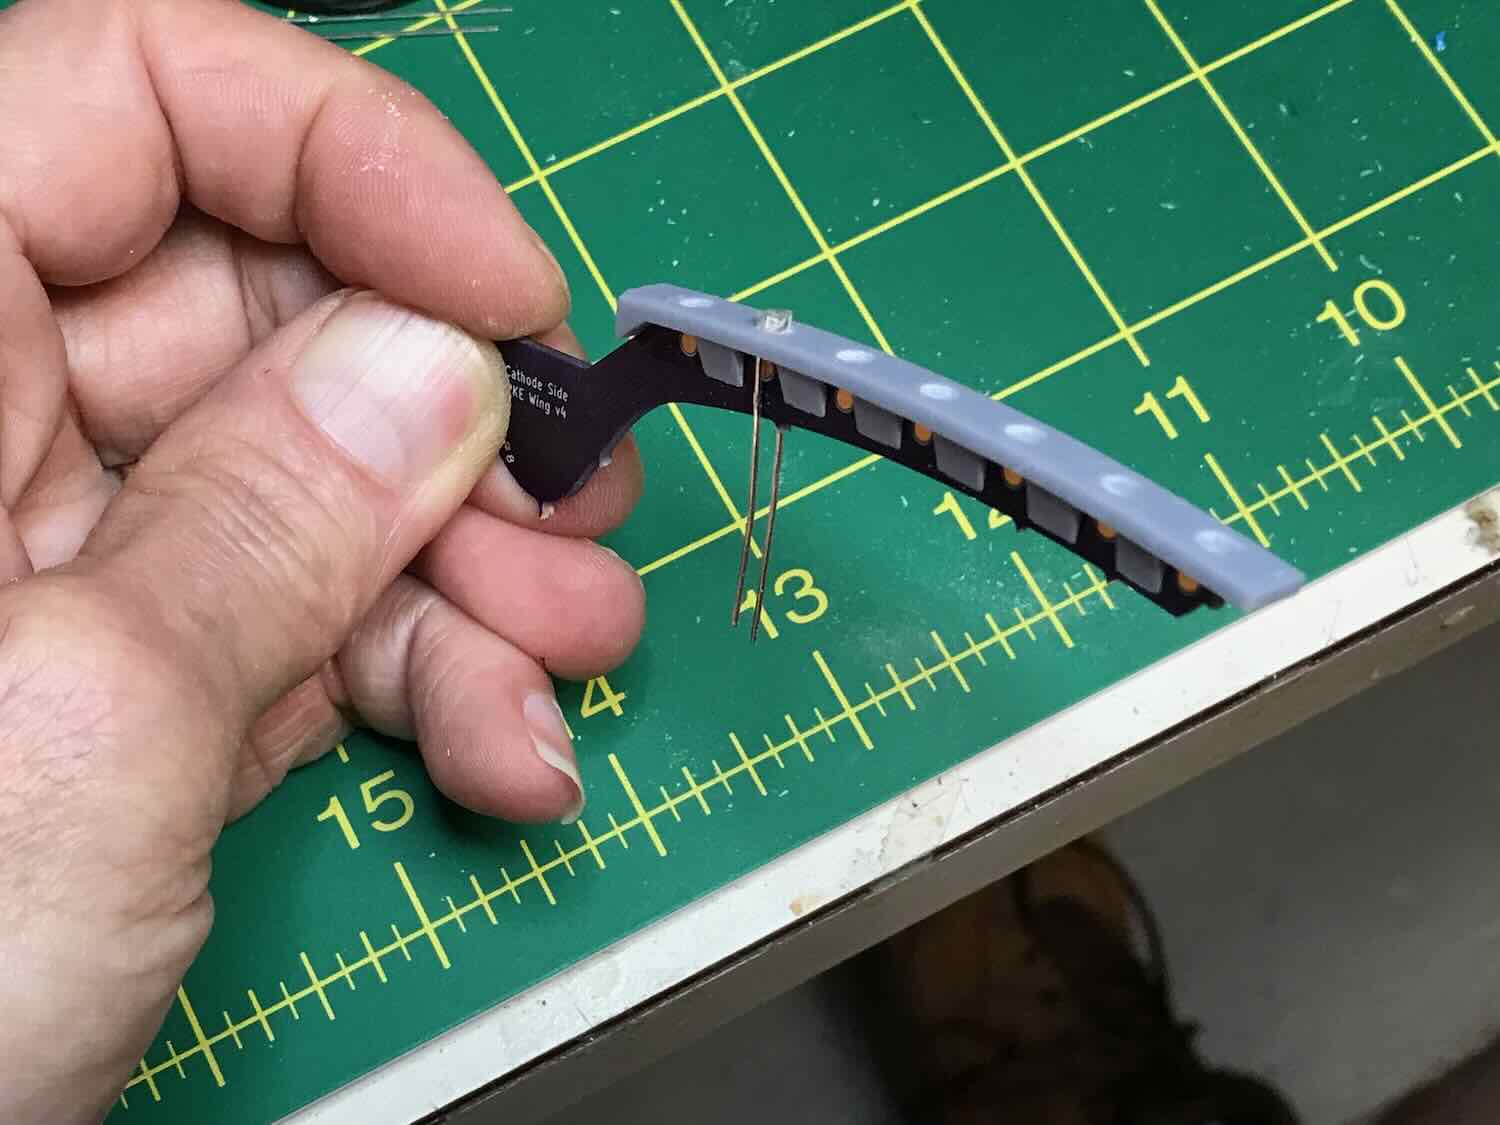
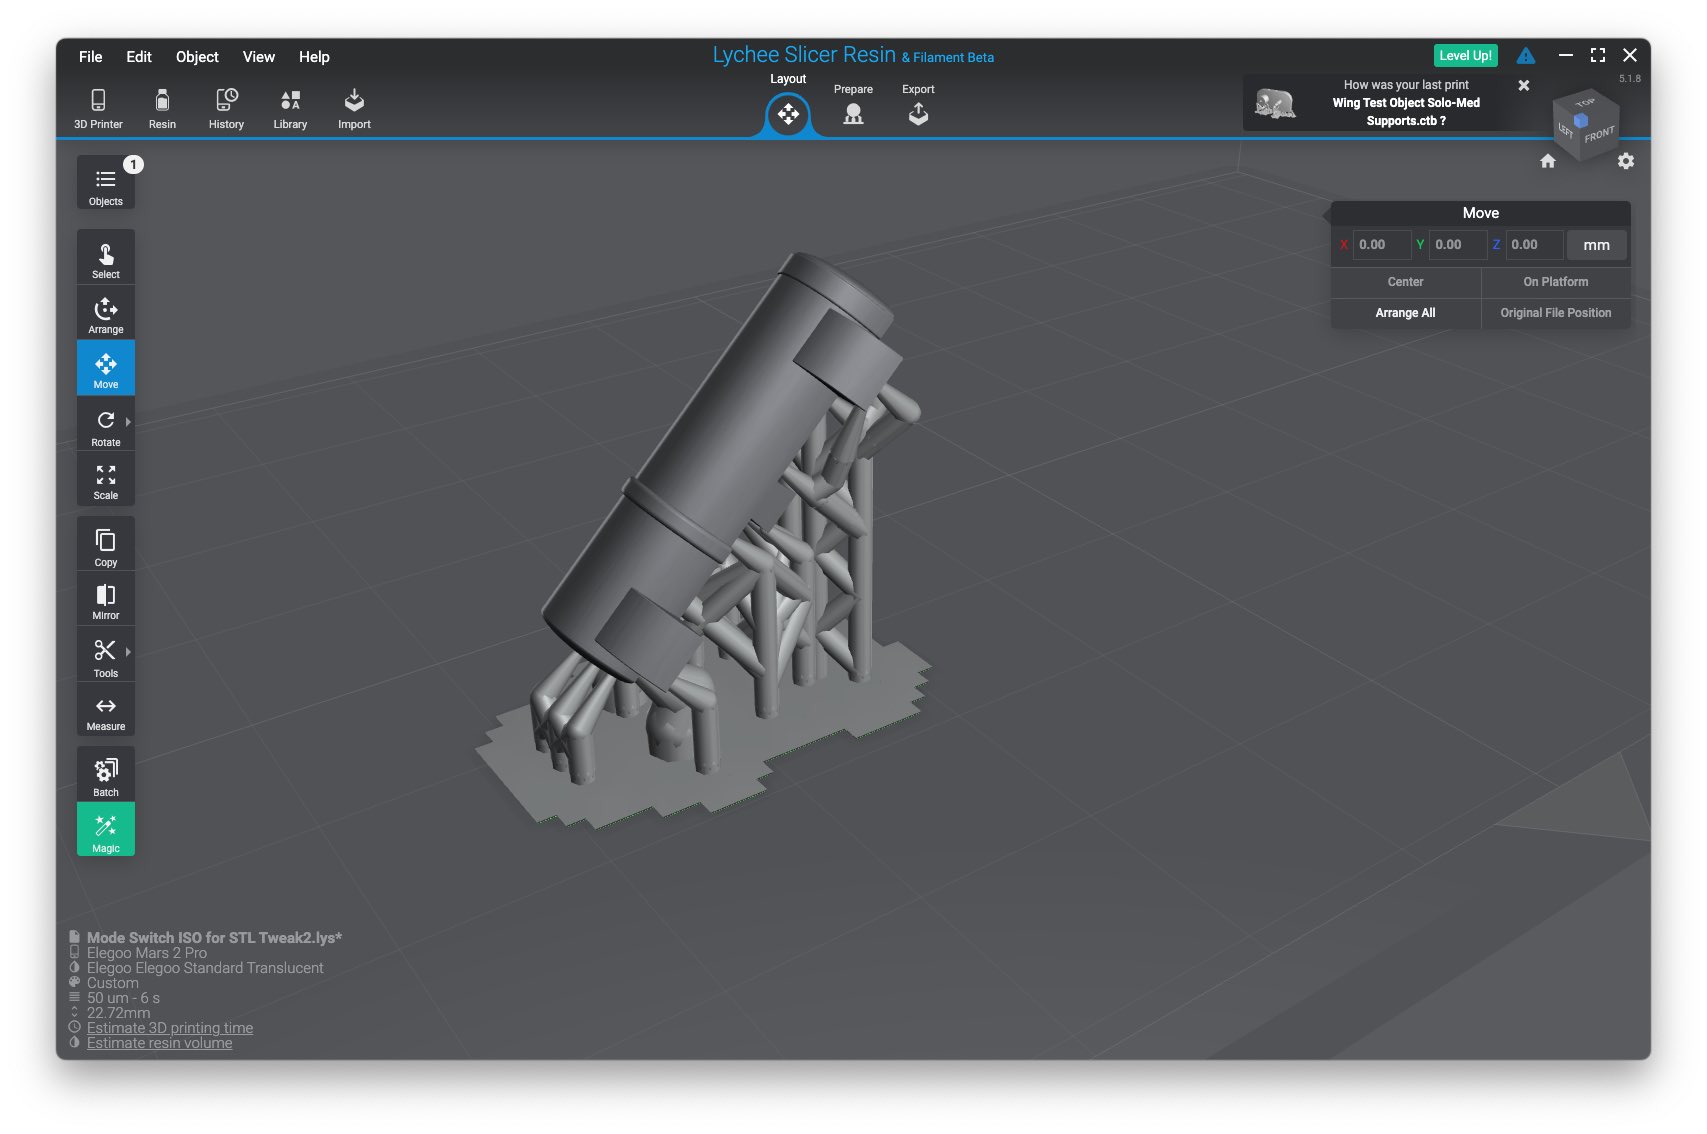
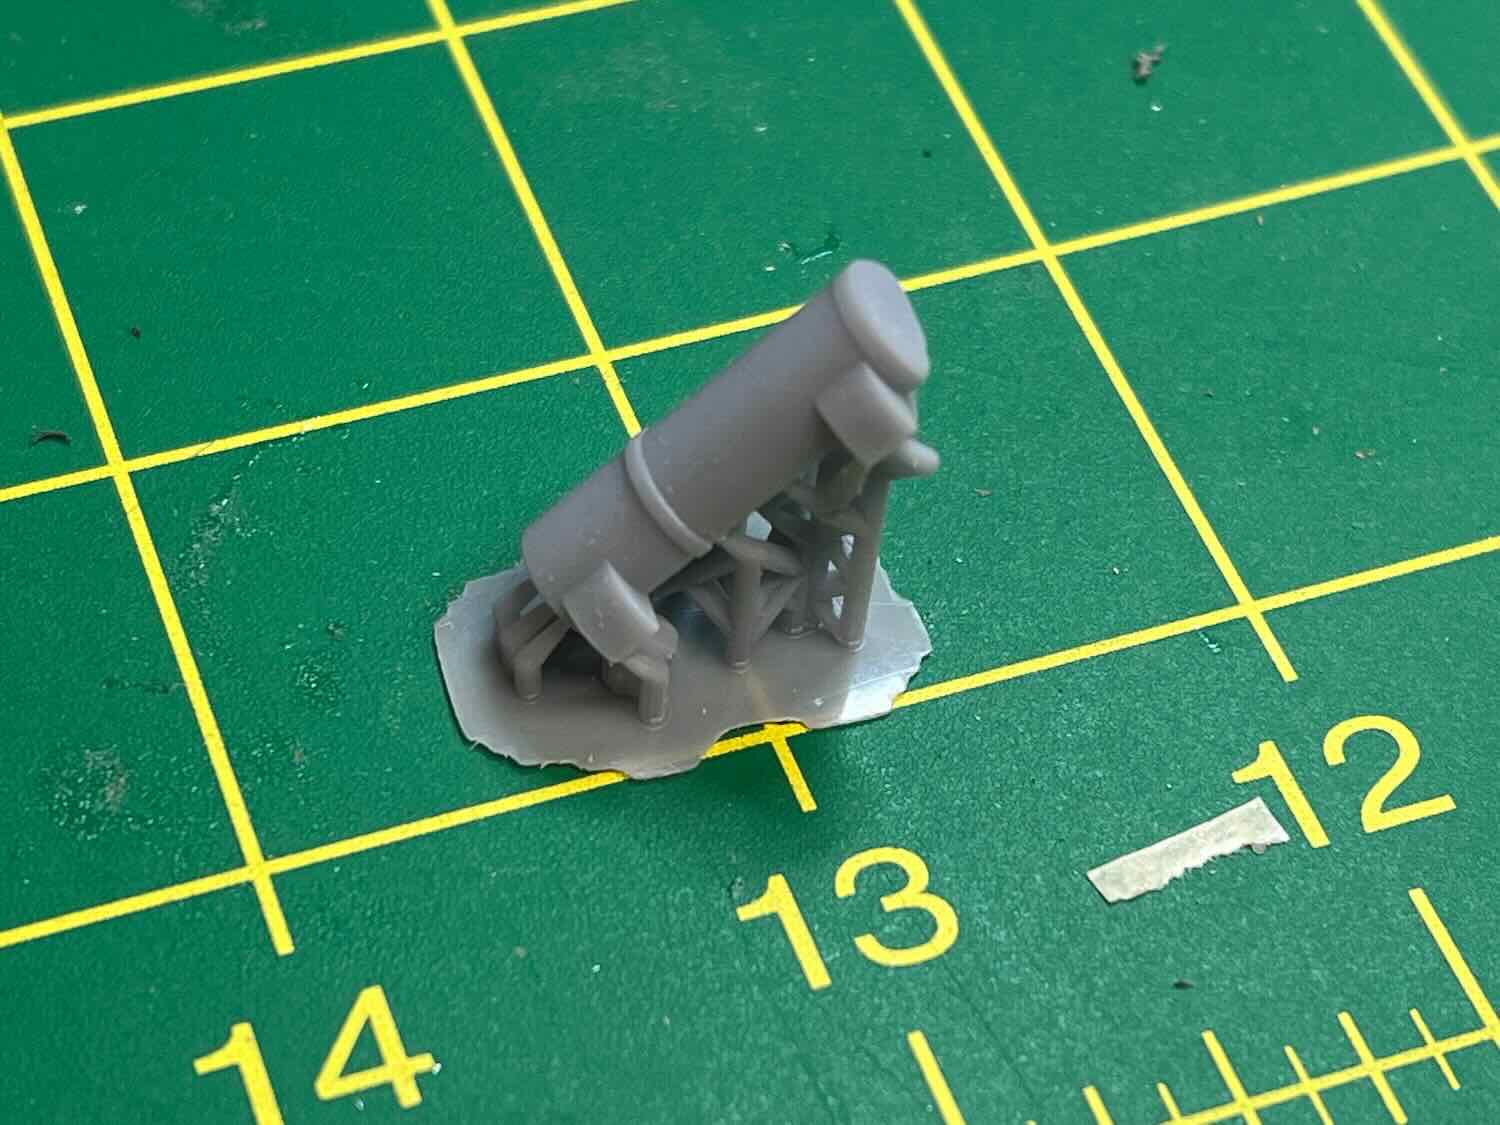
I decided to try 3D printing the parts. I bought a small ELEGOO Mars 2 Pro SLA printer and ELEGOO Mercury wash and cure station. After a couple of good calibration prints I designed a small part in Cinema 4D to test shrinkage and tolerances. With that success I modeled a two-part wing into which the PCB could slide, along with a jig to guide placement of the LEDs onto the PCB for soldering. After a bit of trial and error I got pretty good results with the assembled wings requiring some minimal filling and sanding to clean up.
I used a small piece of aluminum to gauge the height of the acrylic rods. I removed the rods for priming and painting (keeping track of which went where) and then glued them back in (onto the LEDs) with CA glue.
2022 - final assembly
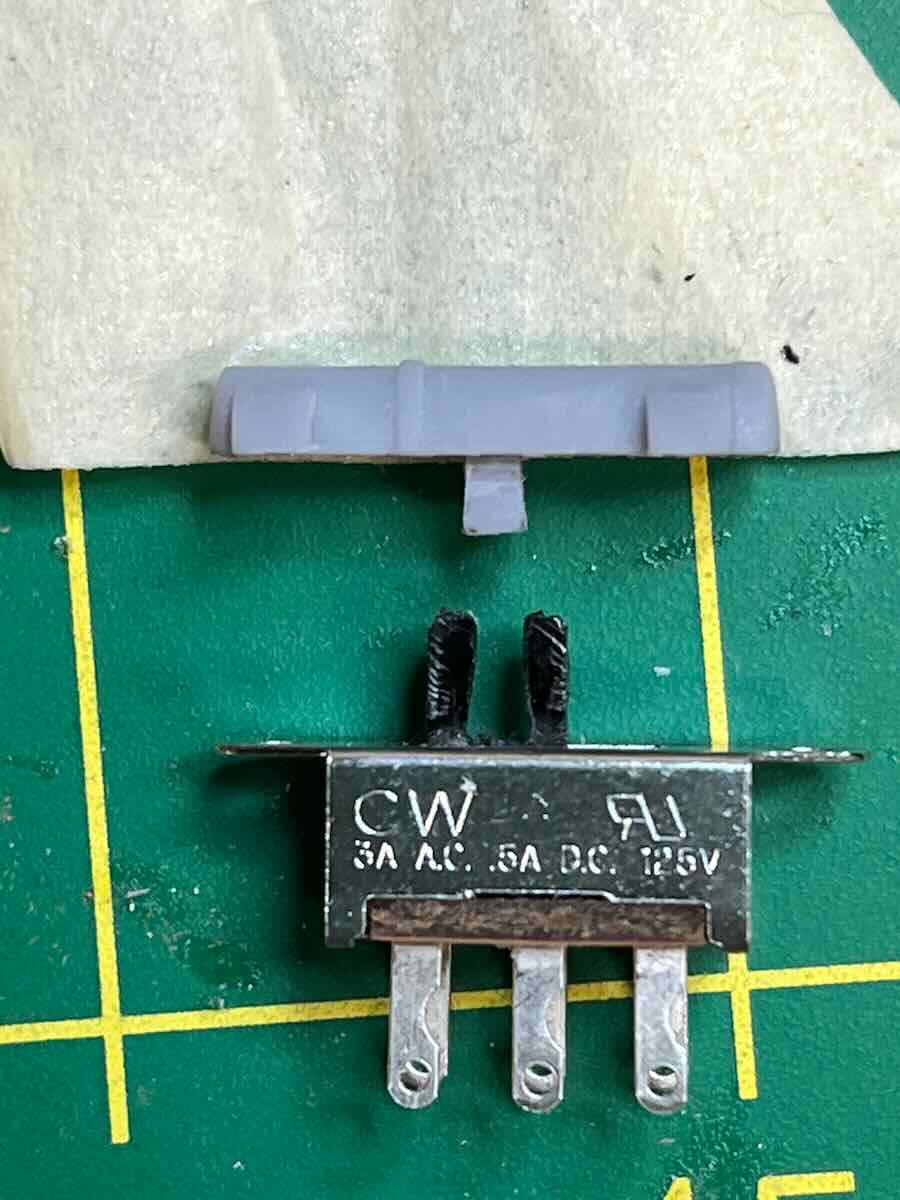
I modeled the mode switch in Cinema 4D and 3D printed it, creating a connection that I could key into the slider part of the switch.
I cut the display screen out of an old CD jewel box. Over that I stuck on a transparent green film and then a grid pattern printing onto a semi-transparent sticker material. This looks okay, but I think I’d get better results with decal paper.
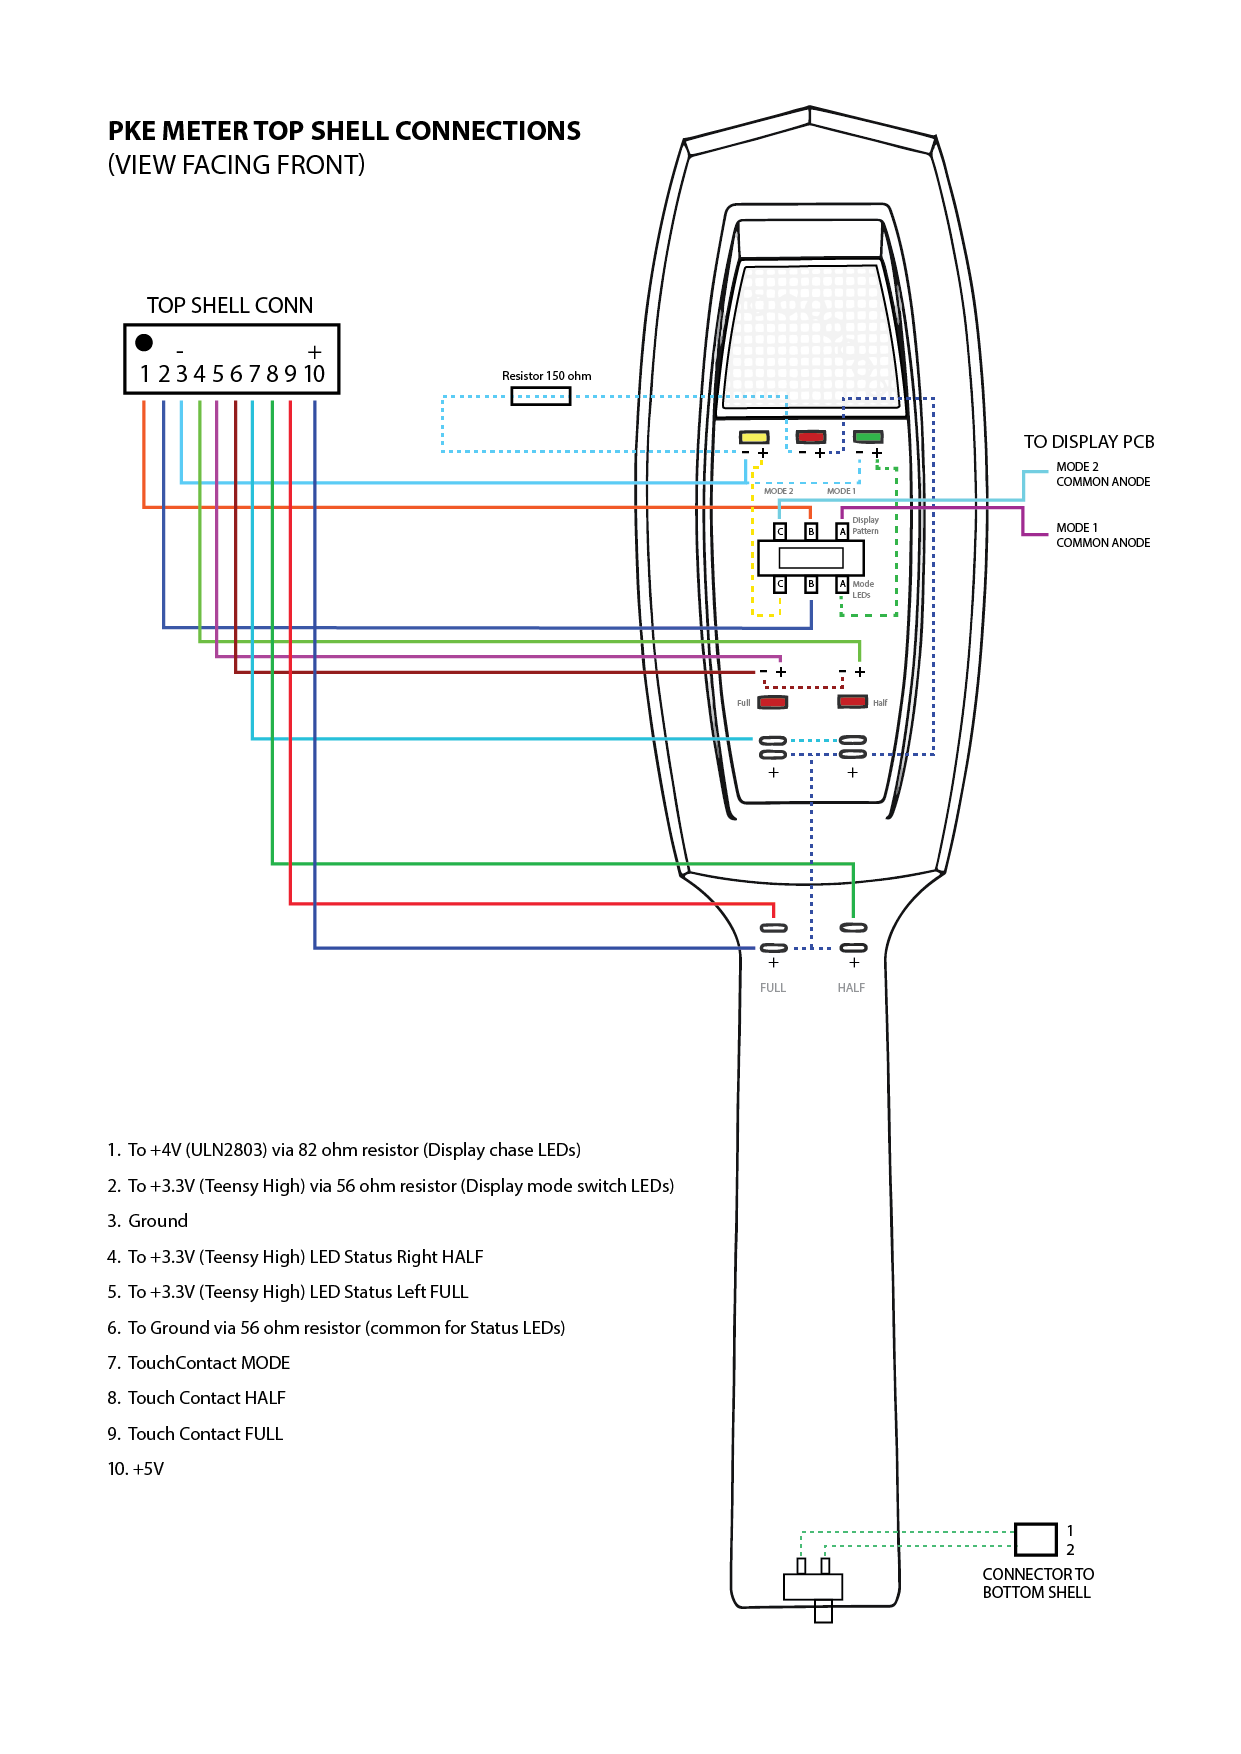
All of the components plug into the main PCB via Picoblade connectors. I used super-flexible 28 and 30 gauge silicone wire to extend the (somewhat inflexible) Picoblade harnesses to the components. Fitting two 2/3 C NiMH batteries into the main shell along with the two small speakers without impinging on the servo linkages was a challenge.
I fabricated the touchswitches from paper clips. I painted the shell satin black spray paint, misted it very lightly with a silver spray paint, then sealed it with a satin clear coat. No weathering!
My plan to produce several of these and possibly offer kits ran into a snag due to the worldwide chip shortage. The chip powering the Teensy 3.2 driving the prop is essentially out of production now. Patrick Benton and I are now working on a Mark II which will run on an Adafruit Itsy Bitsy M0 Express. We’ll be building in the ability to switch to the Ghostbusters 2 chase sequence. I’m also going to rework the shell a bit, both inside and outside, to make it even more accurate and easy to assemble. I’ll be modifying my buck and making new molds, along with using a squish mold approach for casting which should yield more consistent results. I’m going to switch from the five NiMH batteries to a single Lithium Ion battery that can live in the handle. This should free up room in the main shell for a bigger speaker.