
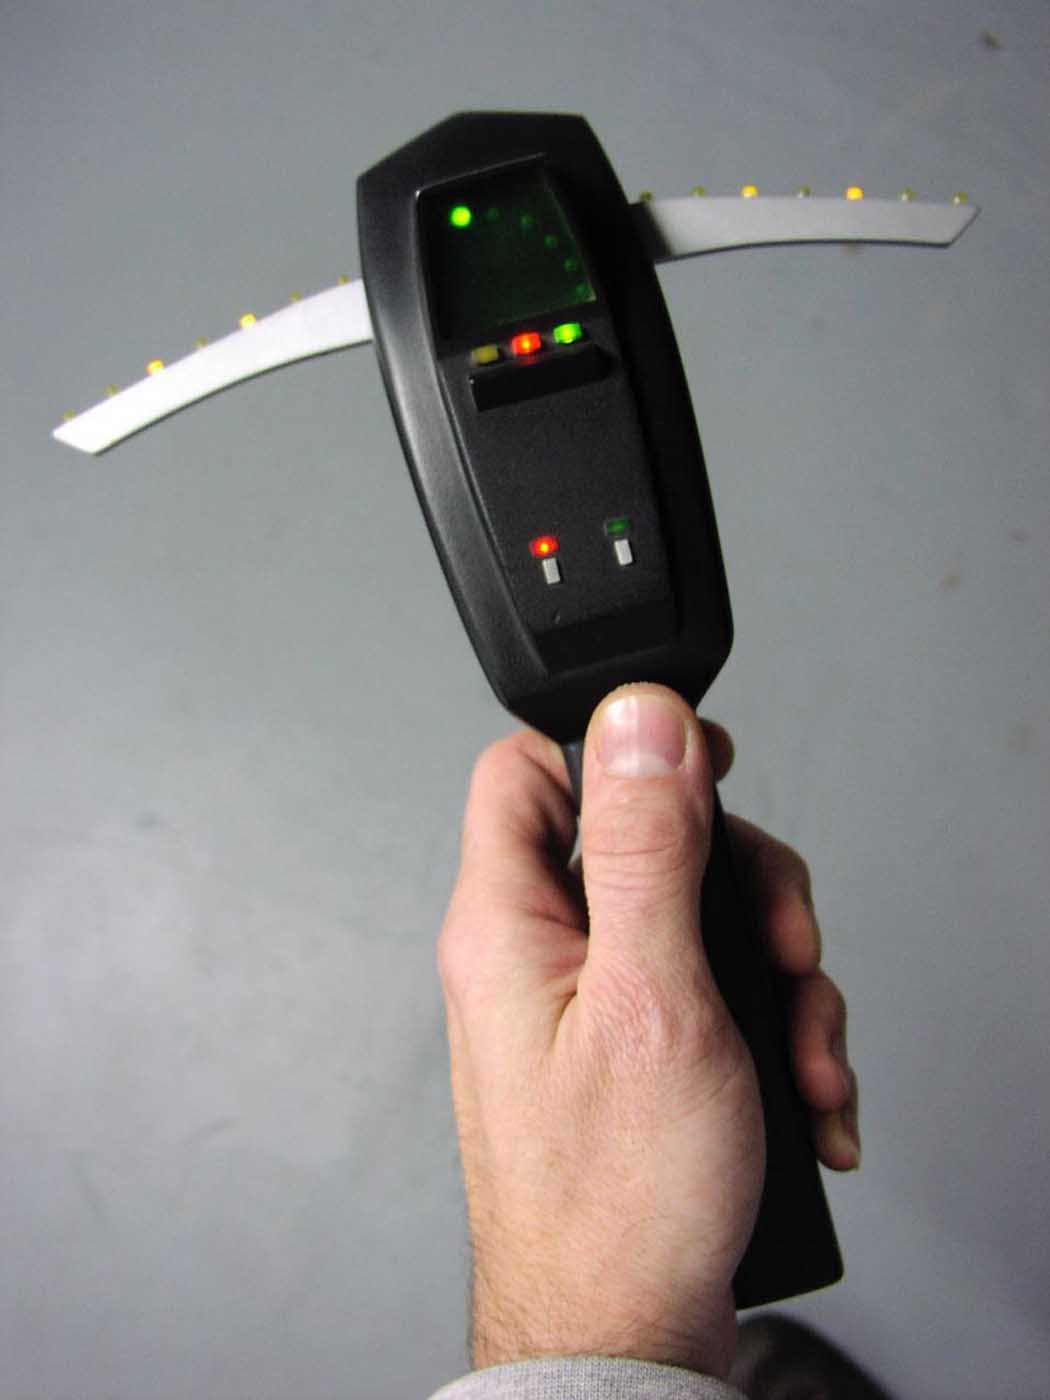
With my Proton Pack pretty dialed in by the late 80s I was looking for another prop to build. The upcoming release of Ghostbusters 2 in 1989 gave me the motivation to scratch-build a PKE meter. Despite limited reference materials and no knowledge of servos I was able to produce a functioning prop that was a respectable replica of the real item.

references
Unlike the Proton Pack, I had no good photo reference of the PKE meter, so I had to go to the videotape. In my case it was a recording of the ABC presentation of Ghostbusters, recorded off the satellite feed on a professional broadcast 1/2″ Beta deck at KGUN-TV (where I was working at the time). The equipment allowed me to pause and jog through the relevant scenes cleanly to inform my design.
I (think) I also had at that point the #1 Ghostbusters lobby card (purchased at a convention) in which the PKE meter is peeking out of Venkman’s lab coat.
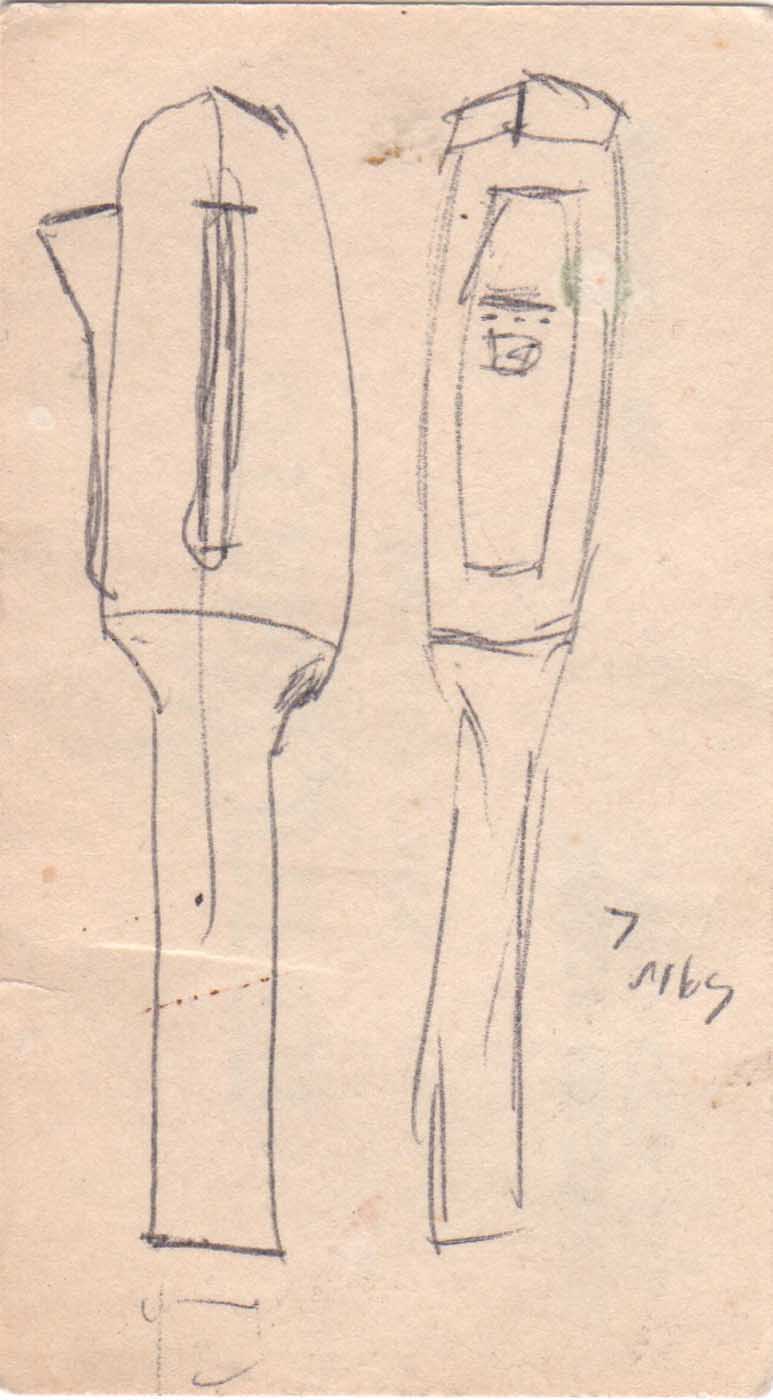
My third bit of reference was a little sketch I made on the back of a business card while holding the real PKE meter during a tour of Modern Props. Someone in the industry invited us to tour the legendary prop house after complimenting Bryan and me on the Proton Packs we had built. This was probably at an L.A. convention in 1986 or 1987. Unfortunately we didn’t have a camera on us, but I was able to jot down some details and remember others (like the nature of the touchswitch contacts).
shell
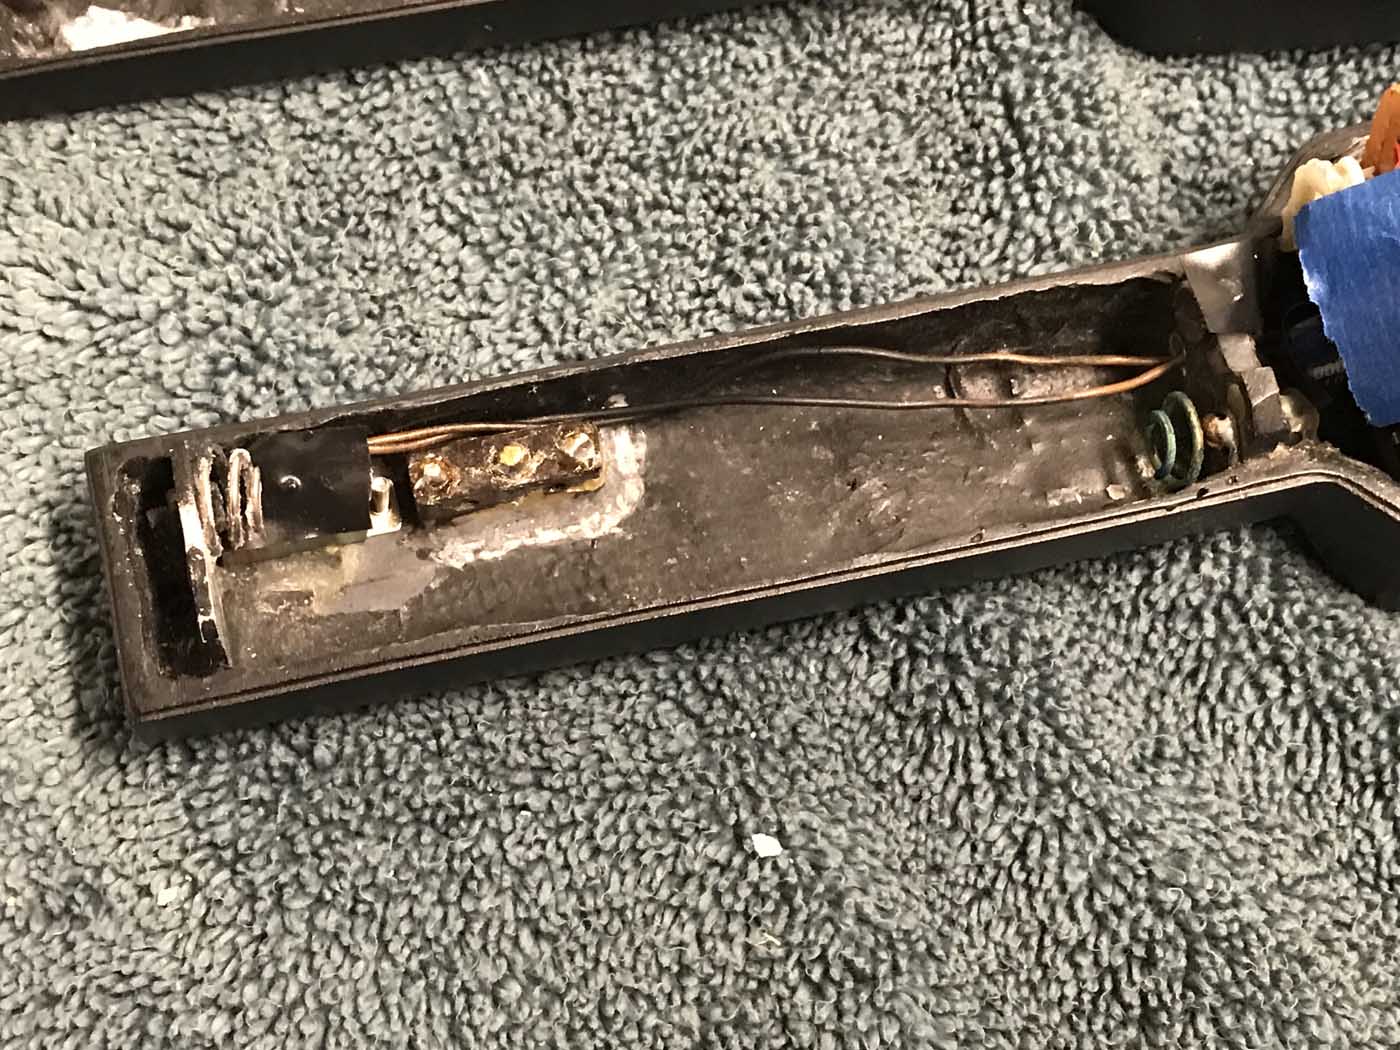
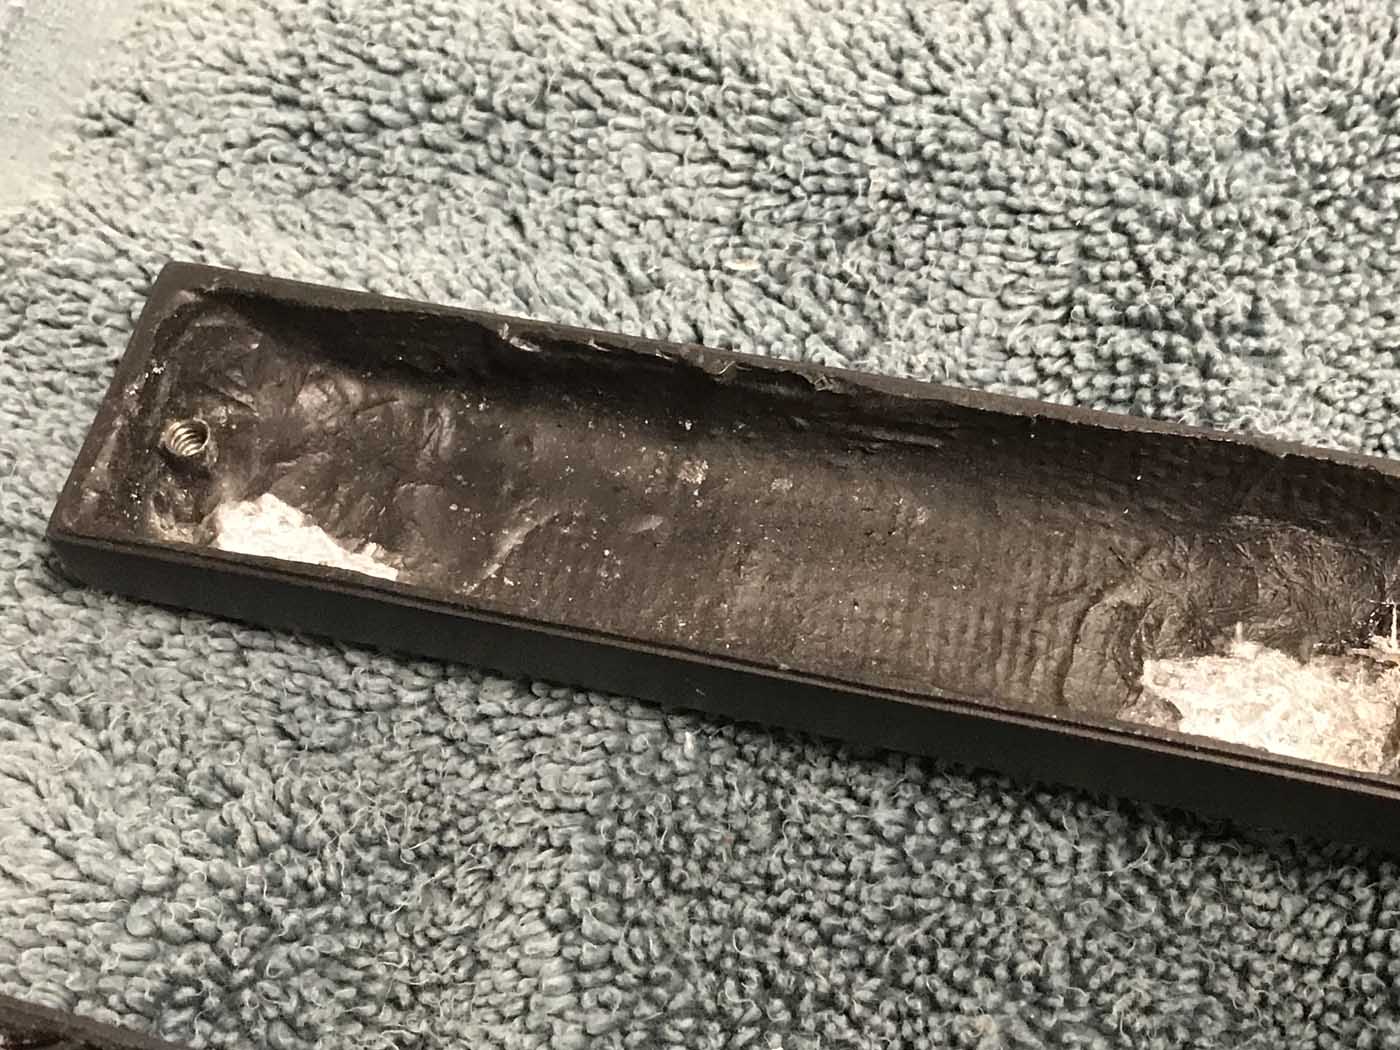
The shell for my PKE meter would be cast from fiberglass. I crafted the buck from balsa wood, heavily sealed with varnish, wax, and PVA before casting fiberglass molds. At his point I was still not up on casting rubbers. For each shell half I created two-part molds that would tolerate undercuts. I brushed in cabosil-thickened, black-tinted resin into the prepared molds to pick up the sharp details of the prop and reinforced that with fiberglass cloth. I also mounted cannibalized battery springs and bolt receptacles with resin and cloth. The interior isn’t pretty, but the exterior turned out pretty well after some cleanup.
As with my Proton Pack I didn’t take pictures during the build, and I lost the buck and molds during our move from Tucson to Portland in 1995.
wings mechanism
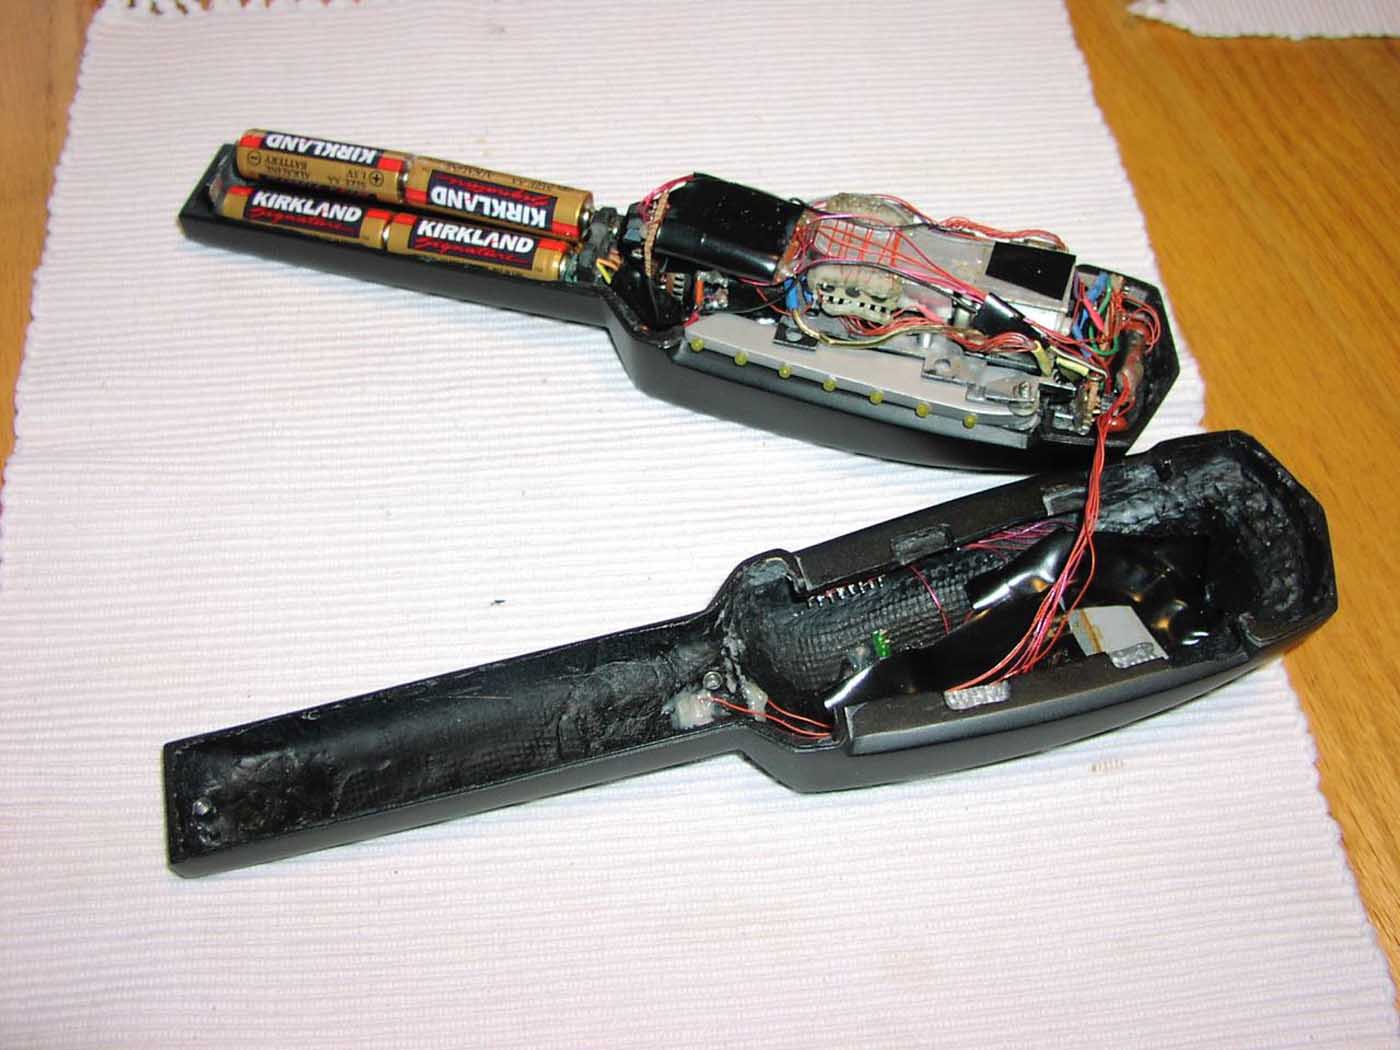
The mechanism and electronics would present the biggest challenge for this small prop. At that time I didn’t know the wings were driven by servos, so I went with a more low-tech solution. Starting with a motor and gear train from an old Tamiya 1/35th scale model tank, I built an aluminum frame and track that could slide a mechanism up and down to deploy the wings. I had to carve a rack gear out of a piece of aluminum to translate the rotation of the pinion gear to vertical movement.
An engineer at KGUN helped me work out simple logic circuitry and switches that would allow me to send the arms half up or full up depending on which touch switches were engaged. As the mechanism moved up and down it would trigger various roller switches to cut power from the motor, send the wings full, or reverse polarity to send the wings home. This solution worked, but it was very finicky. Bad things could happen if the mechanism jammed or it overshot one of the roller switches.
finished prop
My finished PKE Meter incorporated touchswitches like the real prop, though I configured mine vertically. The design required relays to power the motor and lighting circuity.
I fabricated the wings from aluminum sheet, sandwiching yellow LEDs between the two pieces and filling the gap with Bondo (IIRC).
I again used Forrest Mims’ Engineers Notebook to design the circuity for the LED chasers. Due to my misinterpreting my videotape reference I thought there were times when multiple LEDs would be lit at the same time on a wing, and so the circuit I designed was more complex and required more components than necessary. Ten years later I’d learn that that illusion was due to the camera shutter capturing the brief overlap of the lights.
At the time I didn’t know the lights of the real prop were controlled by a potentiometer on the handle, so I designed the circuit to cut in different value resistors into the 555 timer circuit depending on the deployment of the wings. The lights would chase slowly half way up, fast at full up.
Although an alternate pattern for the green display screen is barely visible in the film, I thought that was due to the film image being flopped for some reason. I didn’t know a selector could switch between two patterns.
upgrades
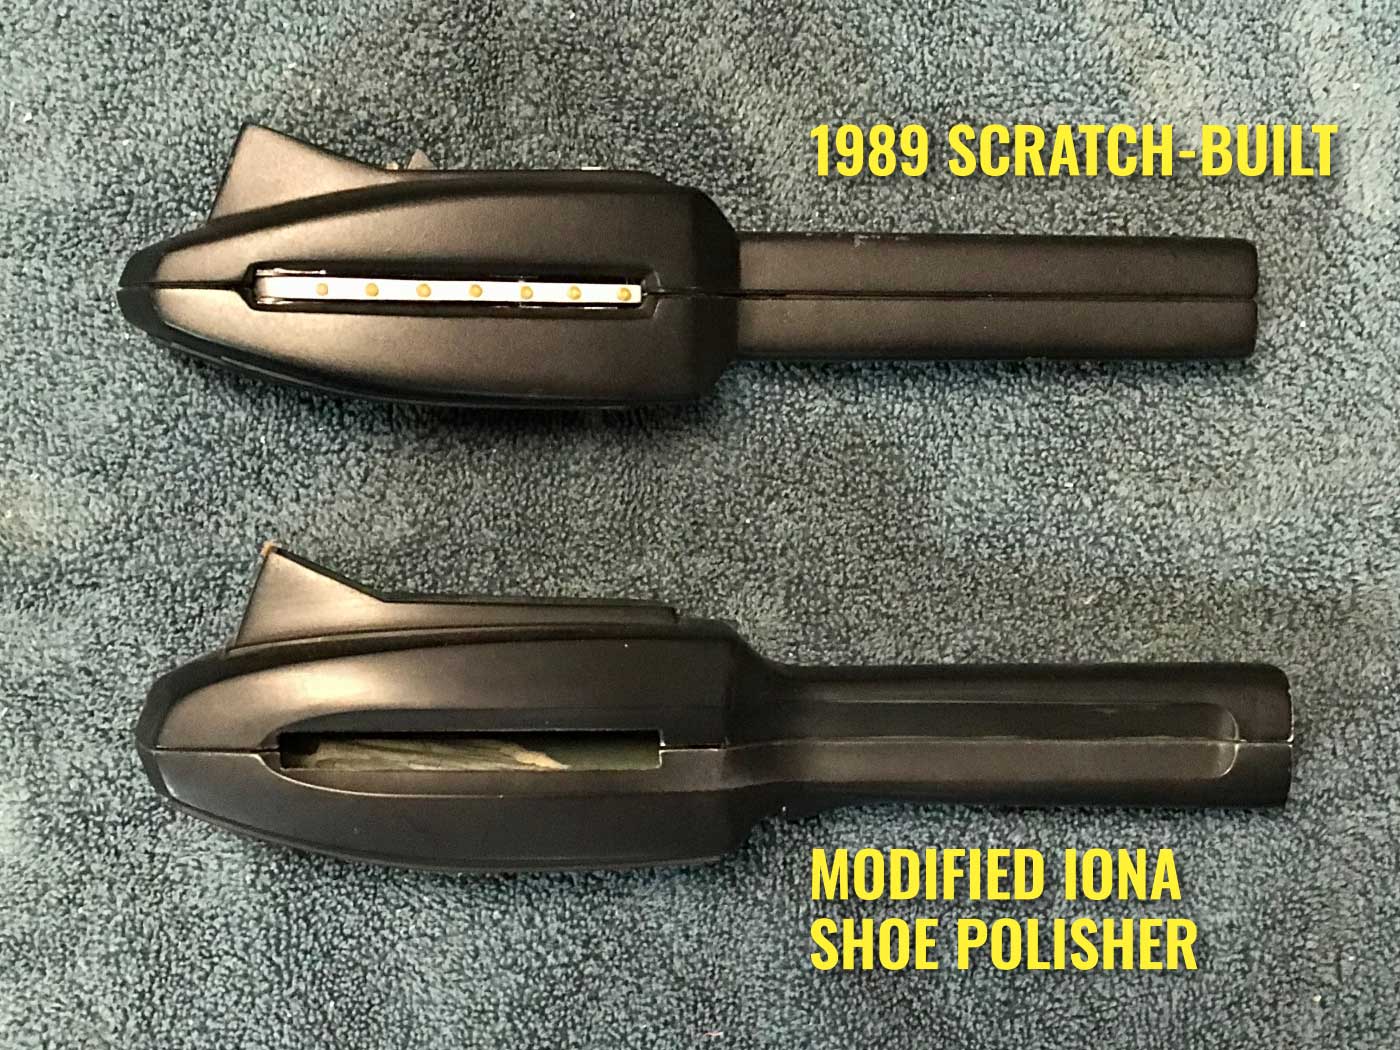
A few years after this scratch build Bryan acquired an Iona shoe polisher and excellent photos of the real prop. With those I started a new build (that I’m close to finishing). Although some of the details are off in my 1989 version I’m somewhat impressed that I was able to capture the general proportions very closely, despite the lack of references.
Though my prop worked most of the time it was pretty fragile. Once at a convention it started to smoke; I hurriedly opened it up to remove the batteries. If metal shorted a touch switch a transistor would blow. Whenever I opened it up one of the very thin wire wrap wires would invariably break, usually where it attached to a component, making it almost impossible to fix.
By 2011 I’d learned how to drive a servo using a simple pulse circuit, so I scrapped the model tank mechanism and worked in a servo to drive the arms linkage. The touchswitches, now separated into two pairs as in the original prop, would energize relays to cut in one of three trim potentiometers (rest, half, full) to change the width of the pulse signal controlling the servo. I also reworked the LED chase circuit to accurately replicate the pattern of LEDs as seen in the original film.