
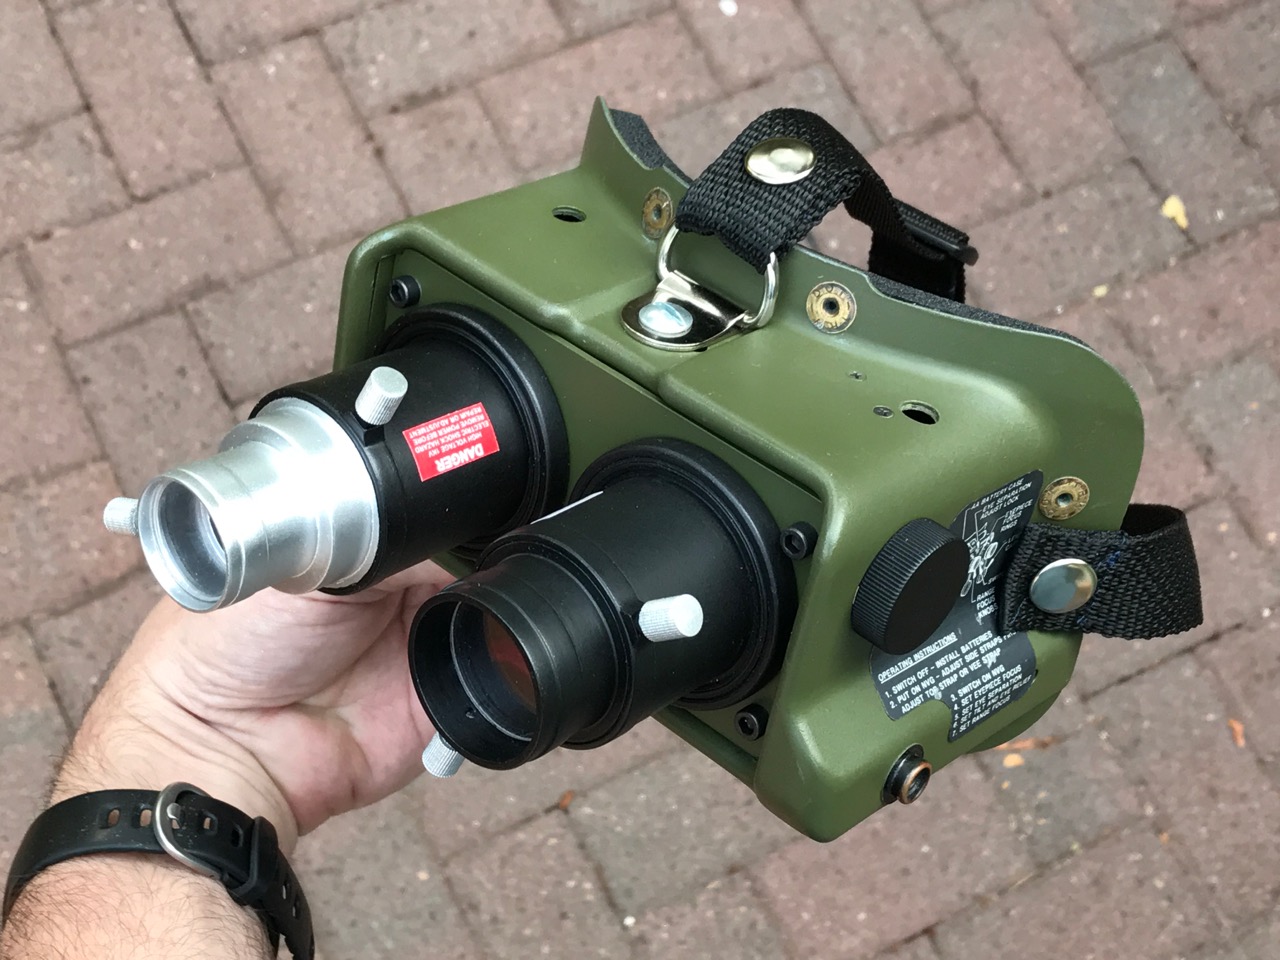
Dressing up as a Ghostbuster is fun, but, to me, the drawback with the costume is that the coolest element is worn on your back, which usually makes for kind of boring photos. So in an effort to add more bling that’s visible from the front I ended up building the most accurate set of Ecto Goggles I could manage.

visor
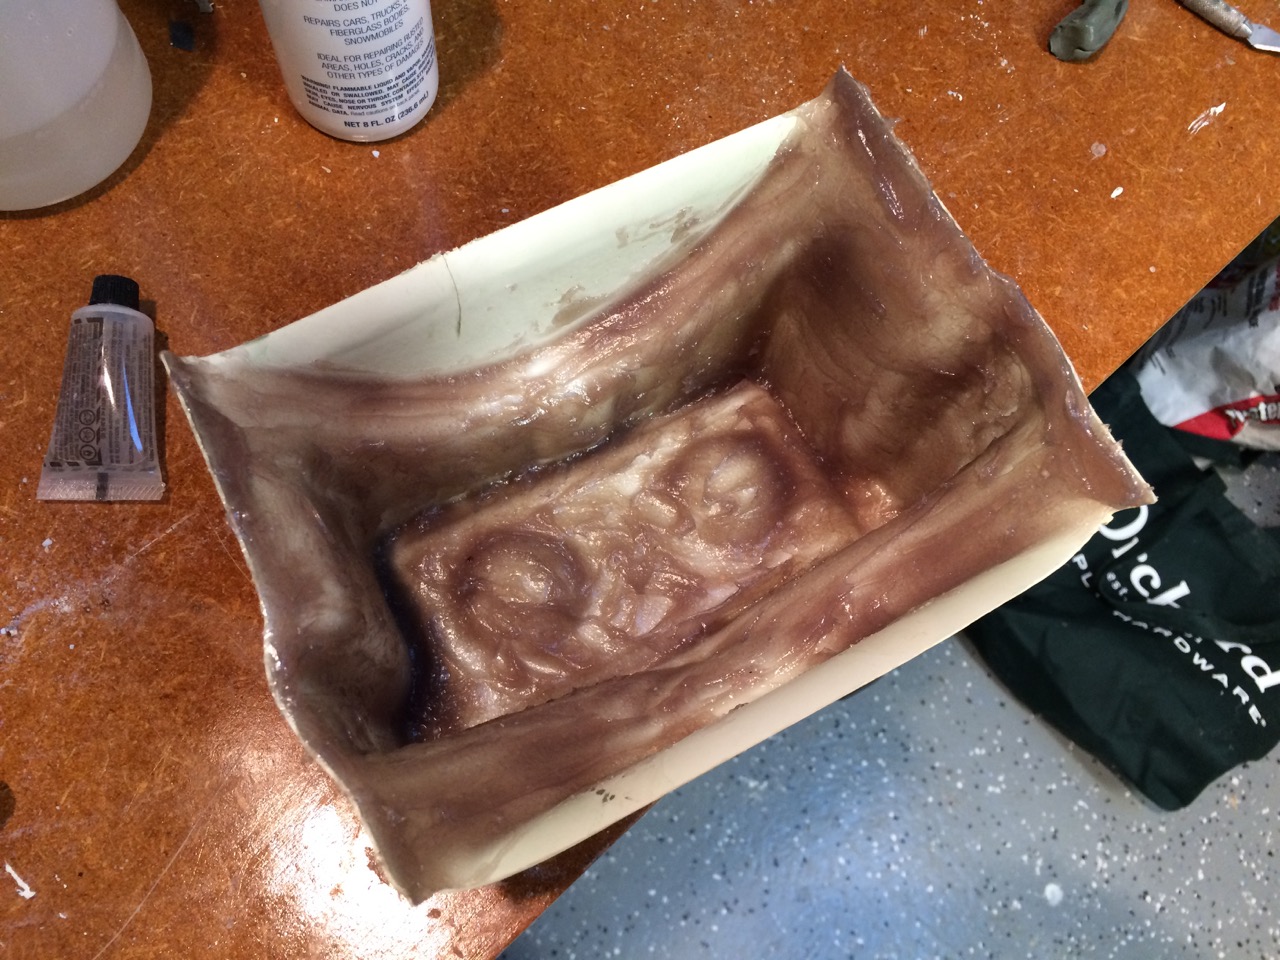
My initial plan was to throw together low-cost Ecto Goggles that would capture the essence of the prop, sacrificing accuracy. My hope was to use a vacuformed visor I’d been given in the 80s as a mold for a fiberglass positive. I successfully pulled a clean cast from that makeshift mold, but as I studied real PVS-5 night vision visors it became clear my fiberglass version would require a TON of work to make semi-accurate. It was going to be a lot easier to just buy a surplus visor online. Once I opted to buy a visor I decided to go all in and try to make a finished prop as close to the actual one as possible.
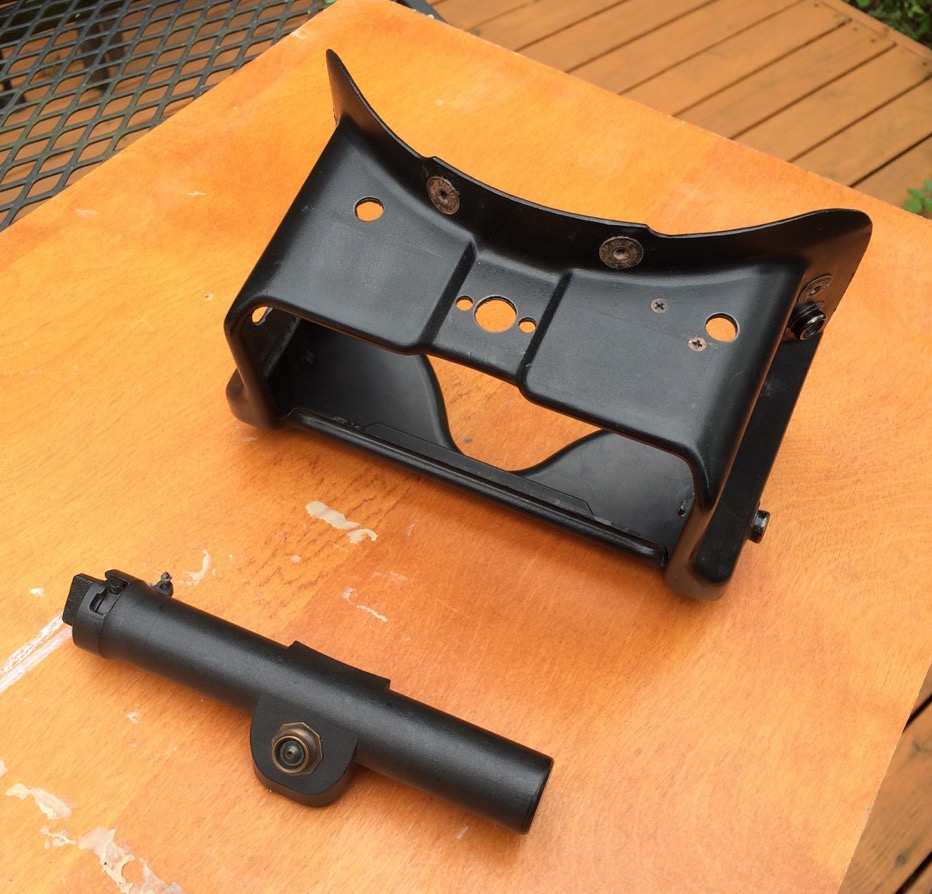
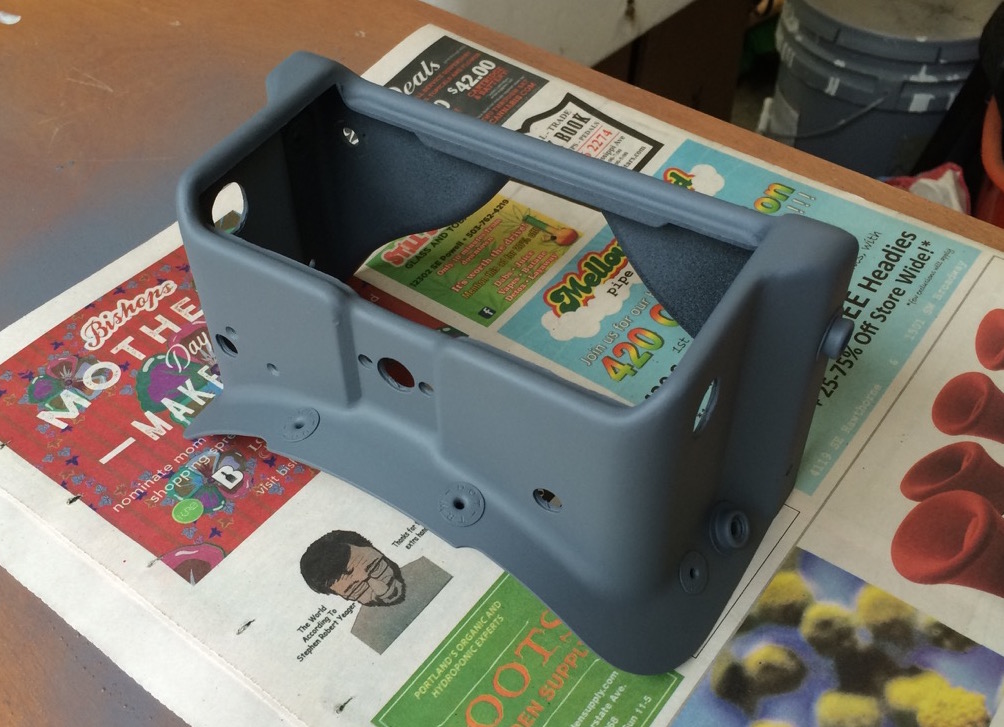
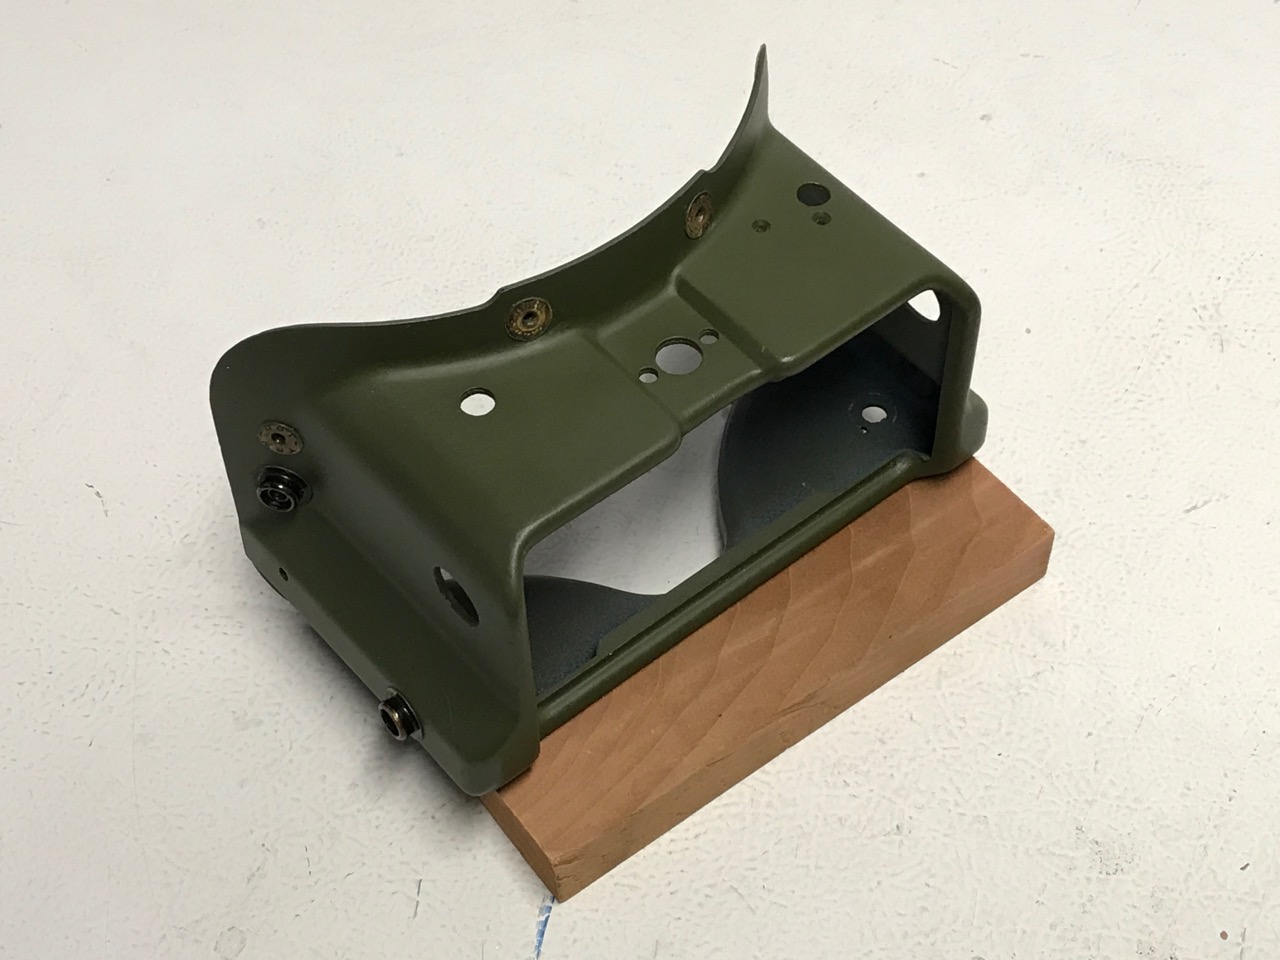
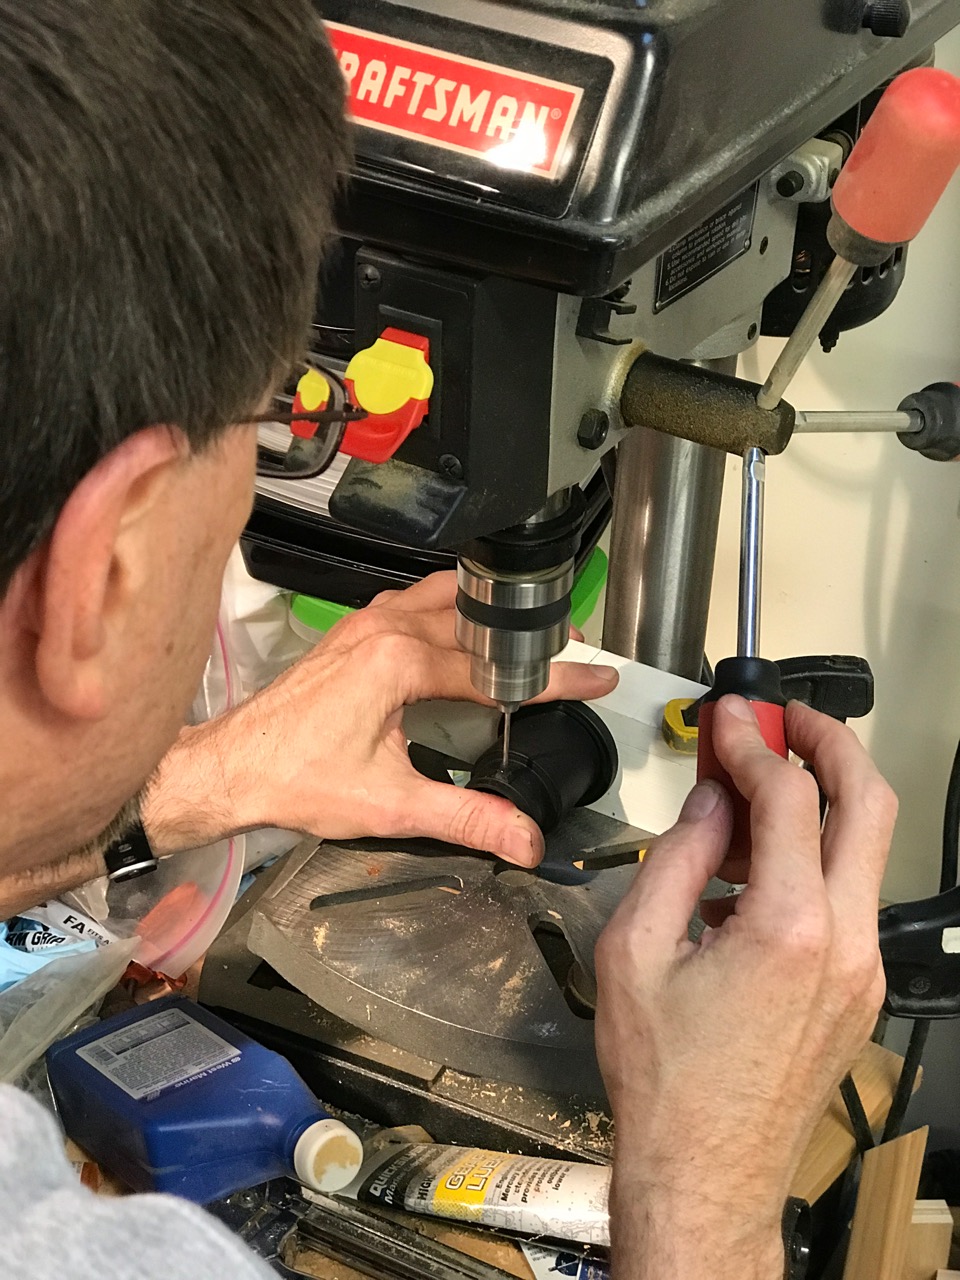
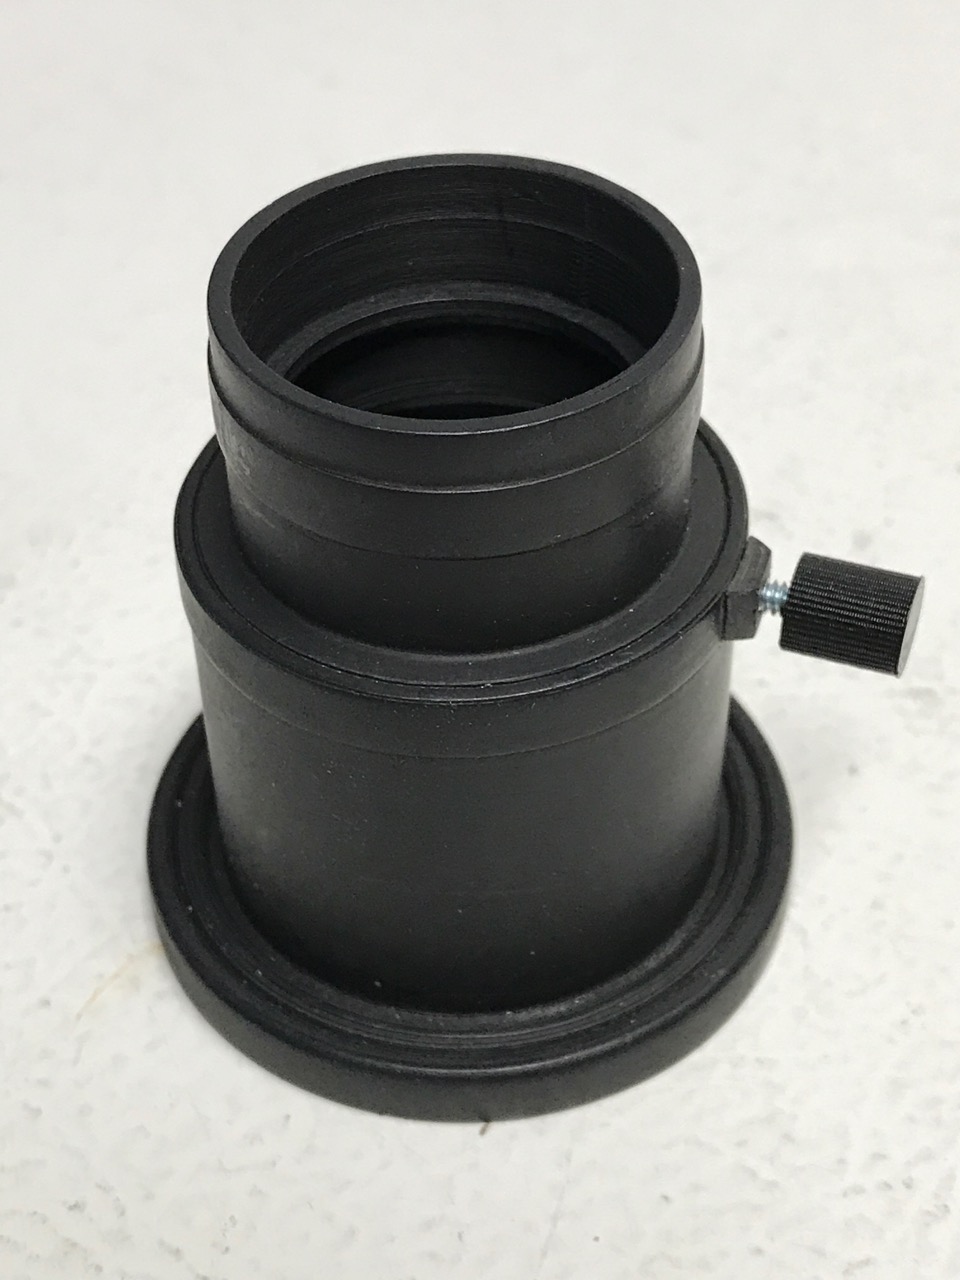
The first visor I bought was just the plastic shell. It looked great, but I soon determined that sourcing the snaps would be very difficult, and installing them could be very hard. I ordered a second visor that included the snaps. They were pretty corroded, and no amount of acid or buffing would brighten them up, so I did some light sanding and left it at that. After carefully removing the stickers with adhesive release I painted Micro Mask on the snaps and primed the visor with Krylon Grey Sandable Primer. The final coat is Tamiya TS-28 Olive Drab Spray Lacquer.
lenses-design
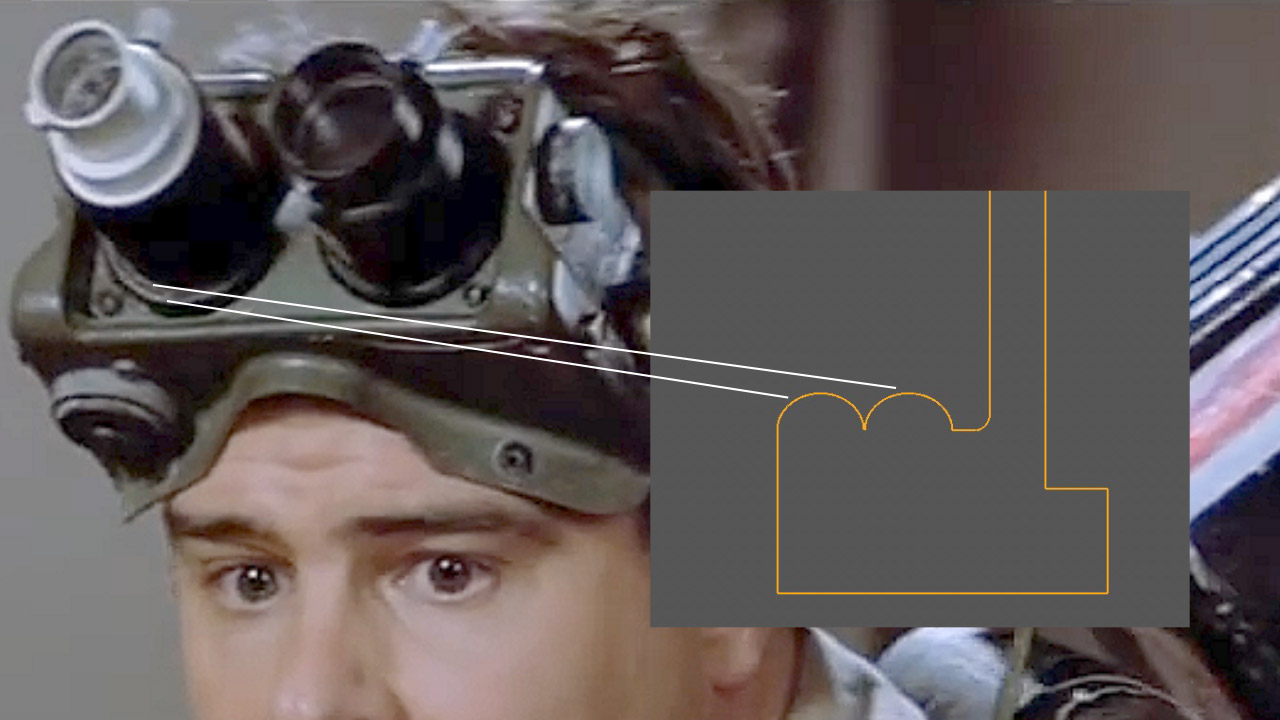
I’ve yet to come across photos of the Ecto Goggles outside of the movie or publicity photos, so clear reference materials were lacking to inform my recreation of the lenses. I didn’t want to go with the plumbing pipe or scavenged lenses approach. If I could determine the dimensions of the lenses it would be a simple matter to model them in Cinema 4D and have them 3D printed.
I initially tried to find the dimensions using tools in Cinema 4D that could align a 3D model to a frame grab, but the source material was so dark and grainy I couldn’t be sure of the accuracy. It also became apparent that the prop appeared in several configurations over the course of the film, sometimes within the same setting.
Fortunately, a member of the GBfans.com community, Glenn Frederick, posted blurry photos and measurements of the Mirax Laborec Adapter lenses used on the prop on his Facebook page. Based on those measurements I was able to create a fairly accurate 3D model. The design of the lenses’ mounting rings was a bit of an educated guess based on screen grabs of various quality.
lenses-build
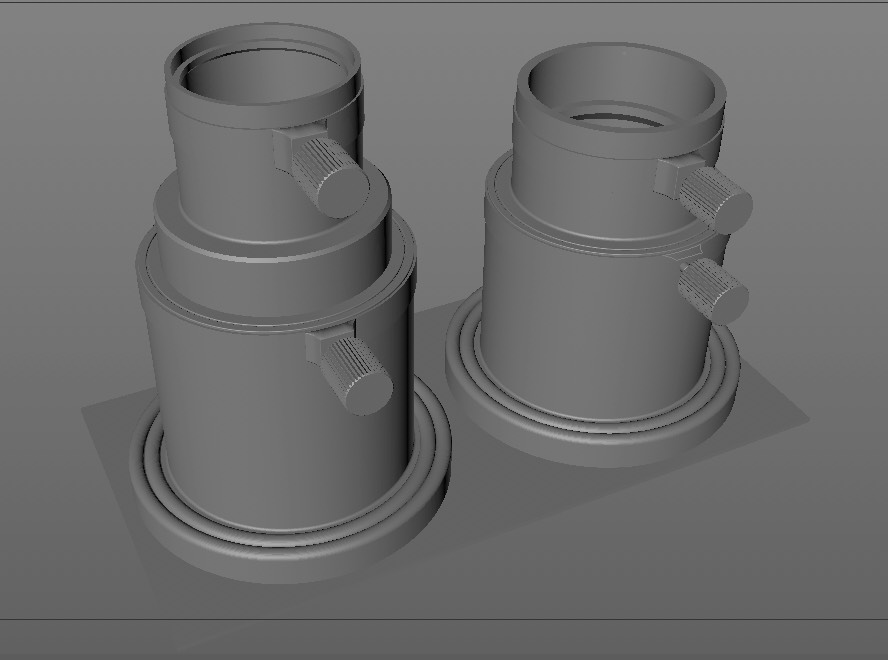
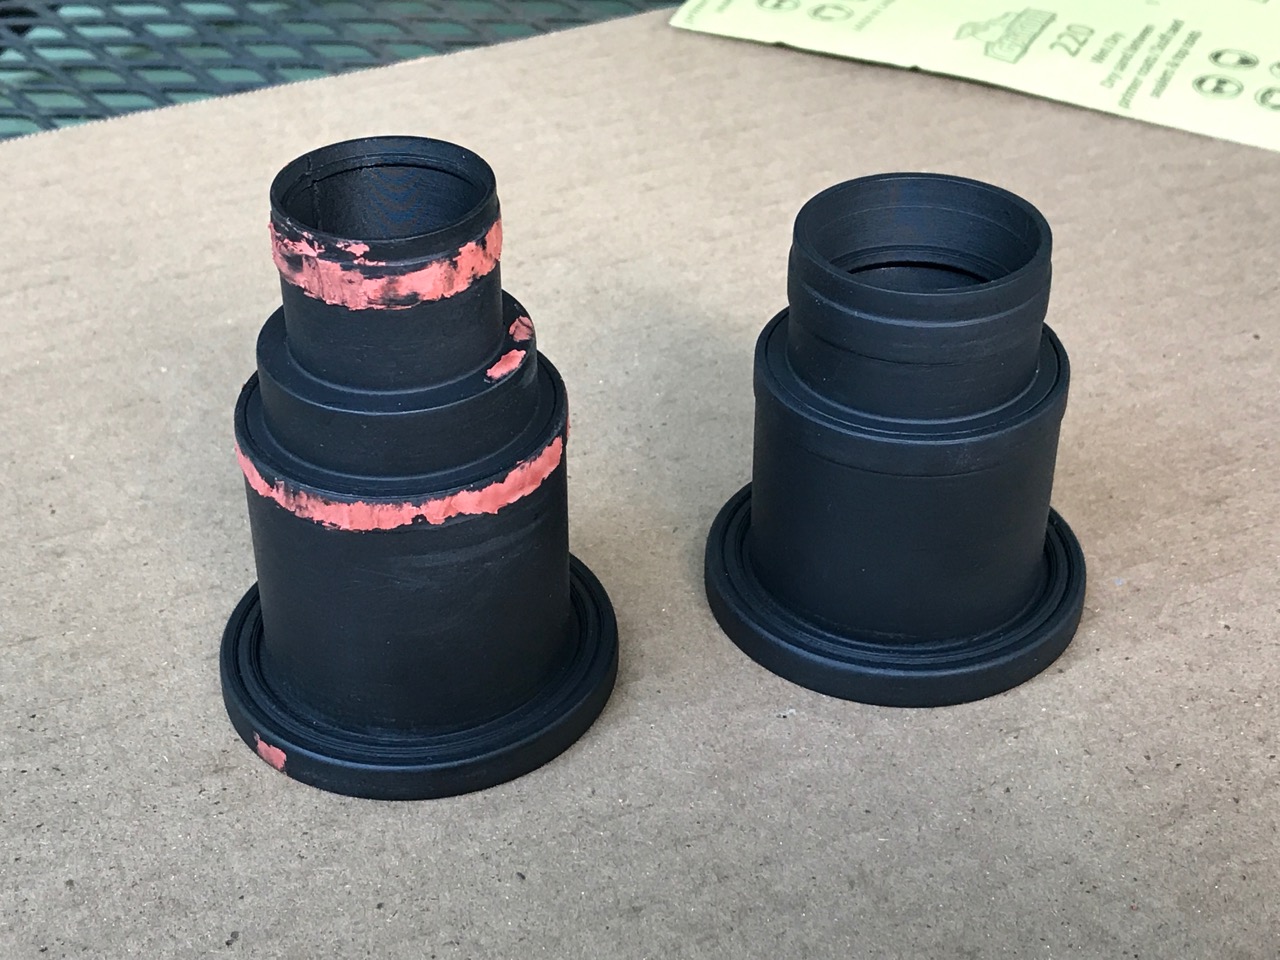
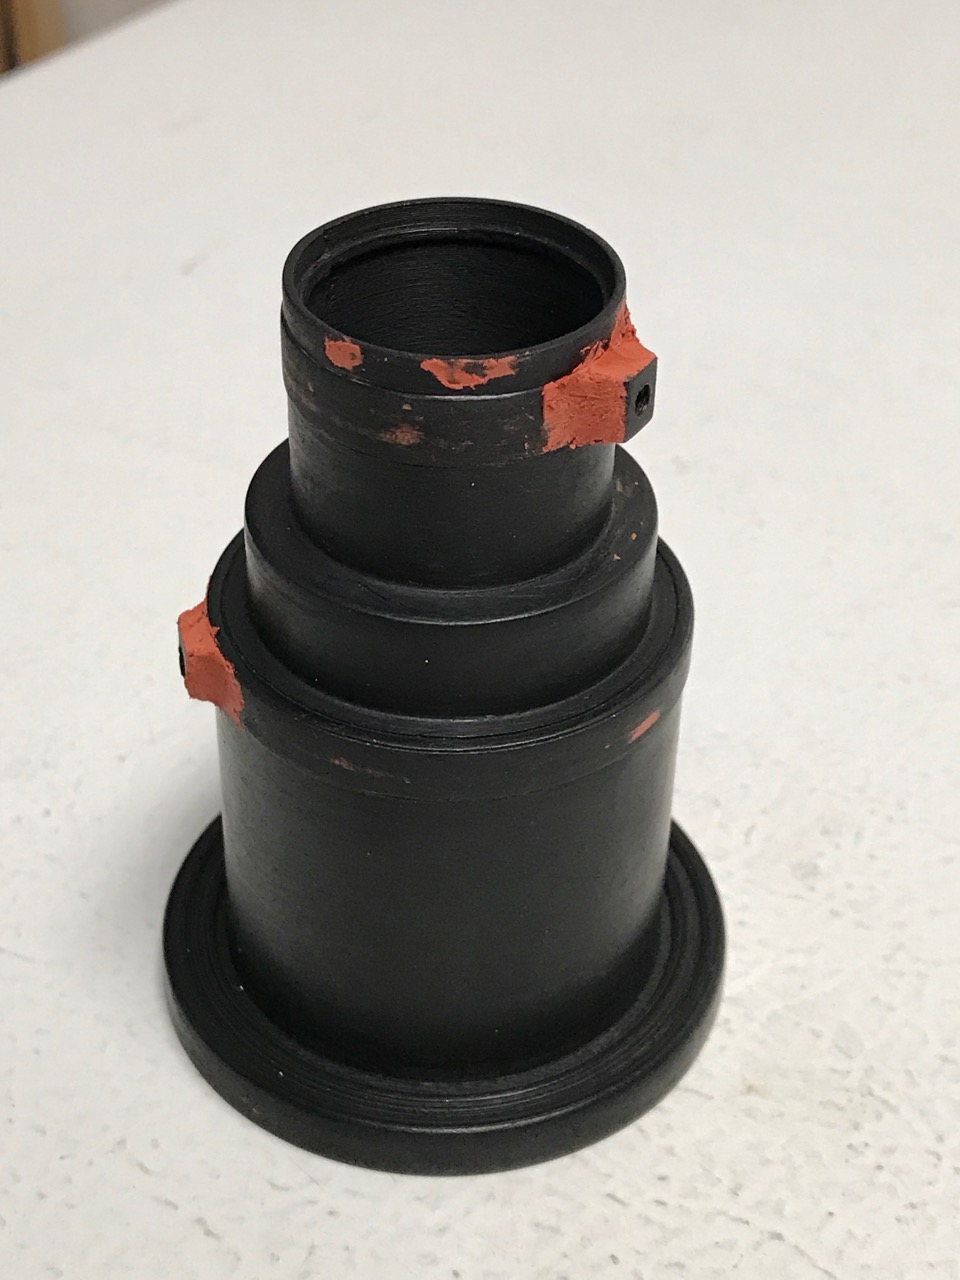
I had my lenses 3D printed by a nearby printing service through 3D Hubs. It was immediately apparent it would take a lot of sanding and filling to make them look like smooth, machined parts. I made the mistake of using black primer initially as it was hiding a lot of flaws that really stood out when I painted that part silver. In hindsight I probably should have made the raised rings as separate parts or plastic strip as that sharp detail got a bit soft as I cleaned up the prints.
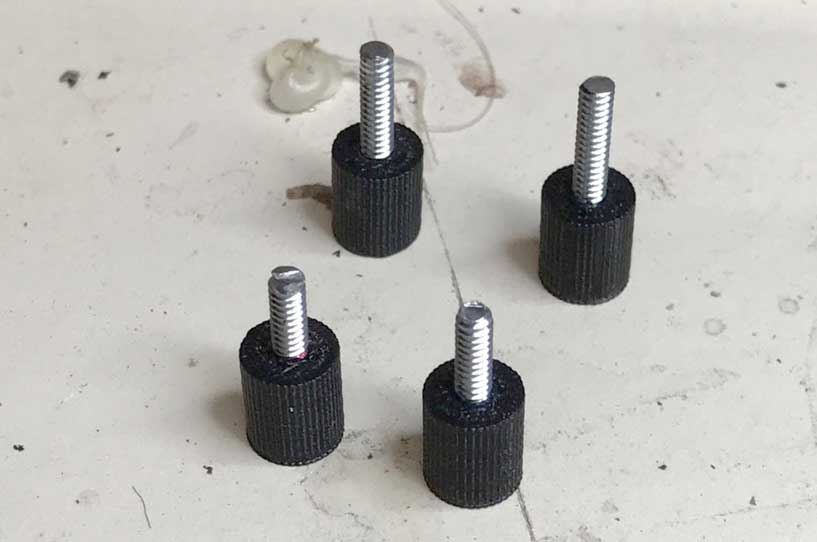
I made the ring nubs separate pieces that I glued onto the main lenses and then tapped 4-40 threads to receive the threaded metal rods (chopped-off bolts) I’d tapped into the knurled knobs.
Nearing completion I realized I’d modeled the retaining ring of the long lens too close to the end, so I Dremeled that out and glued in a new one made of styrene strip farther down.
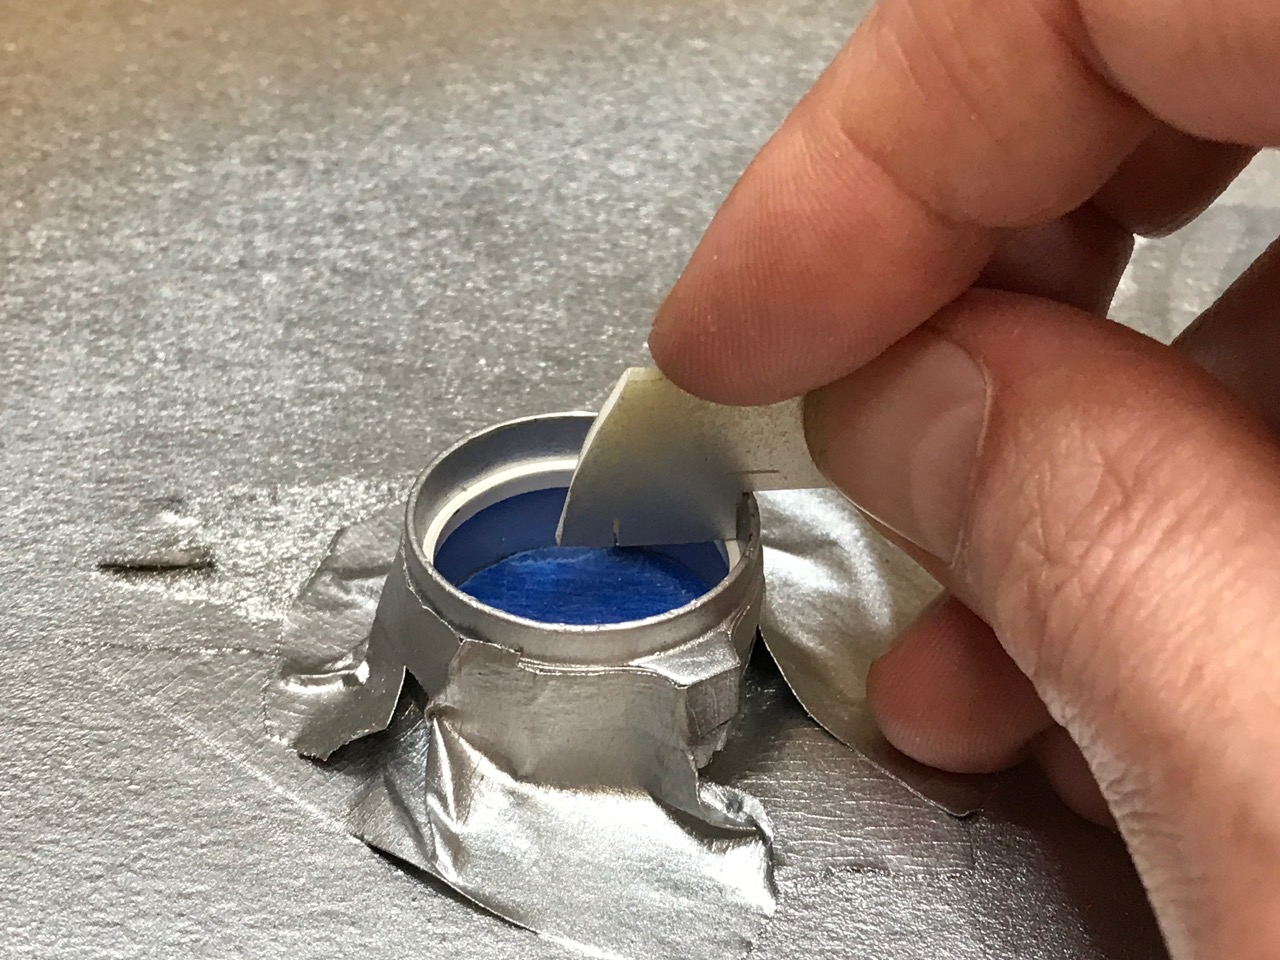
I cut the flat lenses out of an old CD case. After much trial and error I ended up coating those parts with Pledge acrylic floor wax and then gluing them in with superglue. The Pledge coating prevents crazing.
assembly and details
I designed a template in Adobe Illustrator to guide the cutting and drilling of the aluminum faceplate. After cutting those holes pretty crudely I opted to cut out some better-looking holes out of very thin plastic. When placed behind the lenses they’d create the appearance of nice, round holes. I had modeled four feet into the lenses: I tapped each to receive a 4-40 bolt and bolted the lenses to the plate. I fabricated some pieces from aluminum to sandwich the rim of the visor opening between the faceplate and these L-shaped aluminum pieces.
Adding an additional snap to the right side of the visor was a challenge; I created a little cantilevered platform to support the snap mounting base so I could hammer down its rivet without stressing the plastic visor.
The knobs that come with the real visors are not what was used in the movie, so I replaced those with the caps of an Alkalol sinus rinse I use. I filled in the top dimple with spot putty and glued and reinforced a bolt to the other side to mount to the visor.
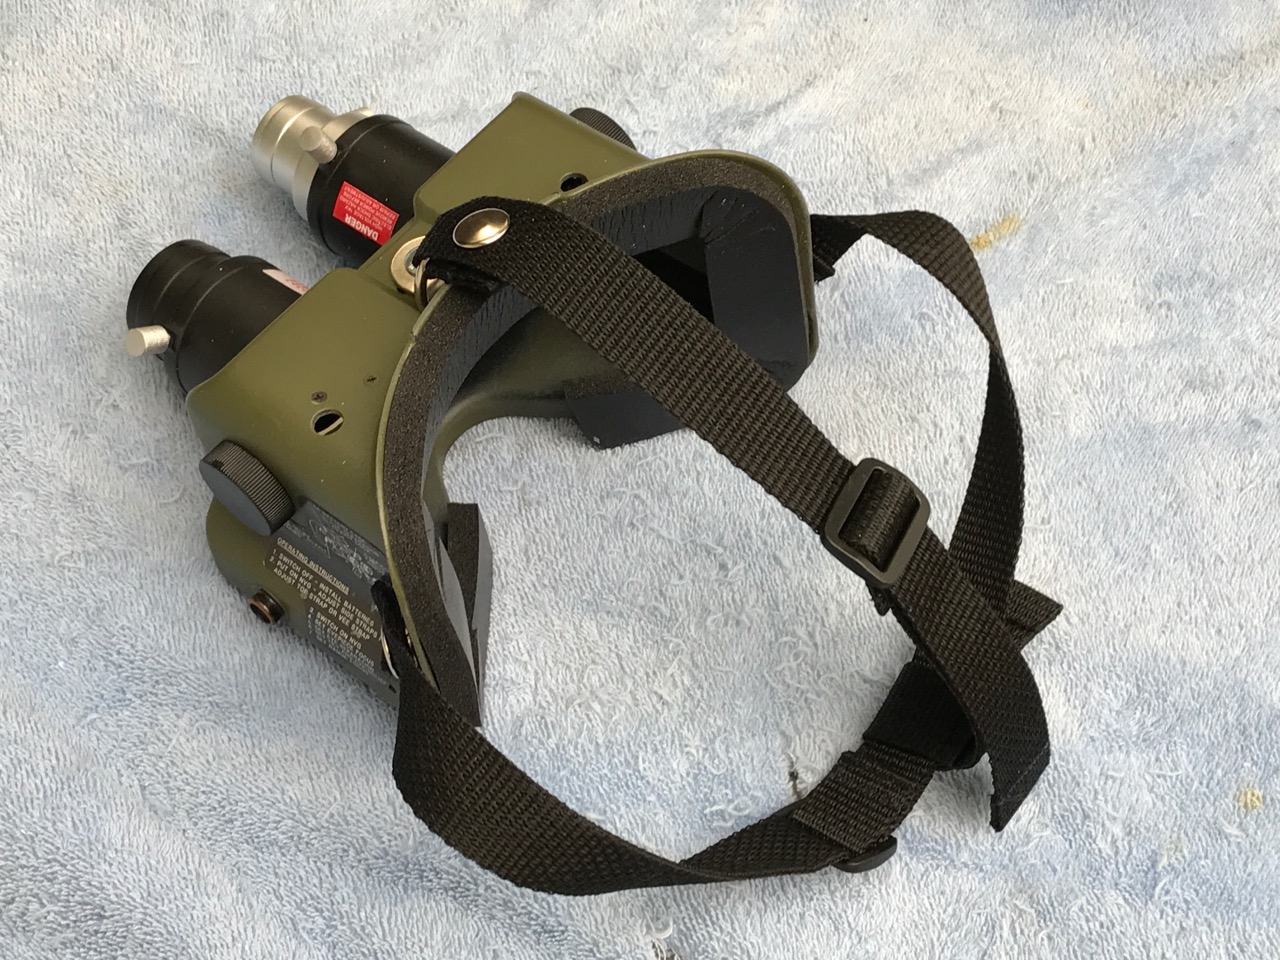
My wife Lisa sewed the straps for me, and I used a D-Ring and slides from Strapworks to complete that.
I cut notches into insulation foam and glued it to the rim of the visor. As I was in a hurry to get this done for the 2017 Rose City Comic Con I used the rubber cement I had on hand. That tended to lose adhesion from my body heat, so I re-glued it later with a strong contact cement.
finished
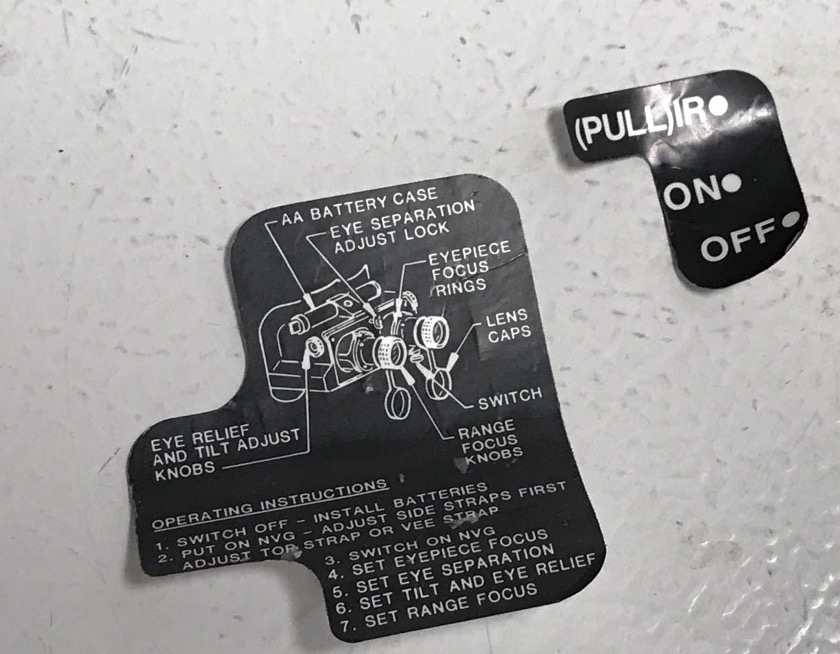
For the final details I used the artwork designed by Demon Vice Commander on GBFans.com for the stickers.I had them printed up at Kinko’s on opaque and transparent sticker stock. I think some of them might have been a bit undersized. I reaffixed the metallic side sticker with Spray Mount.
An even more detailed build thread for this project can be found here on GBFans.
Analysis of the nature and dimensions of the lenses continued after my build on this GB Fans thread.