In the fall of 1984 my friend Bryan Ambacher and I set out to scratch-build accurate Ghostbusters Proton Packs on a very limited budget. Through a combination of luck, ingenuity, and some talent we were able to largely achieve that goal within five months of the movie’s original June, 1984 opening.

Background
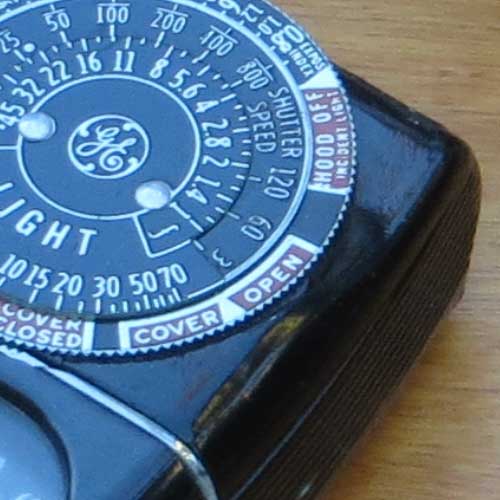
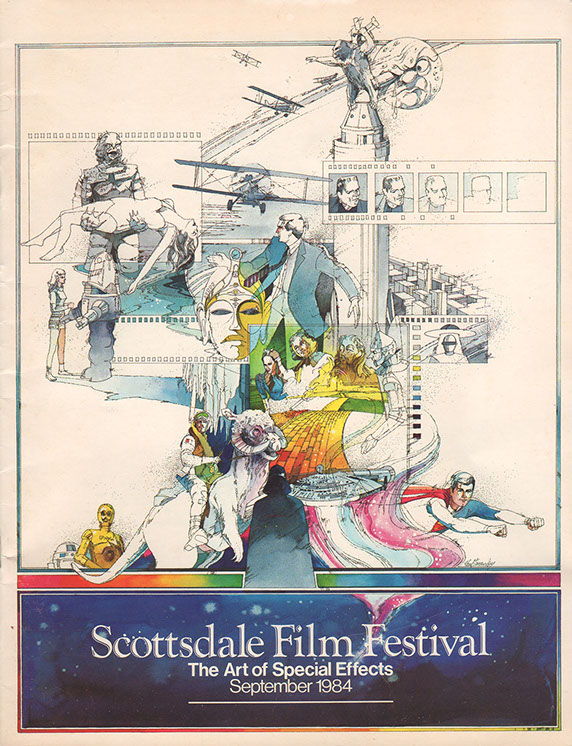
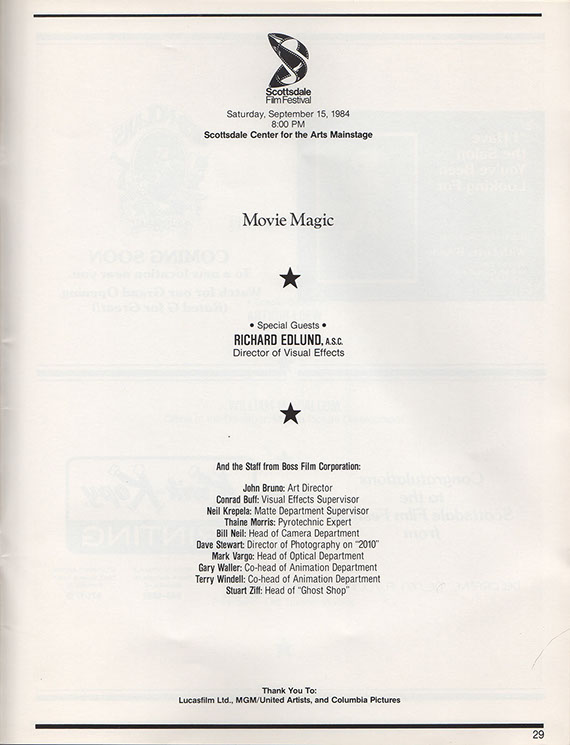
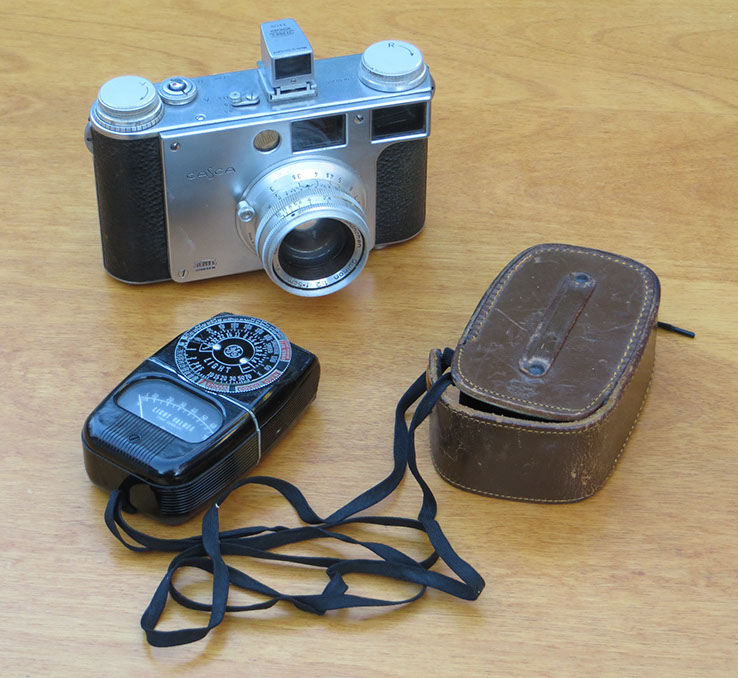
Living in Tucson, Arizona in late summer 1984 we heard that Richard Edlund would be giving a presentation at the Scottsdale Center for the Arts as part of a film festival featuring special effects. His new company, Boss Films, had just completed the effects for Ghostbusters and 2010, and there was no doubt we’d attend his talk. Looking for new props to build I dug up my vintage 35mm rangefinder camera, a hand-held GE light meter, and 1000 ASA film just in case the center had a Proton Pack on display.
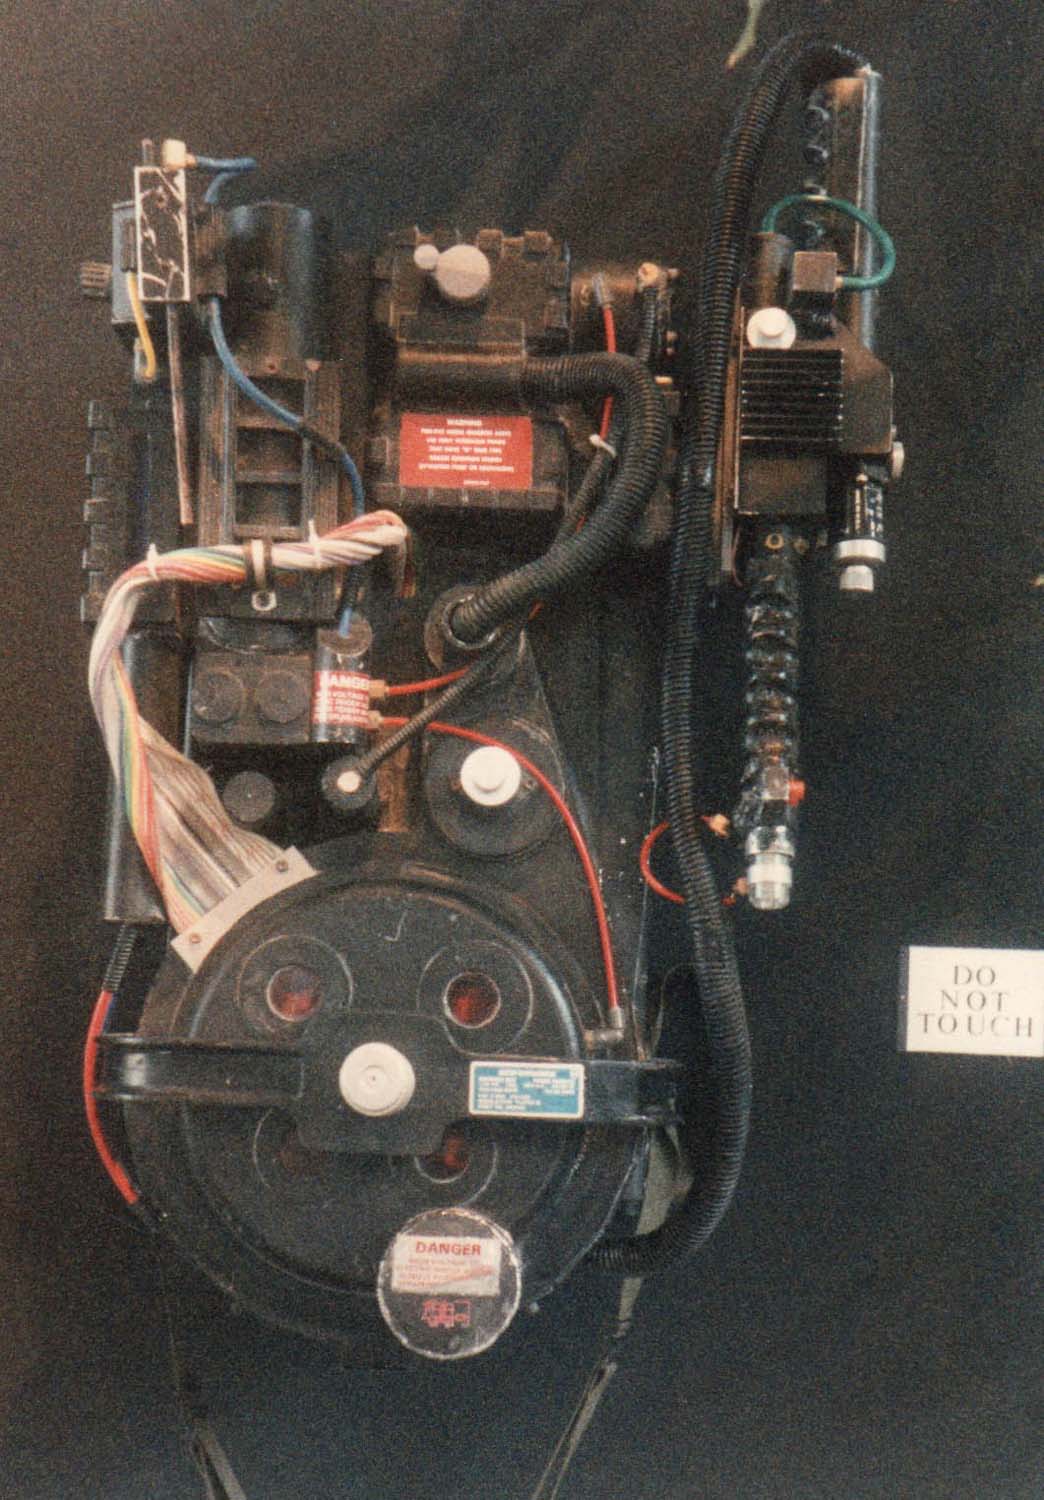
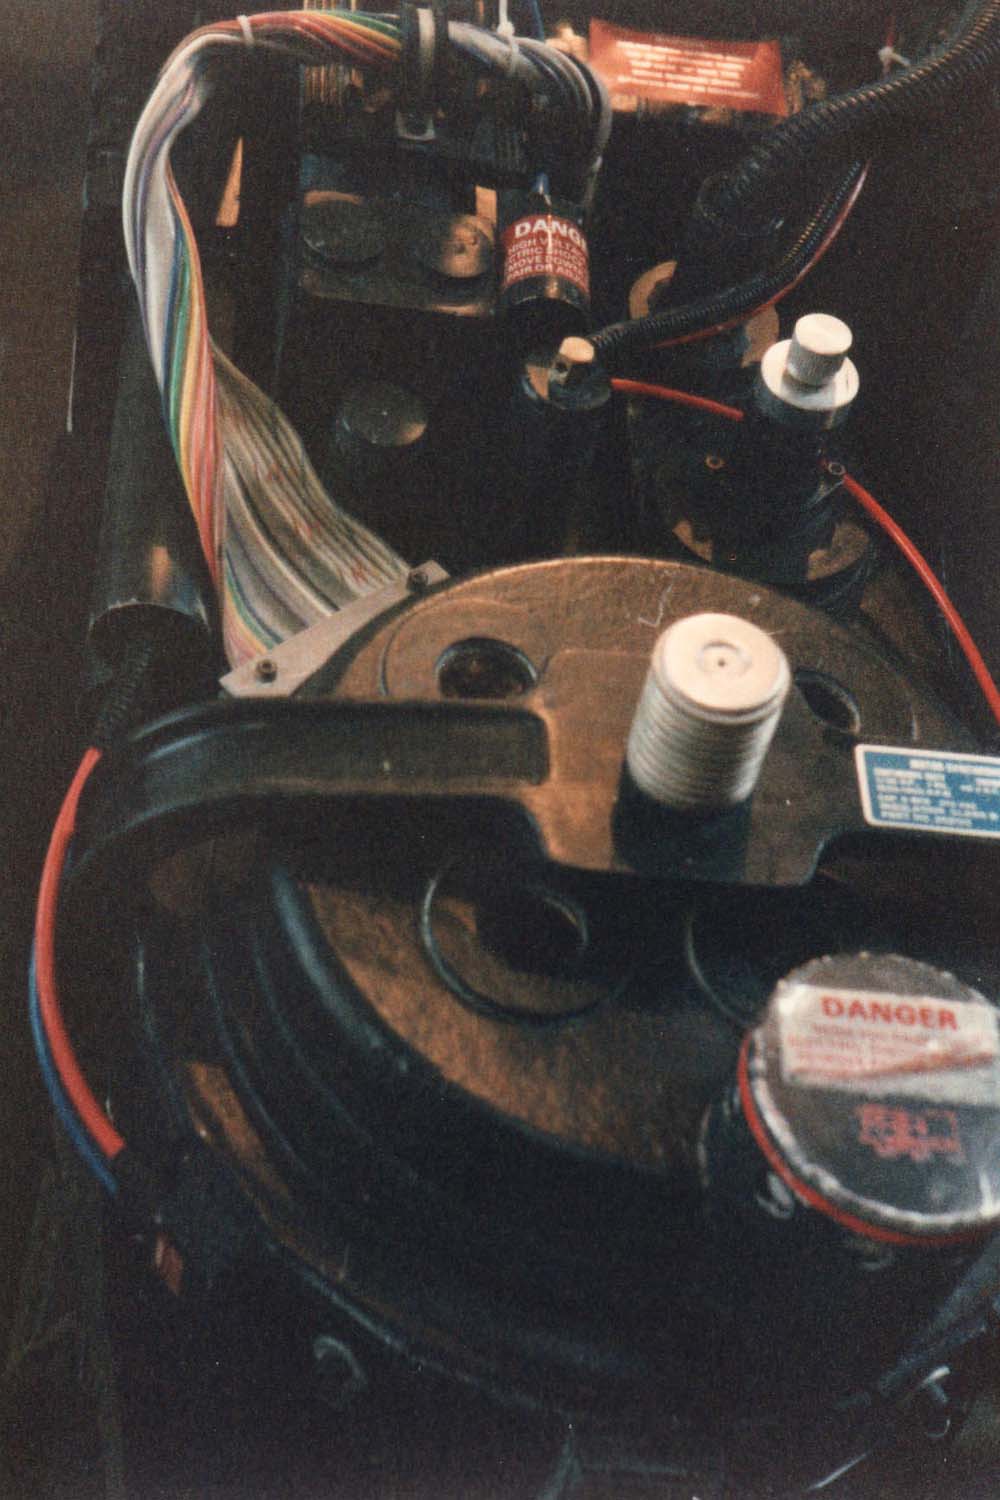
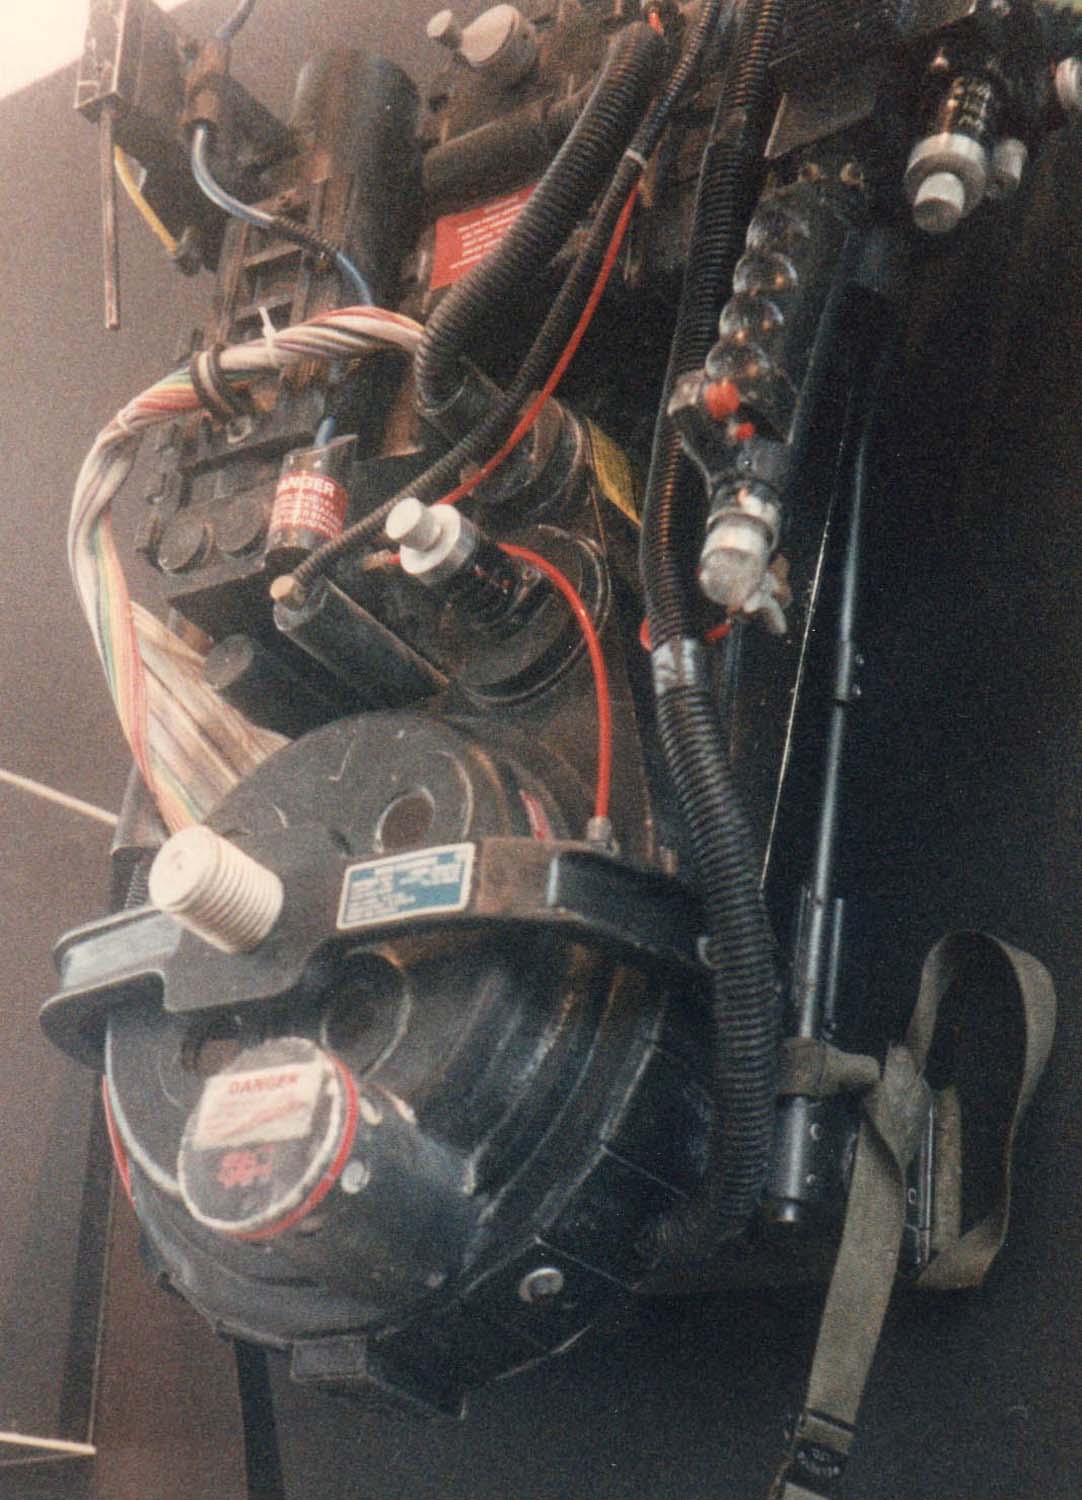
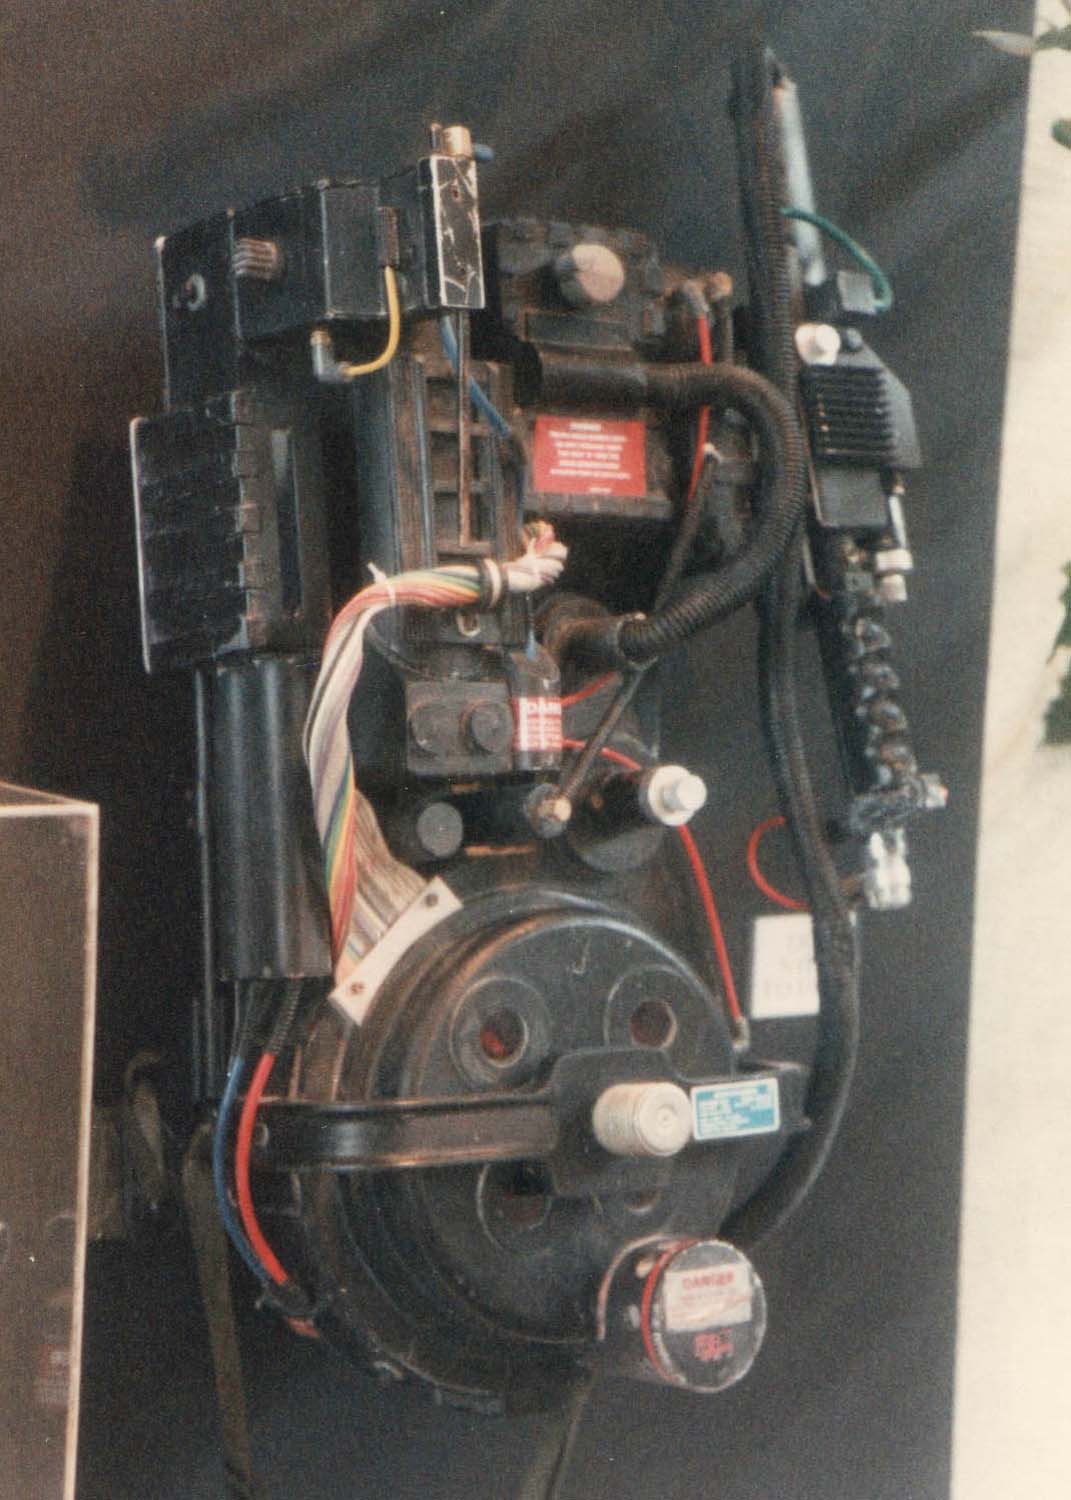
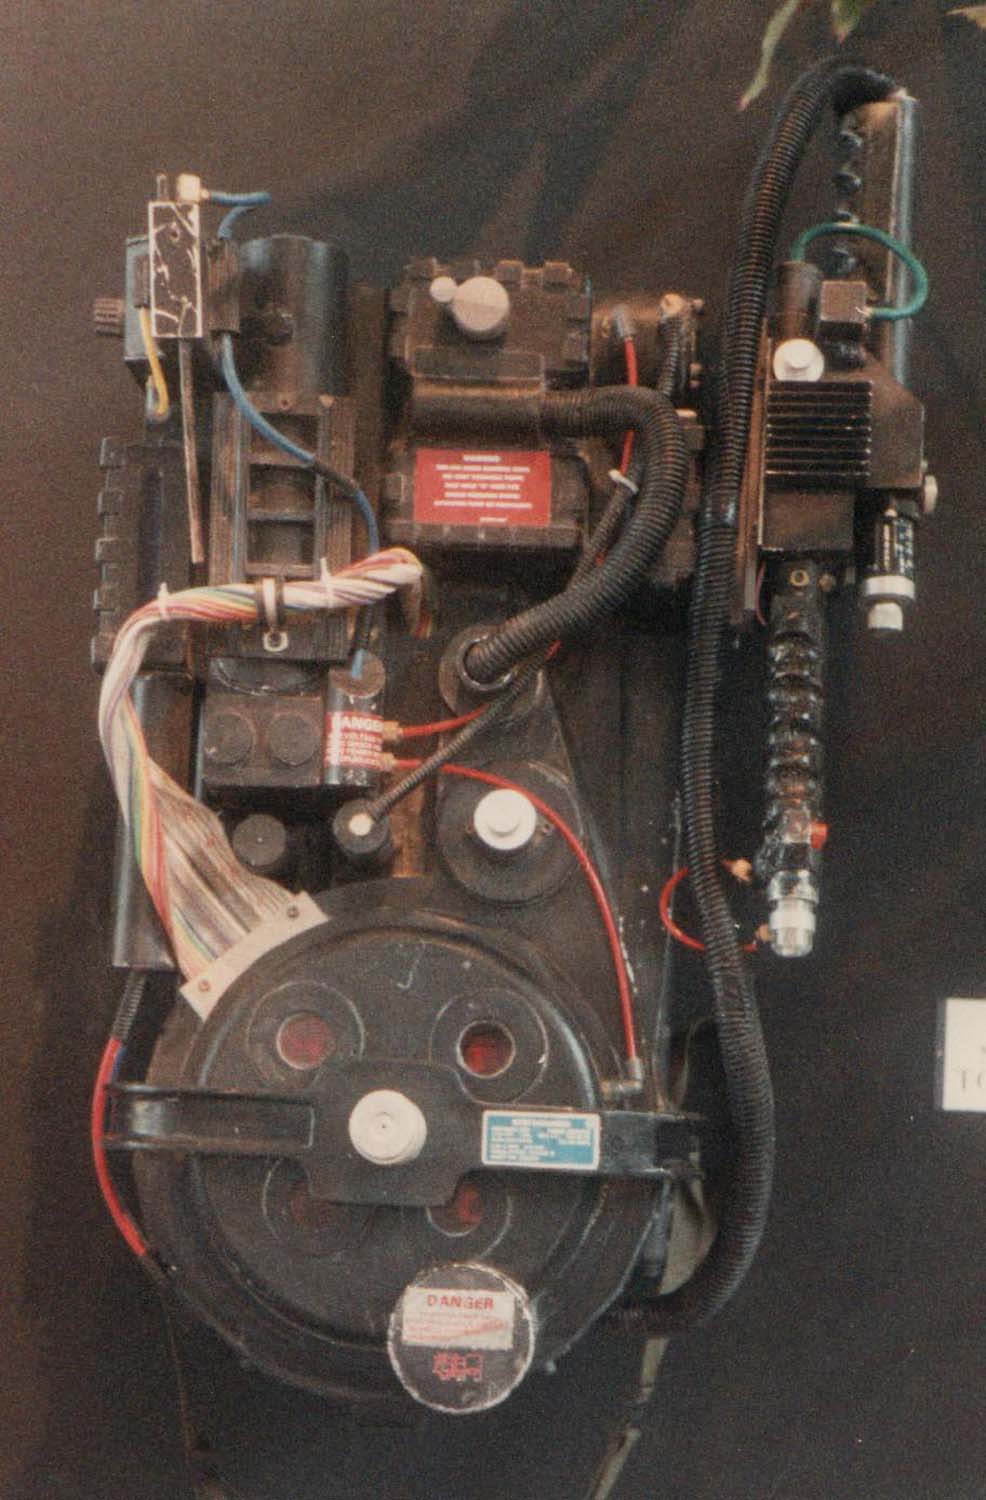
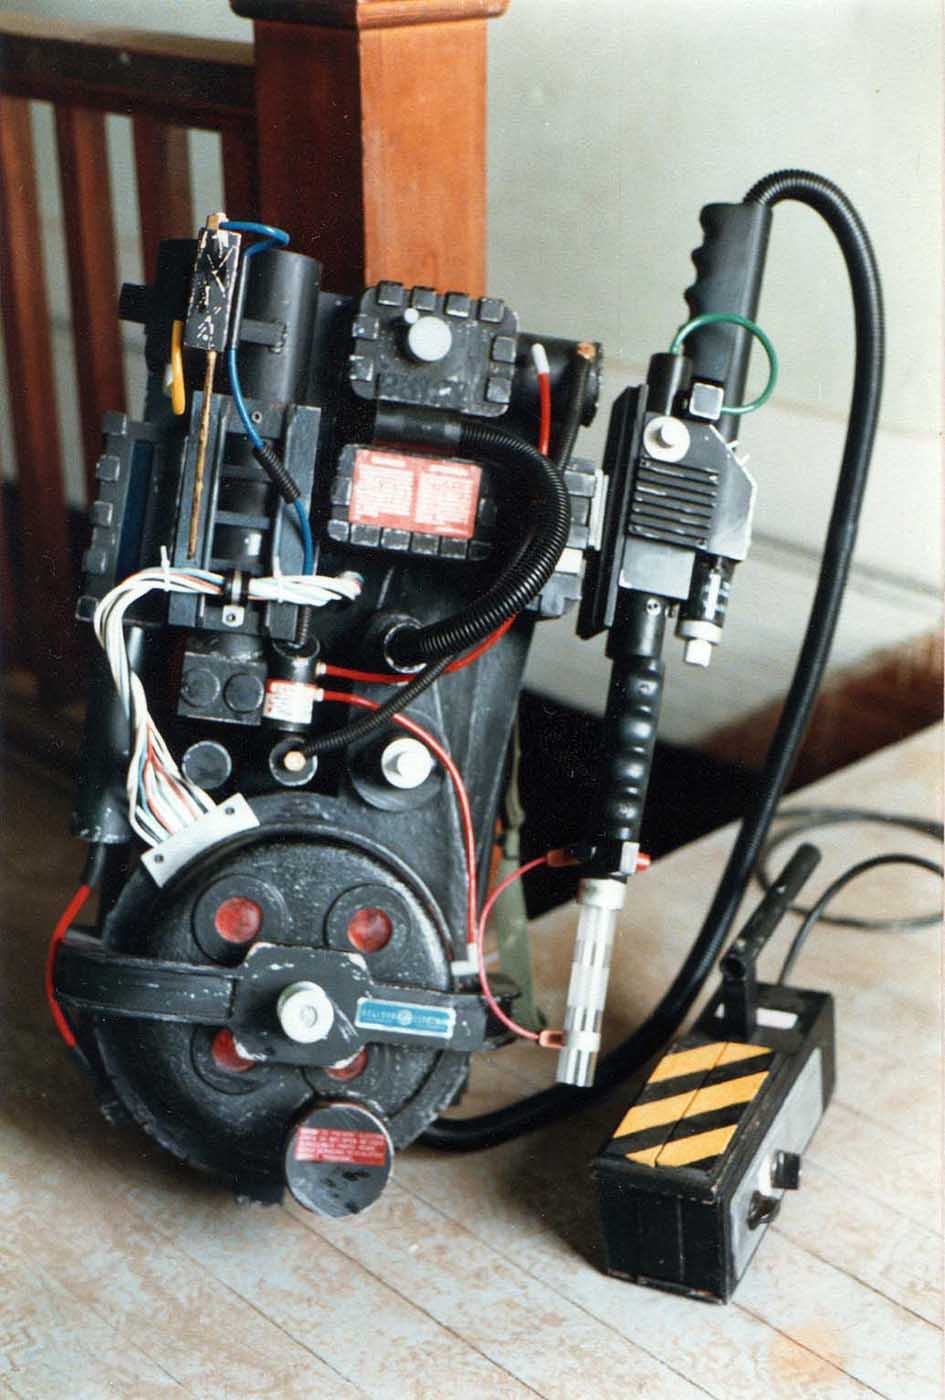
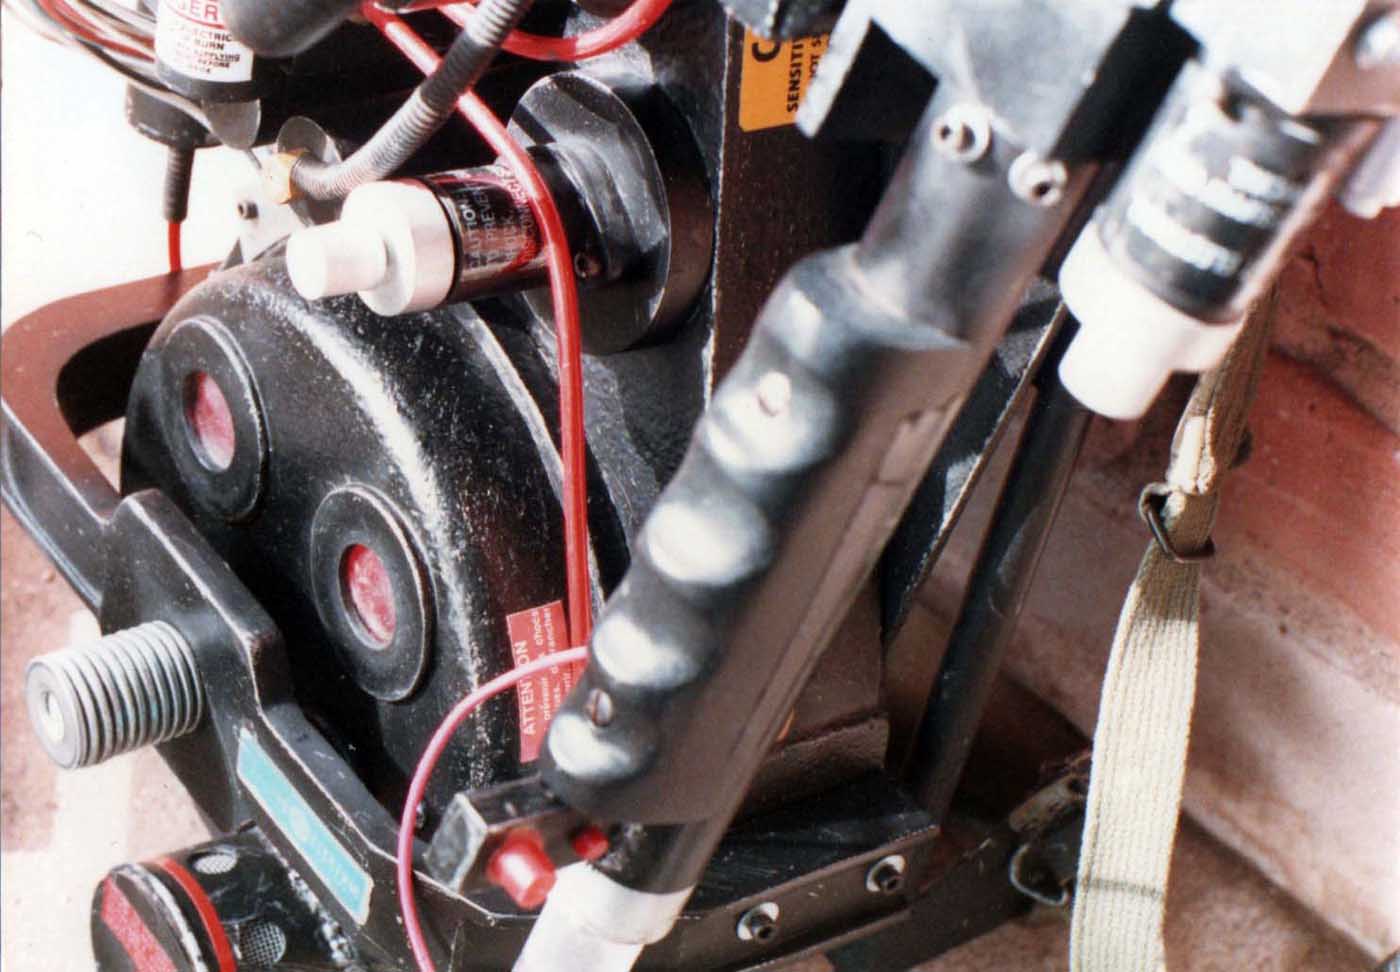
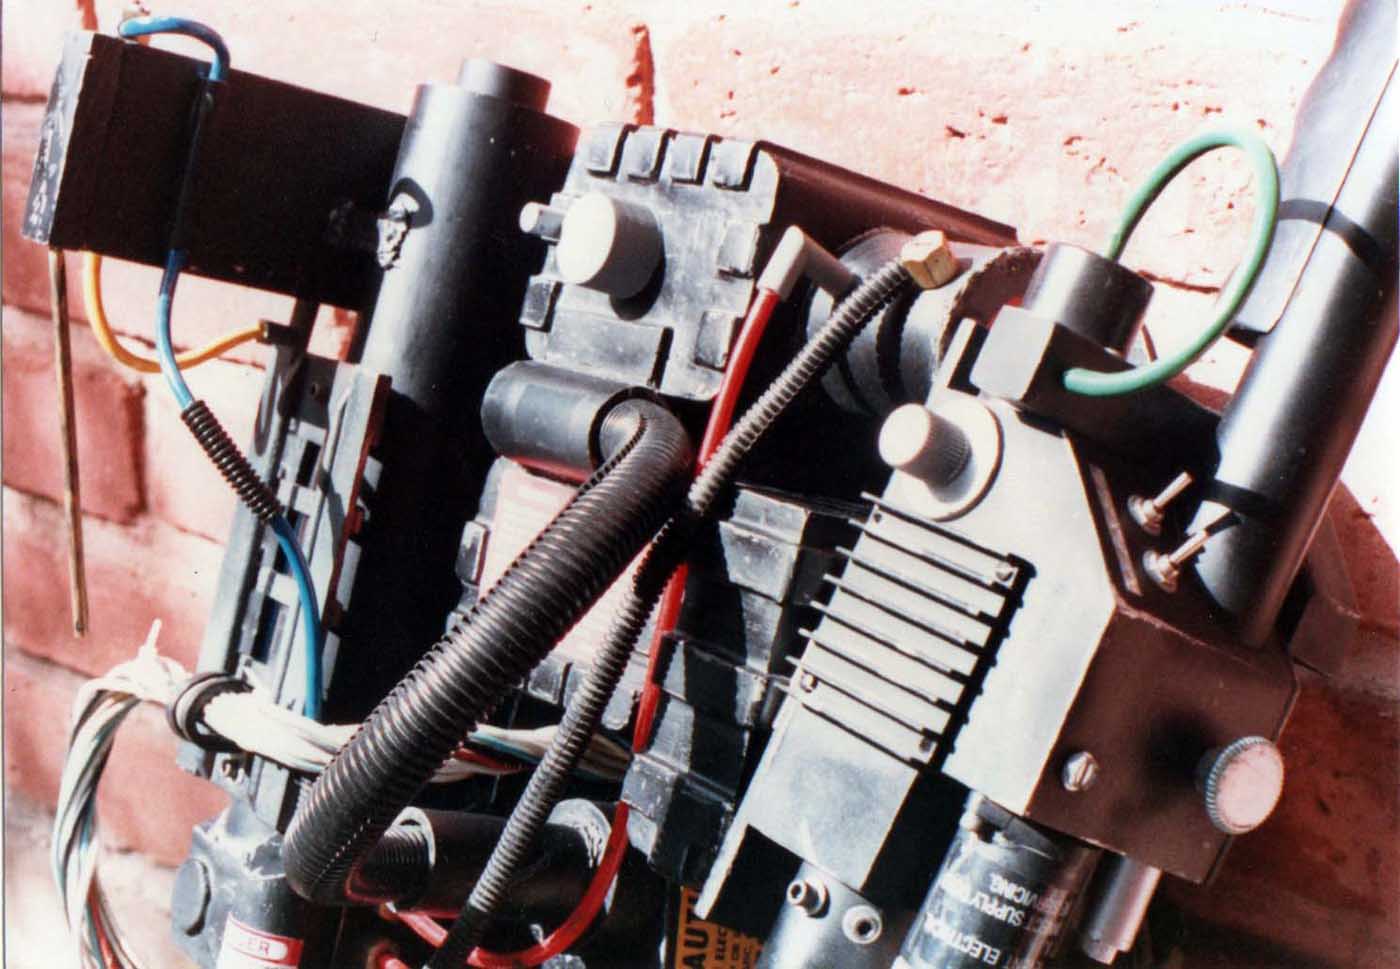
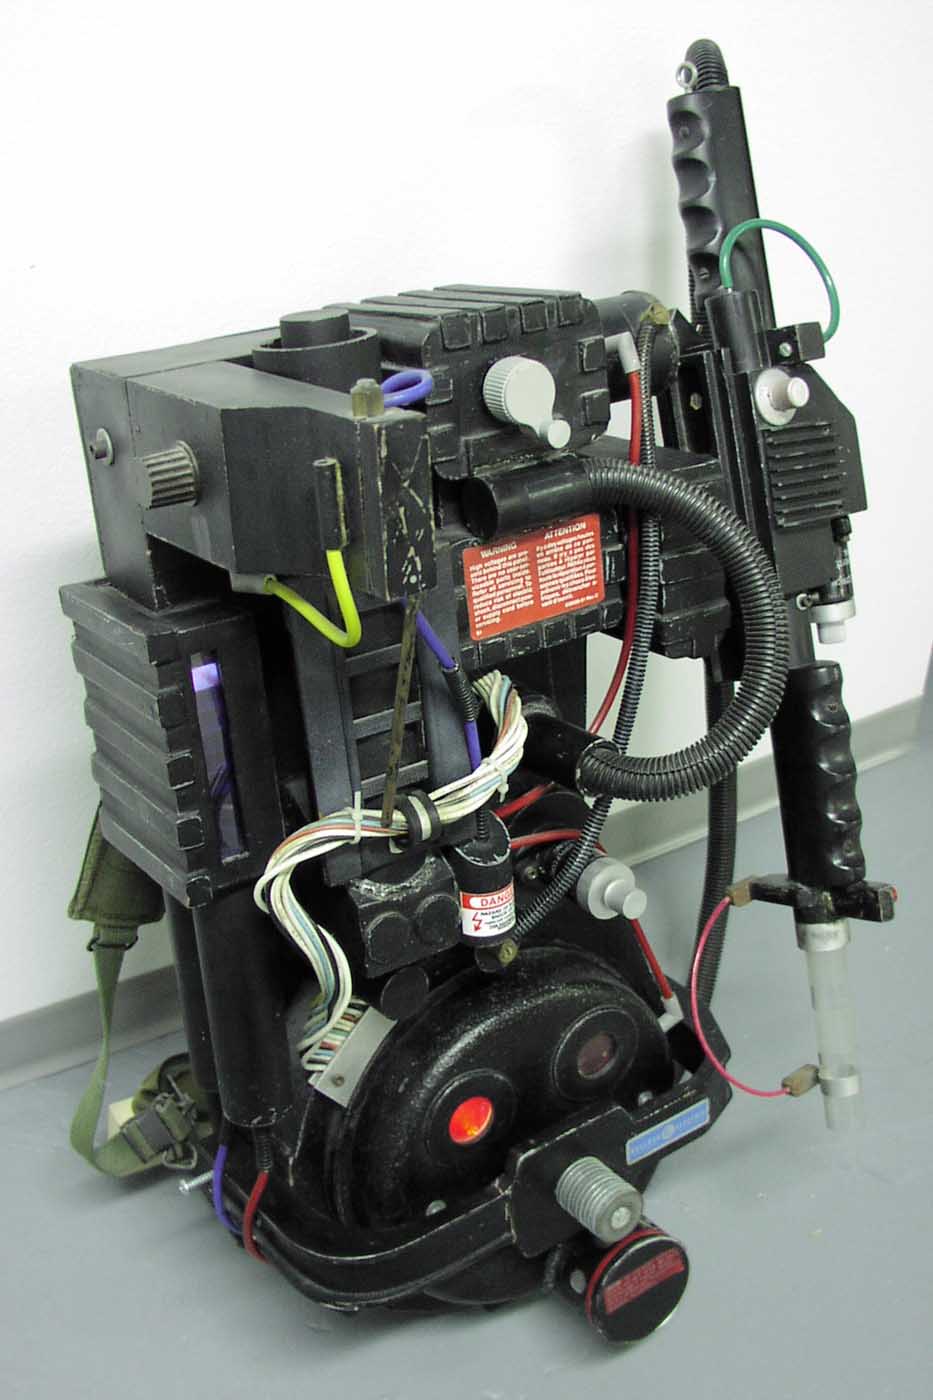
spengler hero pack
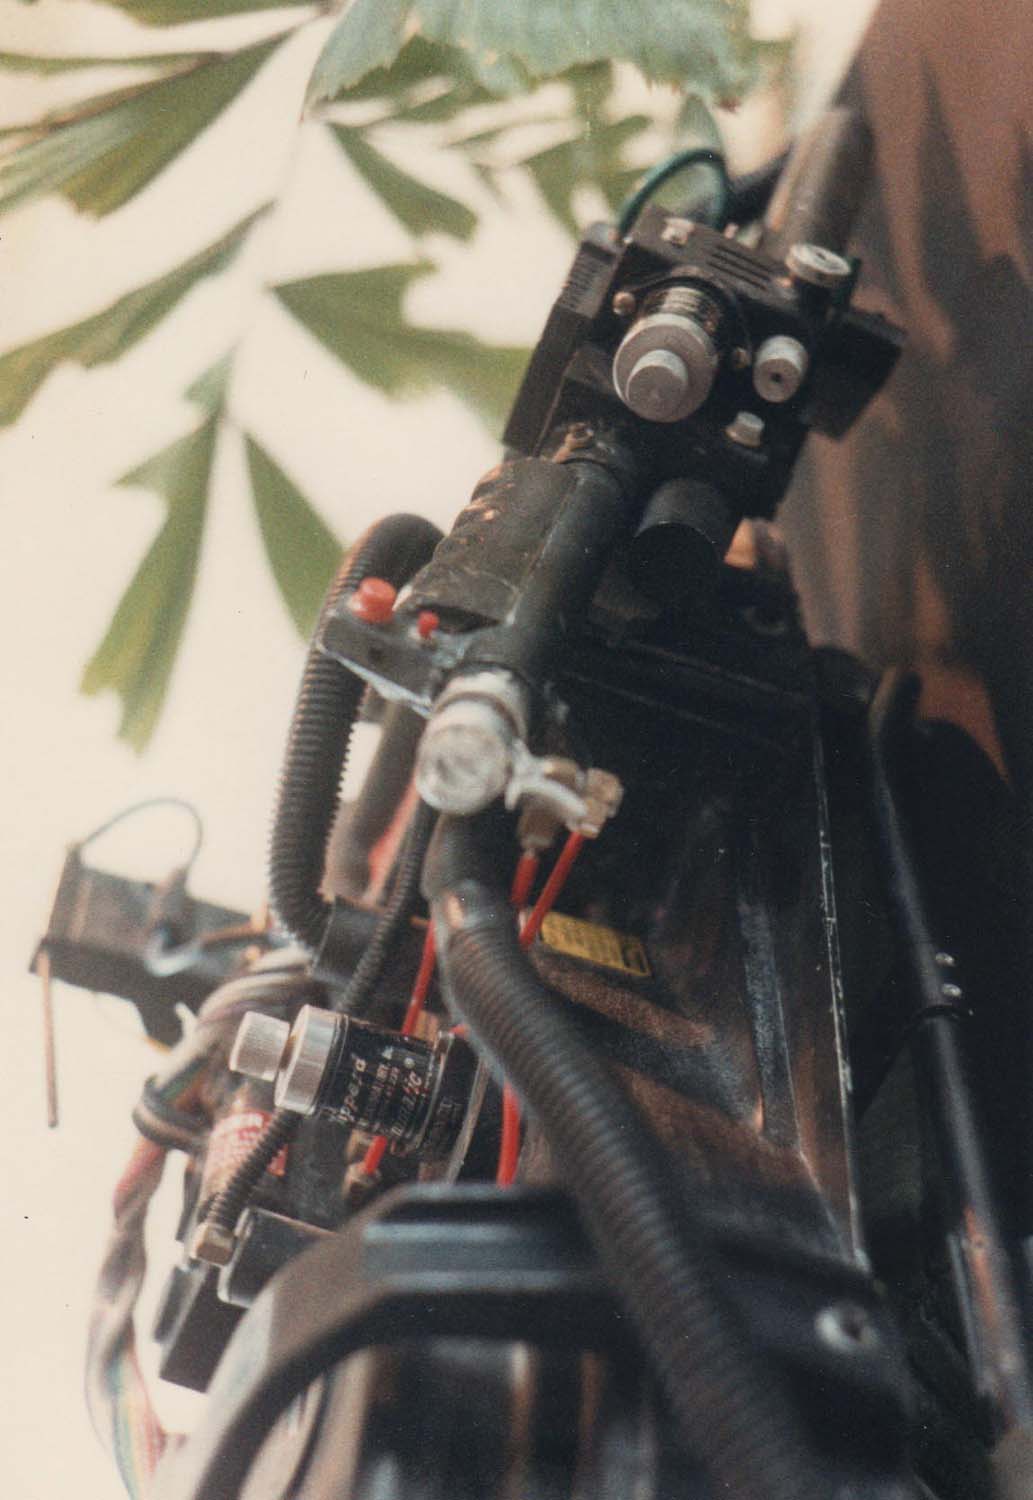
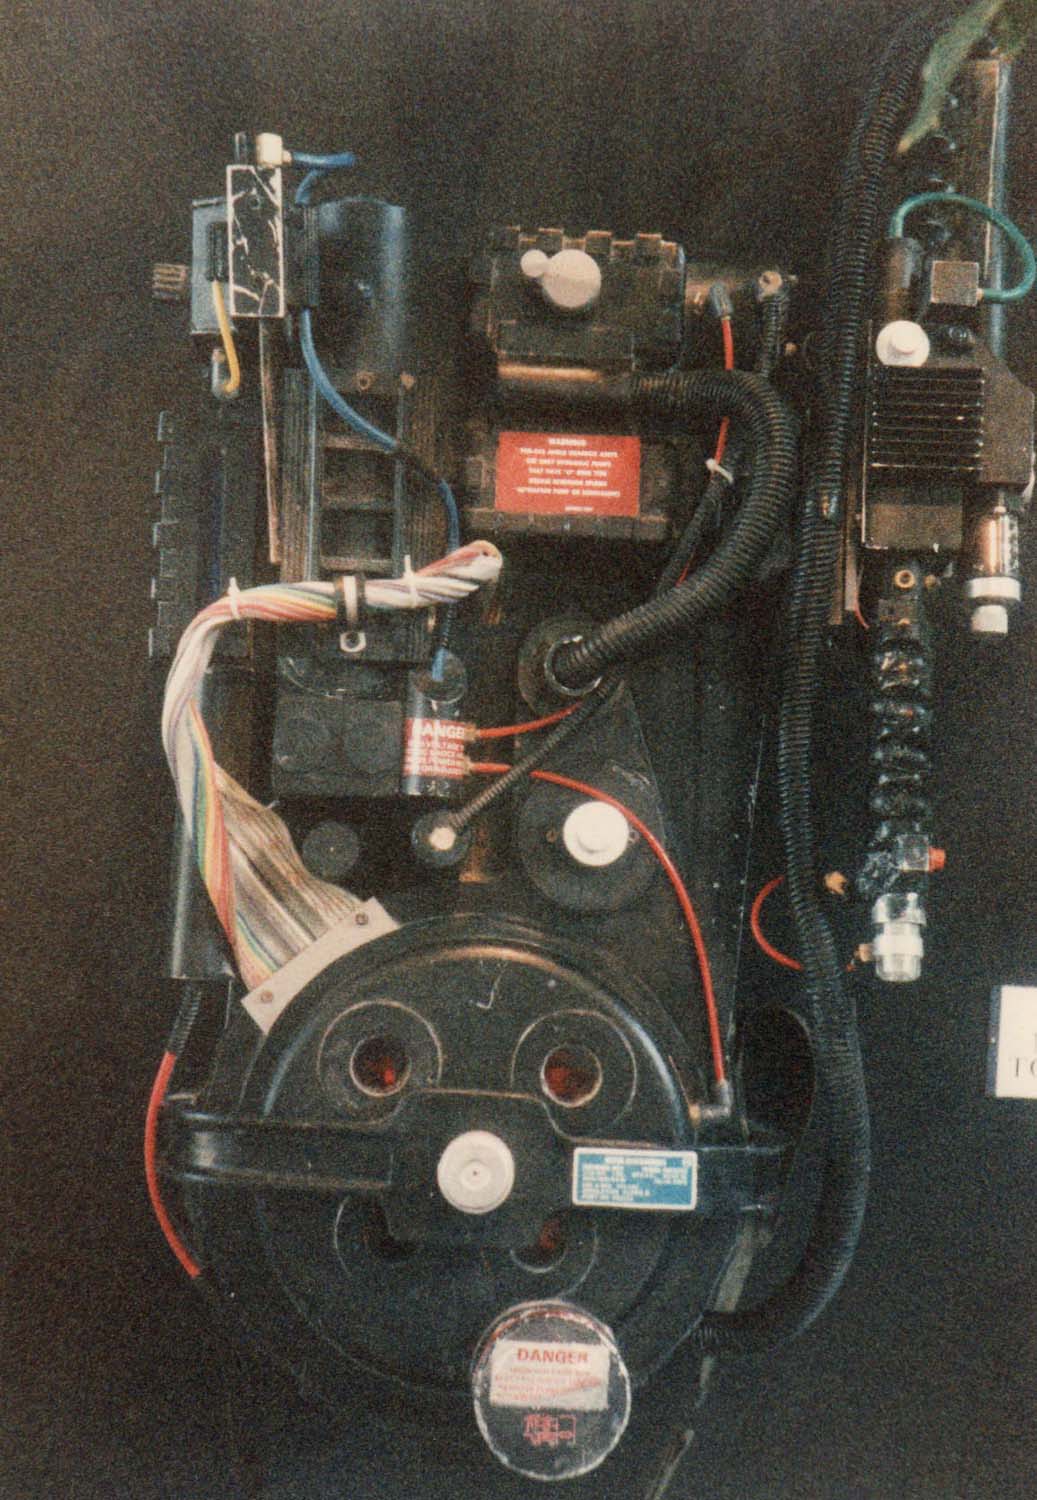
September 15, 1984 – Walking into the Scottsdale Center for the Arts we were greeted by the sight of three props from Ghostbusters: a rigid hero Proton Pack (that I would learn decades later was the Spengler pack), a foam stunt pack, and a trap. Armed with my antique camera, light meter, and 1000 ASA film I snapped 13 grainy photos, focusing almost exclusively on the hero pack. As I couldn’t be sure what my viewfinder camera was photographing there are a lot of shots of the overall prop.
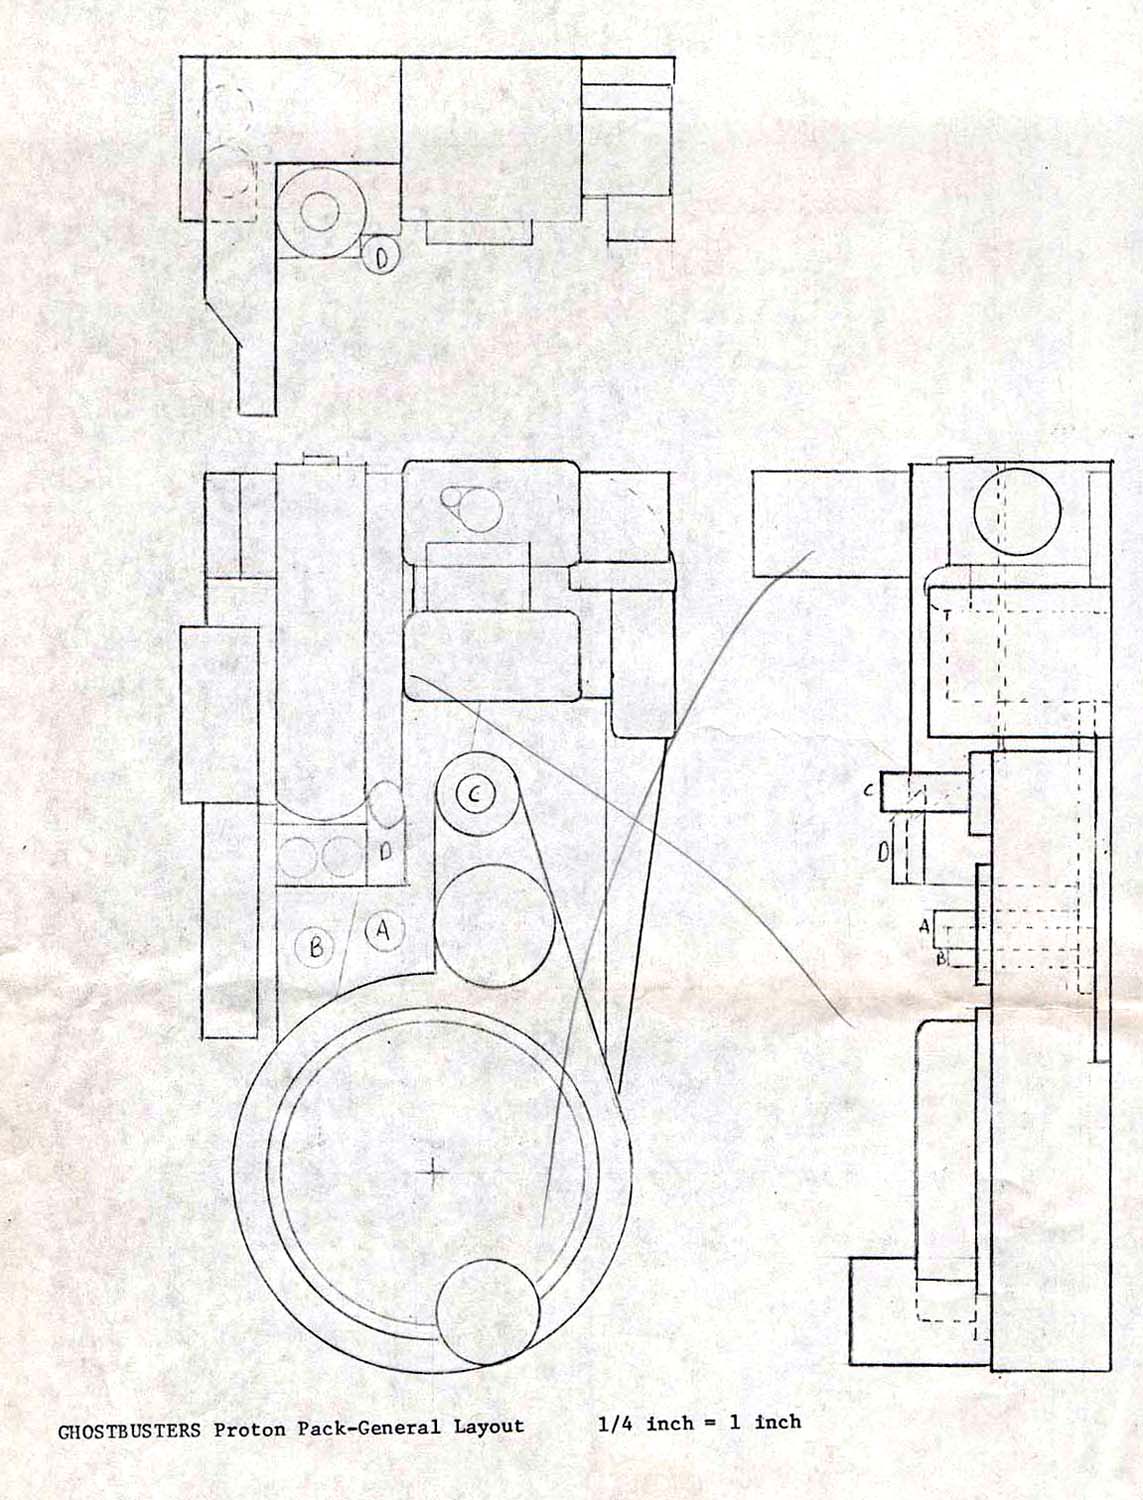
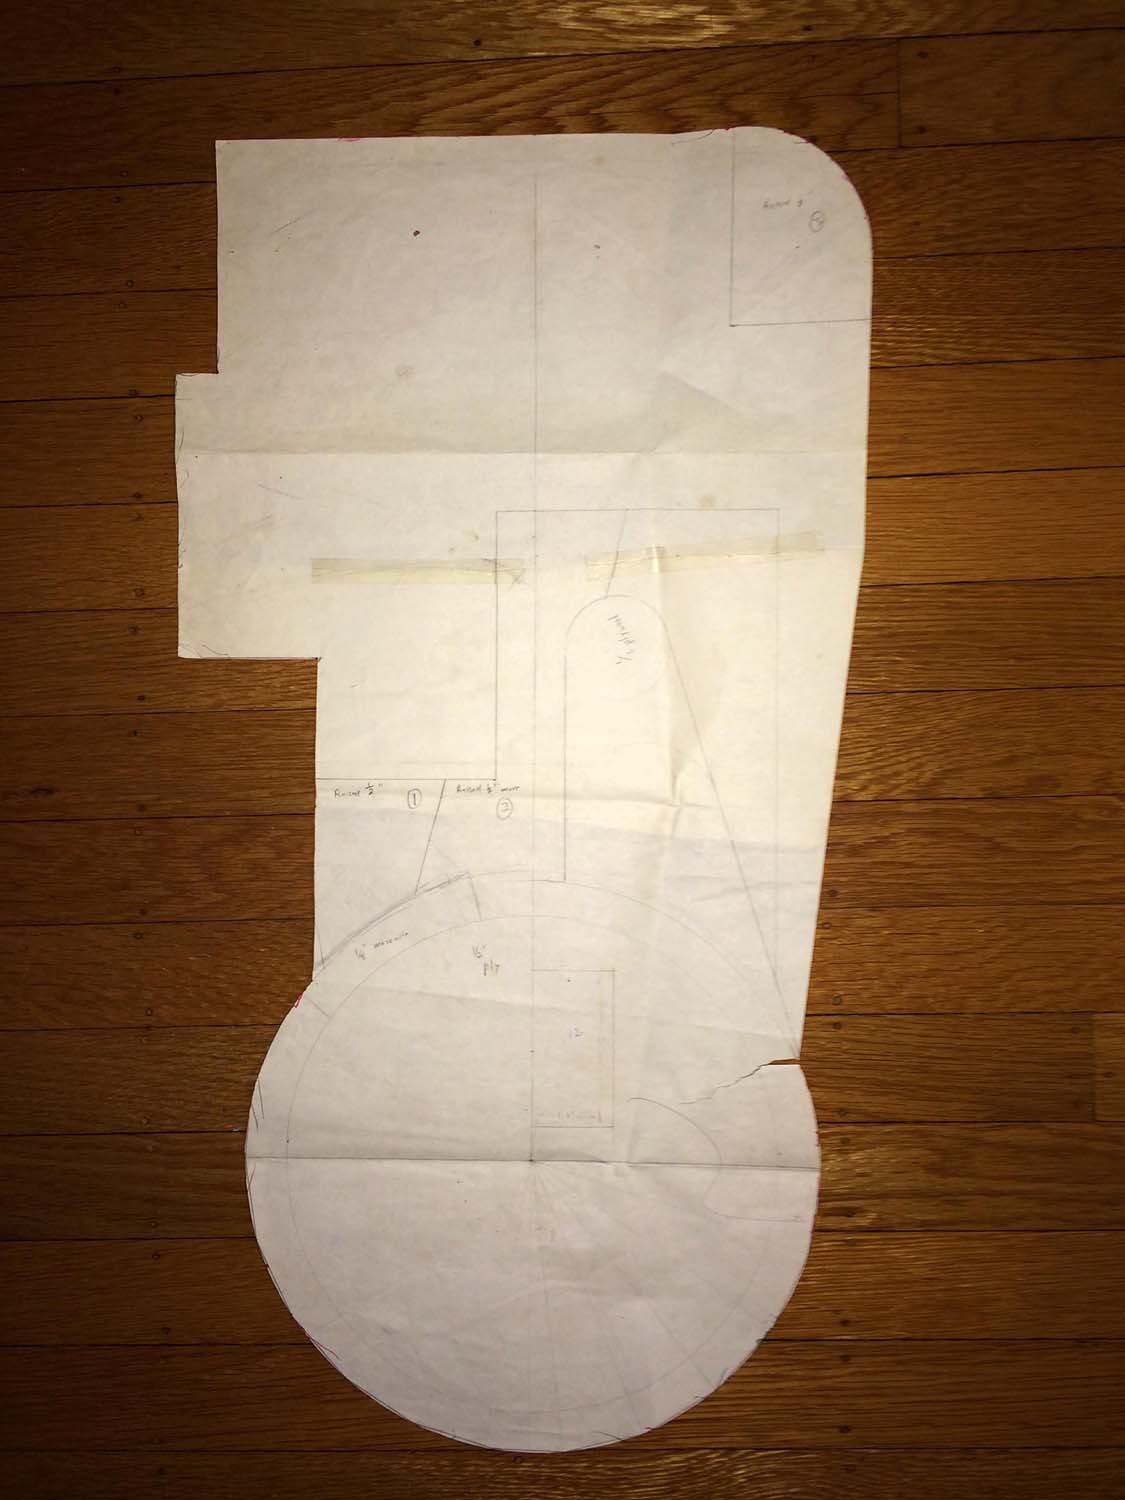
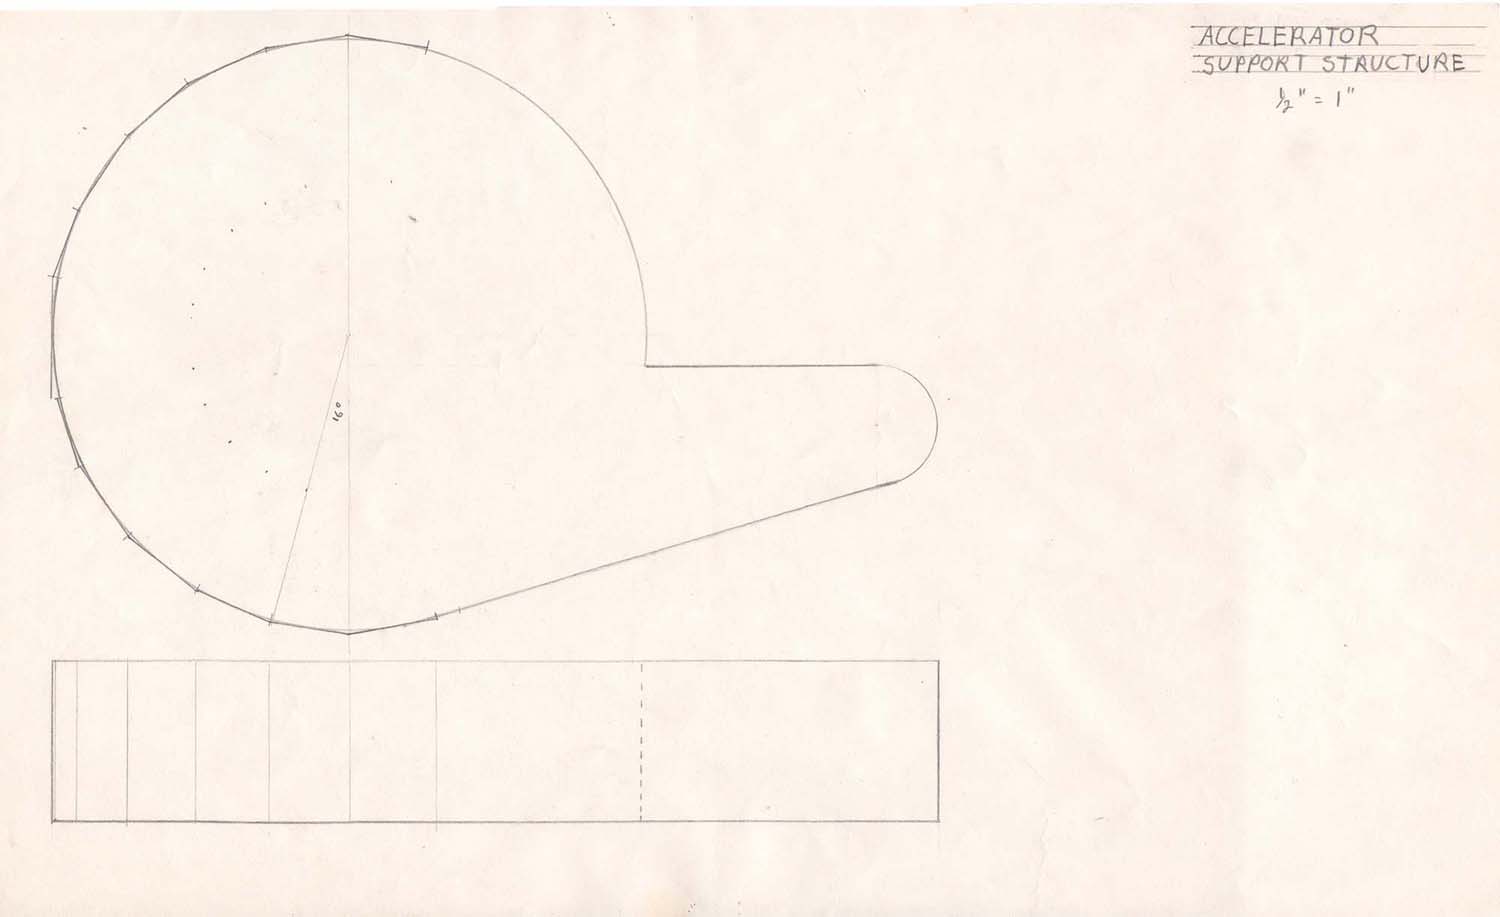
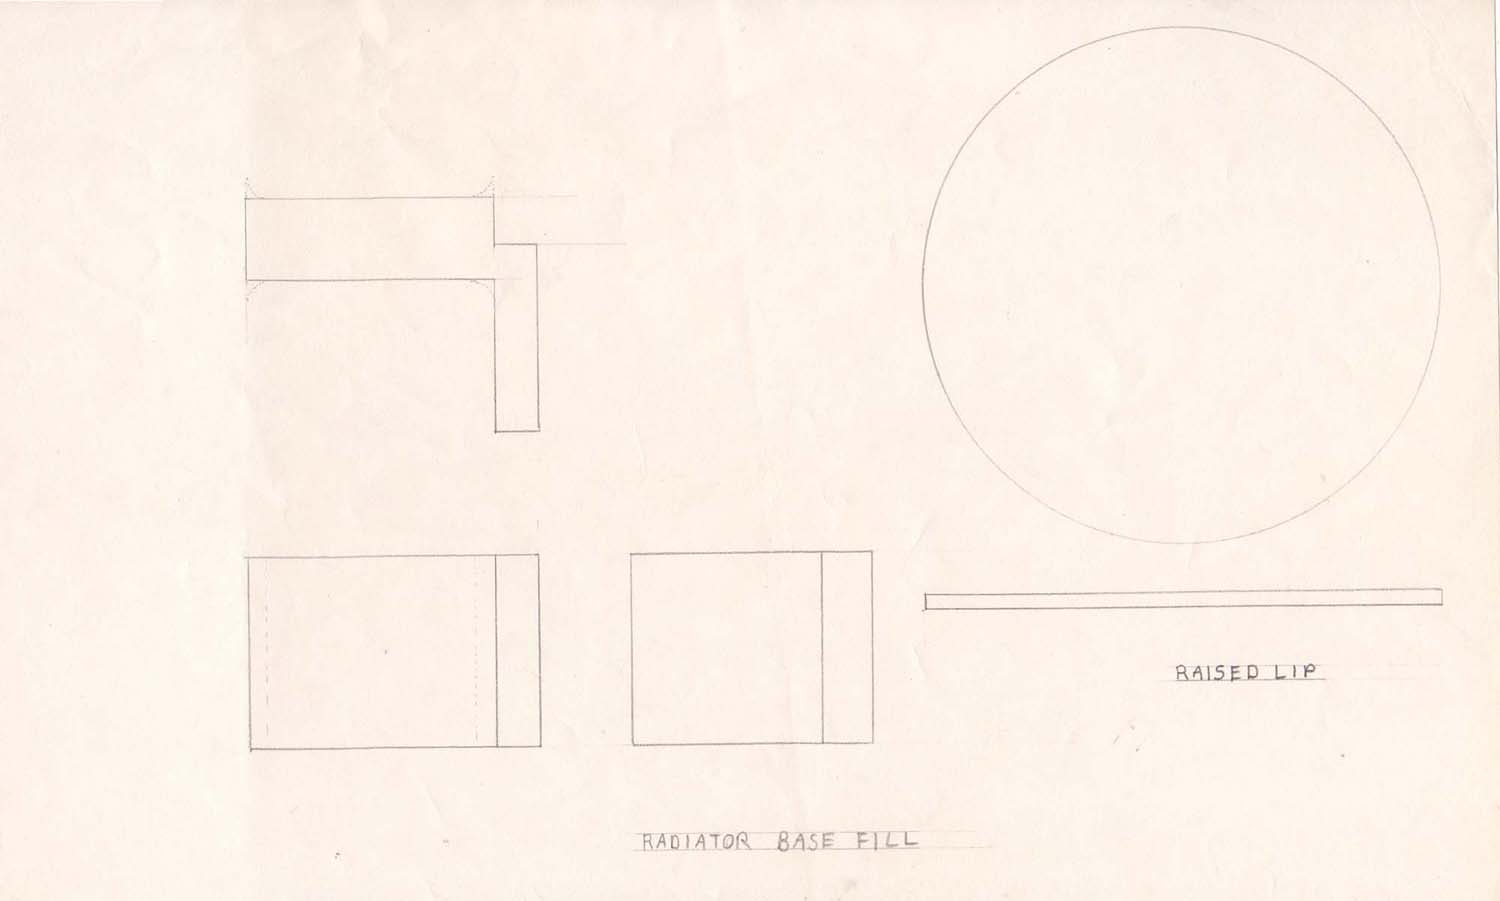
plans
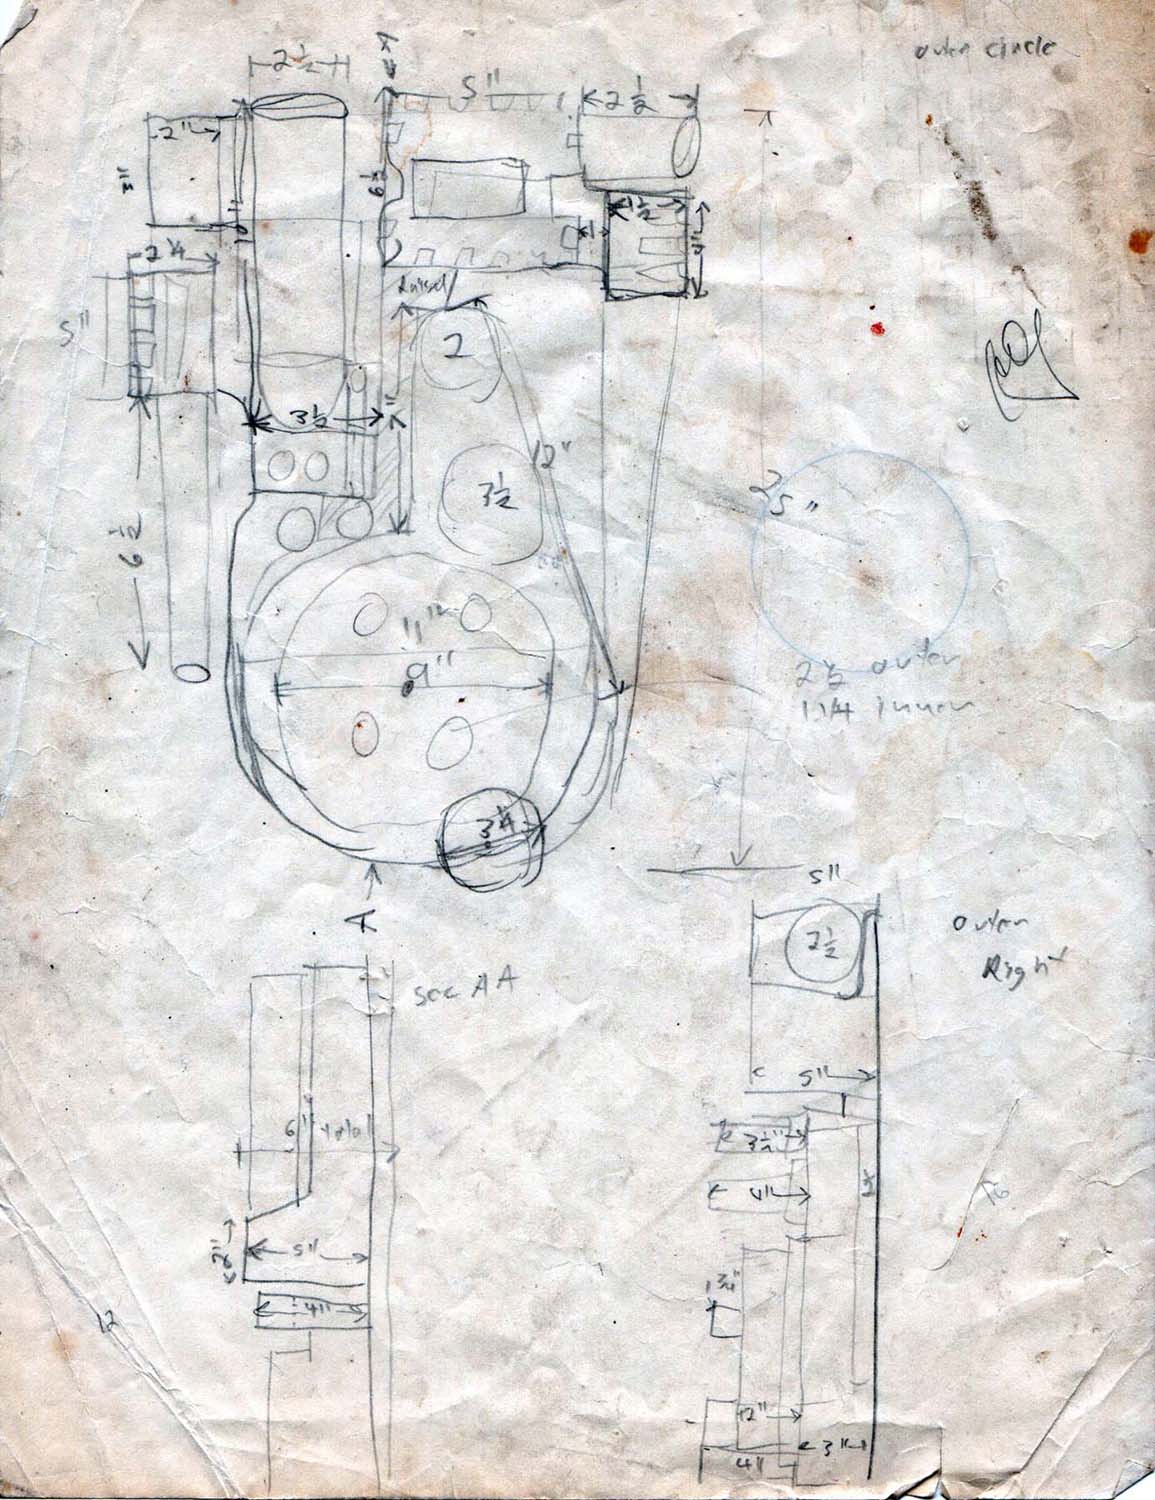
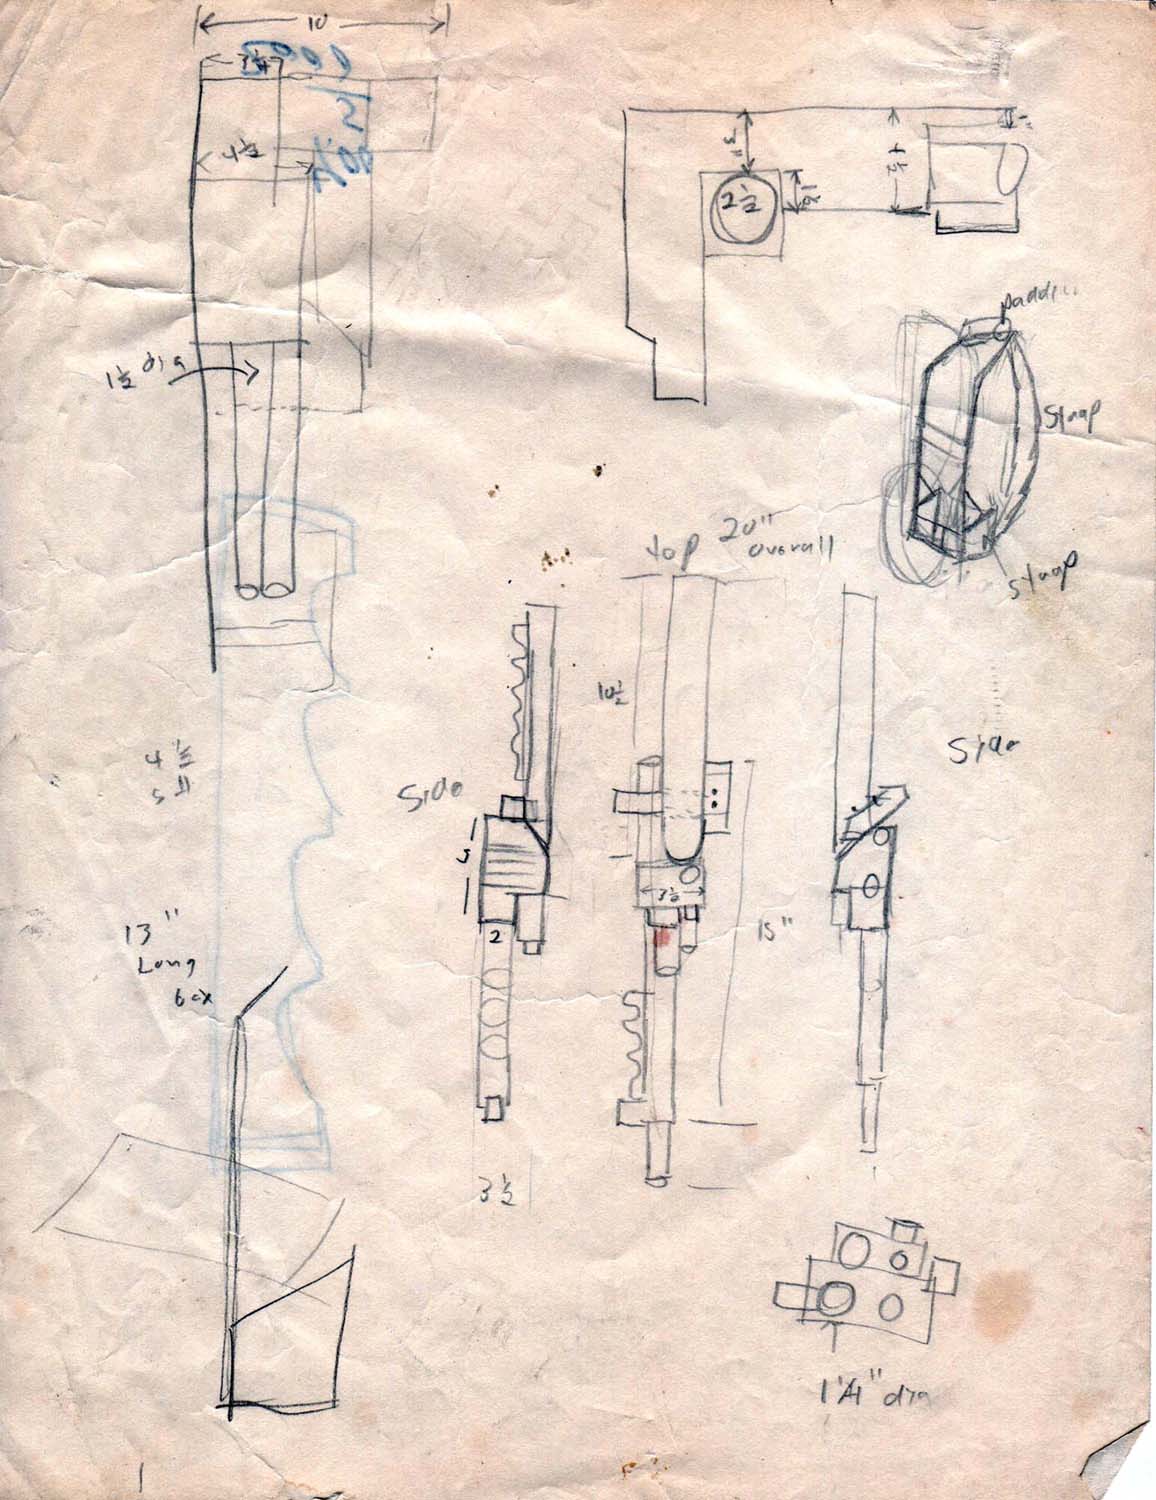
After taking photos of the pack we took measurements of the main components which I recorded in several sketches drawn on site. From those I drew scale plans, first at 1/4 scale, then 1/2 scale and then full scale to guide our build. A few proportions and details ended up being a little off. We never noticed that the top left edge of the gun box was rounded.
build
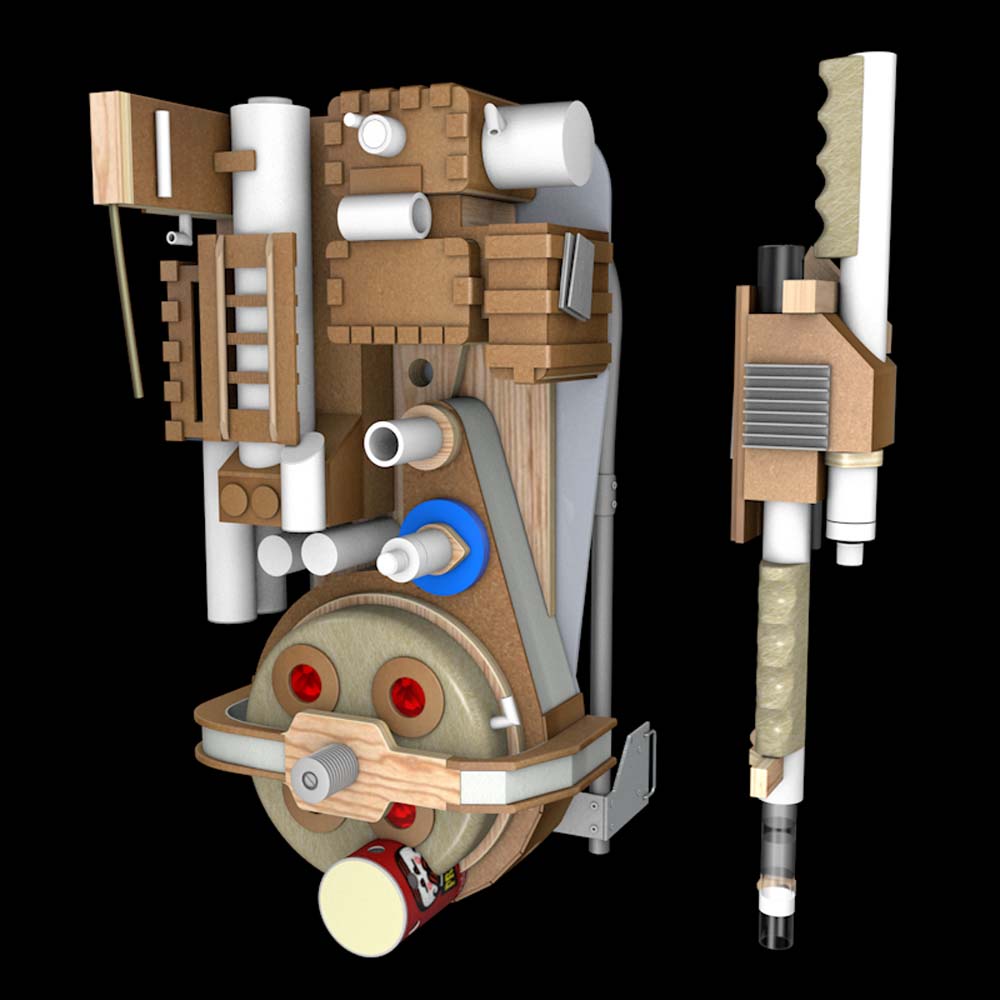
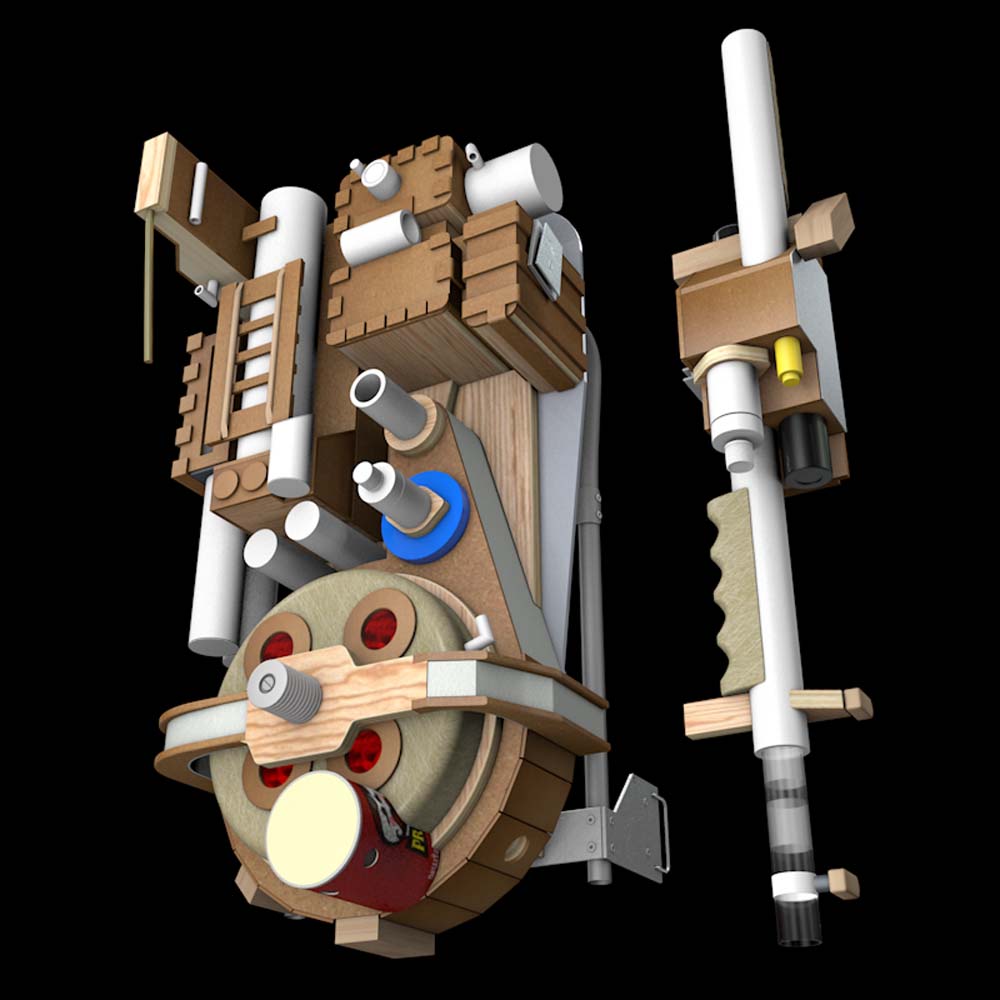
We commenced building our packs in late September or early October, with a Halloween deadline. With our focus being on the end result rather than the process it didn’t occur to us to take any pictures of our build in-progress. Taking photos in 1984 meant buying film and having it developed, which was $7 we didn’t want to spend at the time. In lieu of photos I’ve built and rendered this 3D model in Cinema 4D to show what went into our packs.
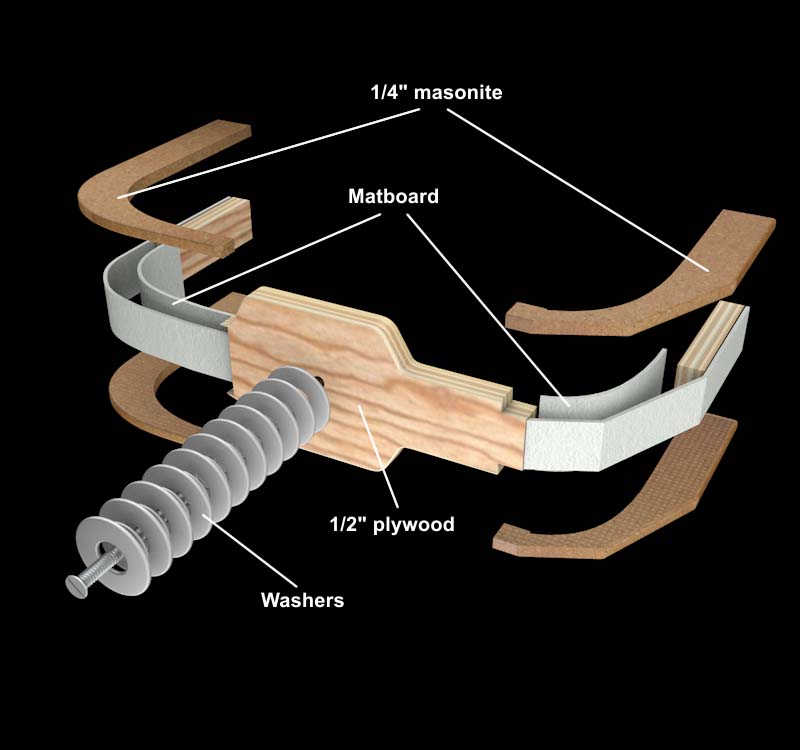
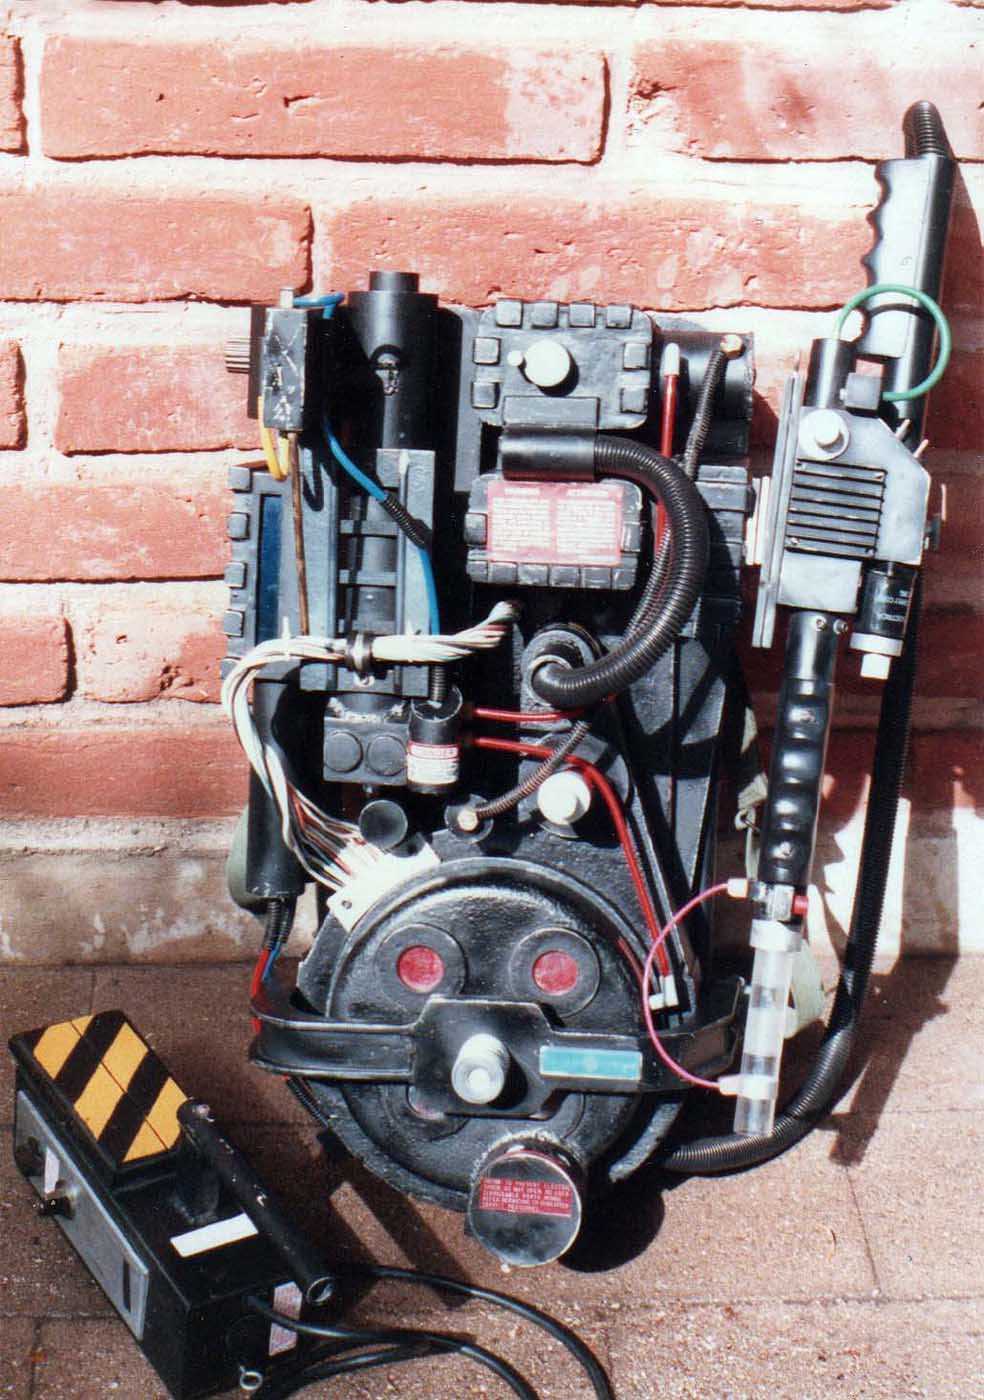
Working in my dad’s garage we built most of the main parts out of plywood, masonite, and PVC pipe. Other components included a Pringles can, Wite-Out caps, a super 8 film canister, 35 mm film canisters, a shampoo cap, and other odds and ends. Bryan fabricated the Alice frame from scratch and sculpted the hand grips (cast in fiberglass). I cast the cyclotron in fiberglass in a roasting pan lid. As there was no real way to print labels in 1984 we pulled ours off the back of Atari arcade games, photocopiers, electrical boxes, weed trimmers, etc.
finished 1984-1985
We debuted our mostly-finished packs at the Smugglers Inn for a Halloween contest, winning $100 (which pretty much covered the cost of our materials.) The first recorded images of our costumes came on November 10, 1984 at the Tus-Con XI Sci-Fi & Fantasy Convention when we were videotaped for the KOLD-TV news.
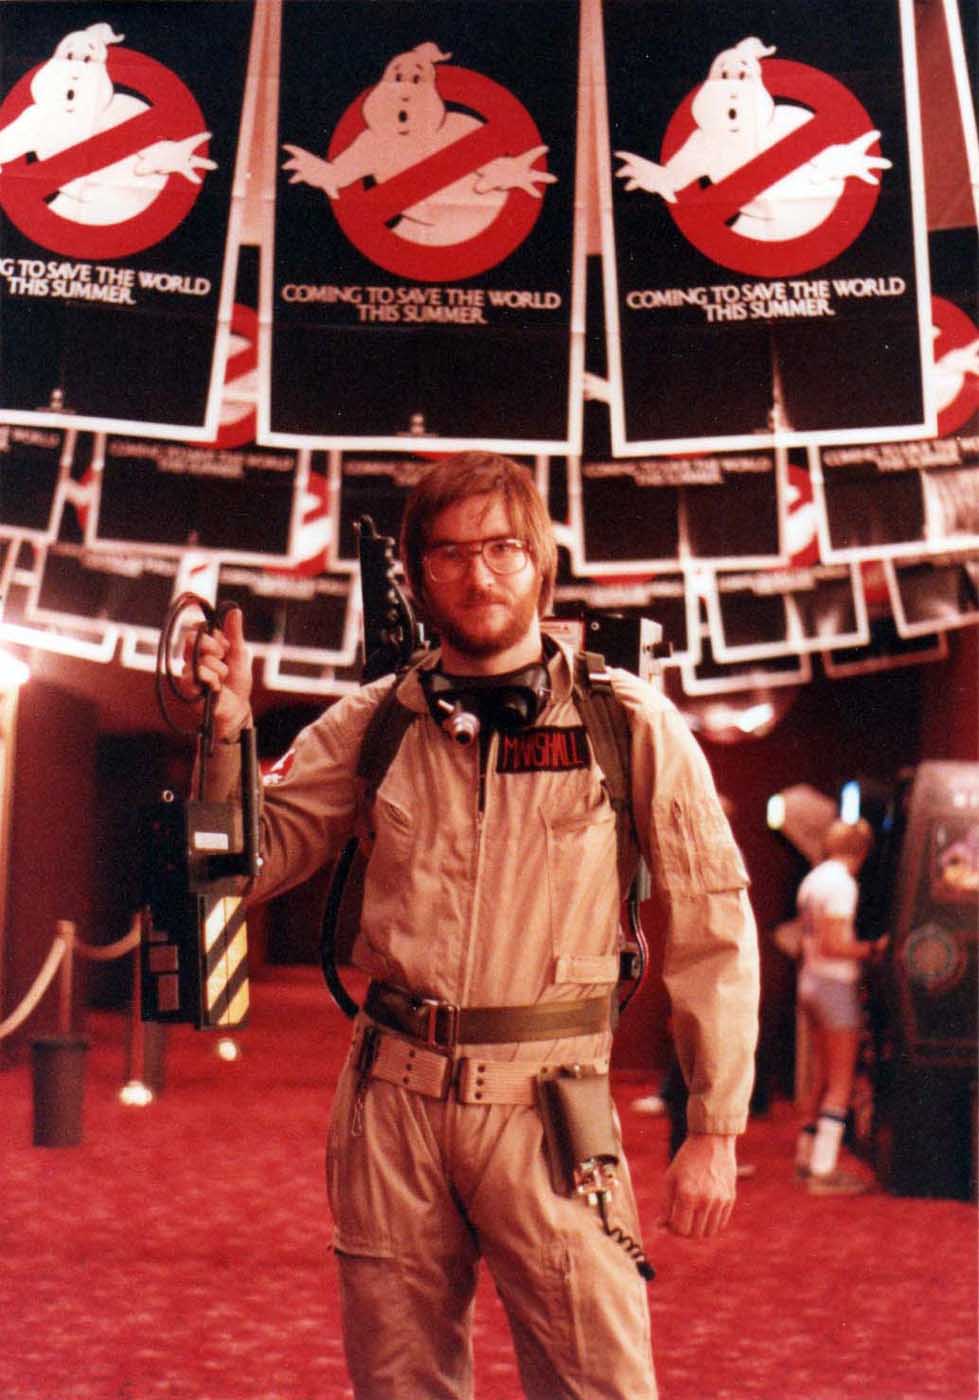
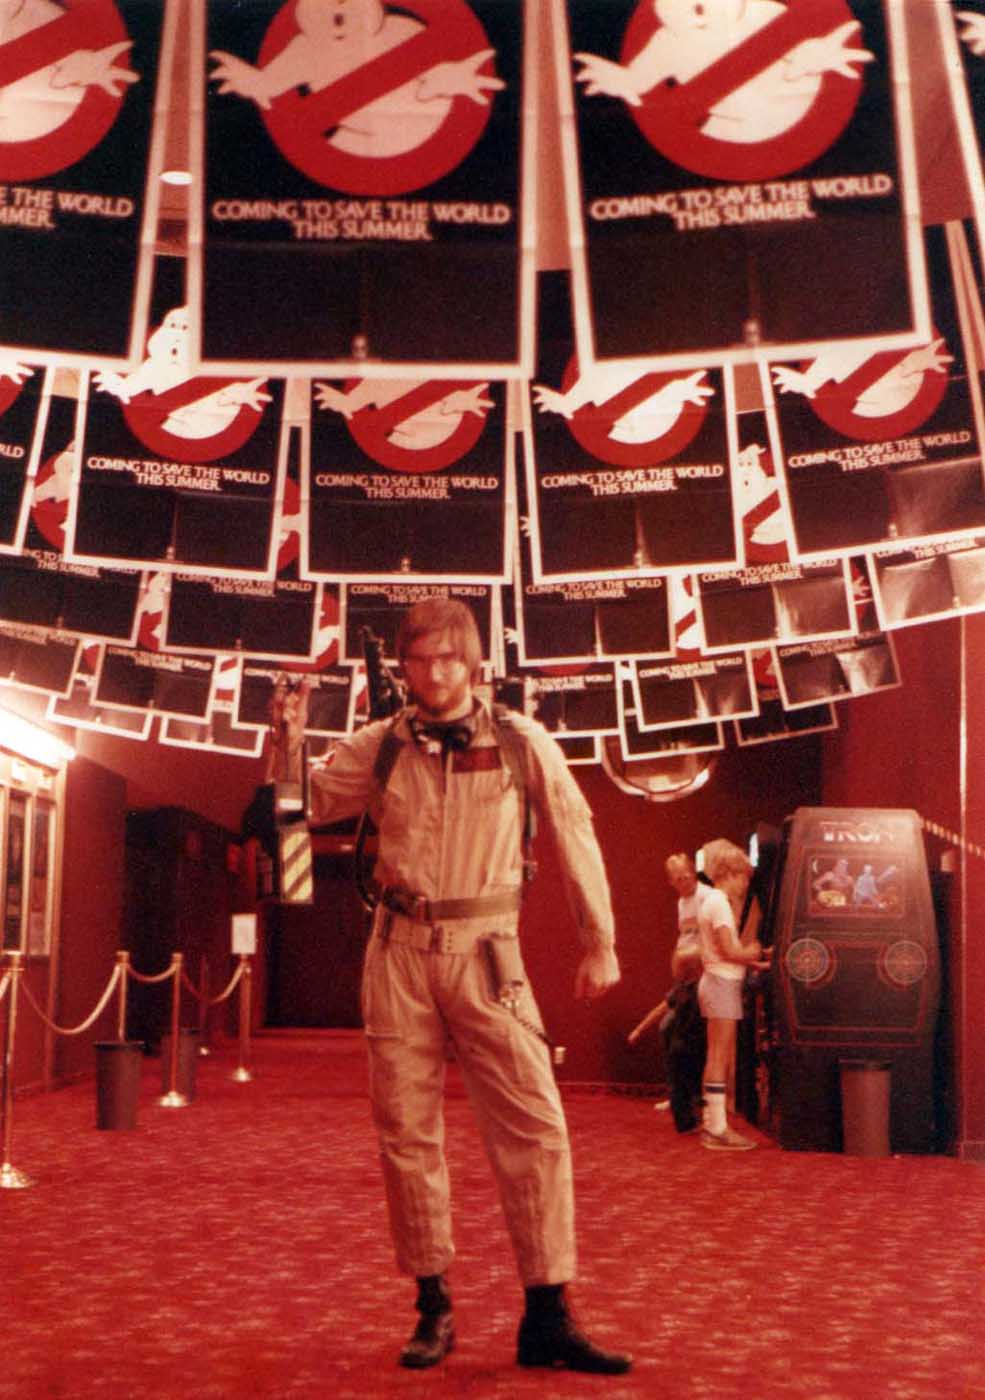
In 1985 we tracked down faux khaki flightsuits at a surplus store in the San Diego area. We took the first photos of our gear that year on a dusty abandoned floor above the screen print shop at which Bryan worked in Phoenix. I put in an appearance at the Foothills Mall Cinema for the rerelease of Ghostbusters that year. We both appeared suited up at a Halloween haunted house at which we both helped build props and rooms.
1984-1985 kold-TV video
Recently graduated from the University of Arizona with a degree in Radio-Television, I was working in the production department of KOLD-TV in 1984 when the Tus-Con XI convention was held about a quarter mile from the station. I was able to copy the raw footage of the masquerade, shot on 3/4″ videotape. The following year we appeared at a nearby haunted house, seen in b-roll and during a live shot with the weatherman.
upgrades 1986-present
Over the decades I’ve made many improvements to my Proton Pack while maintaining the essence of its original form. While it would be an easy matter these days to incorporate accurate Clippards (or replicas) or accurate stickers, I’ve chosen to keep my original versions and preserve the prop as originally built (for the most part).
That said, I have made some upgrades. Around 1986 I replaced many of the plywood and masonite components with fiberglass versions to reduce the weight of the prop. I laid up the fiberglass into sealed and waxed plaster moulds. This was a horrible approach, but all I could afford in 1986.
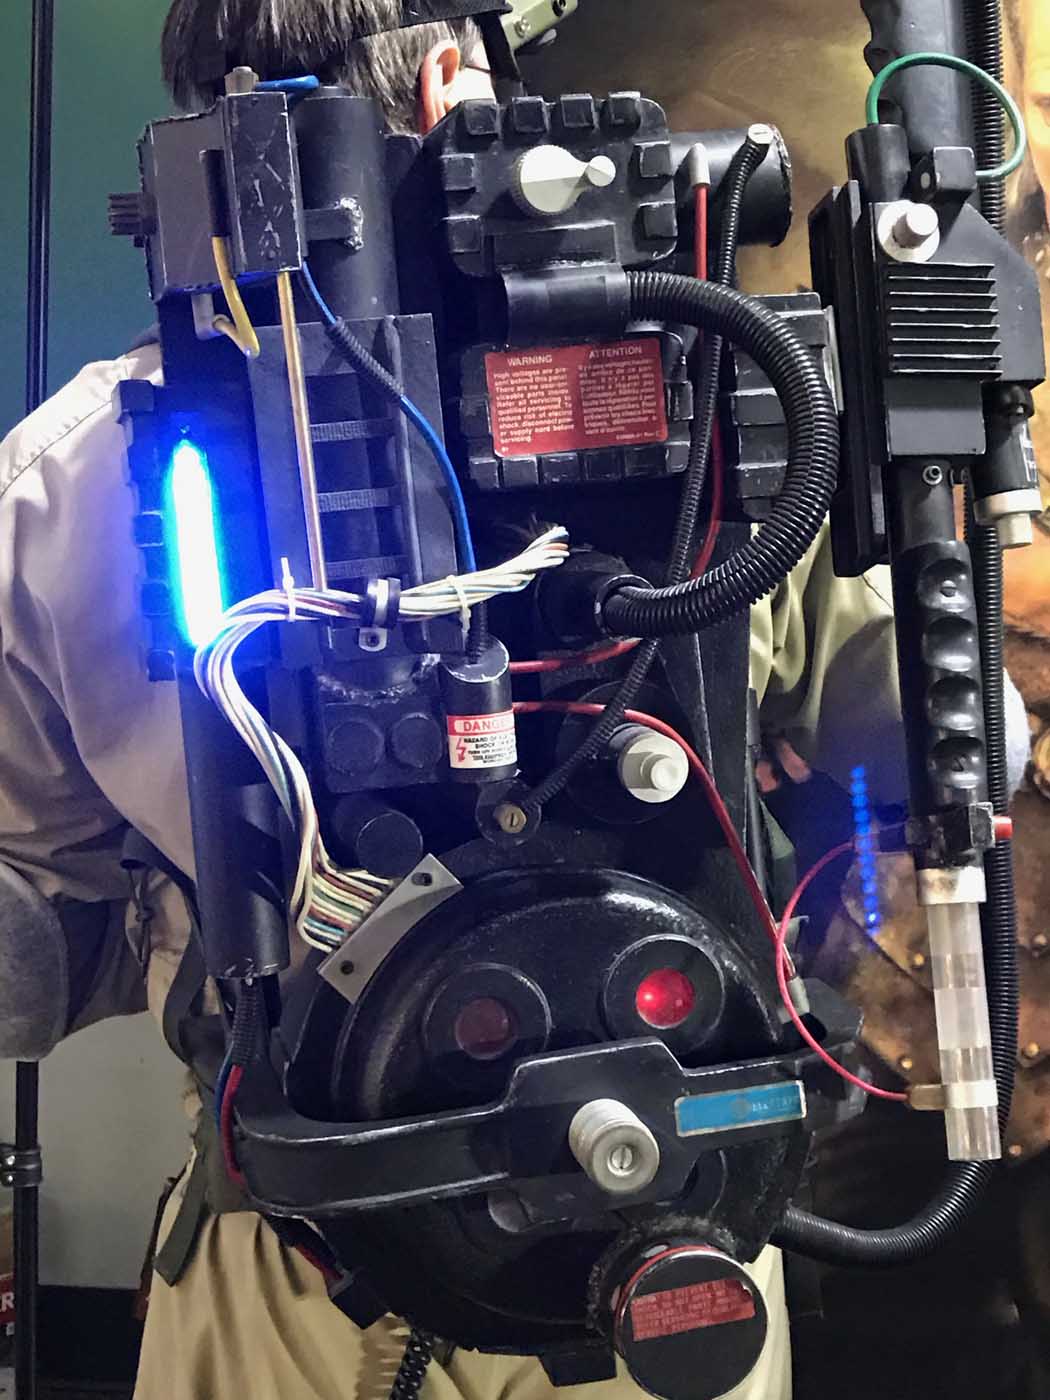
By that time I’d installed lights for the cyclotron using schematics from Forrest Mims’ Radio Shack books (with the help of TV station engineers). A single, ping-ponging light was all I could manage for the power cell.
By 1989 I’d rebuilt the wand from fiberglass, again installing electronics based on Radio Shack schematics. All of these different circuits required a pastiche of AA, C, D and 9-volt batteries, accessible through the removable cyclotron.
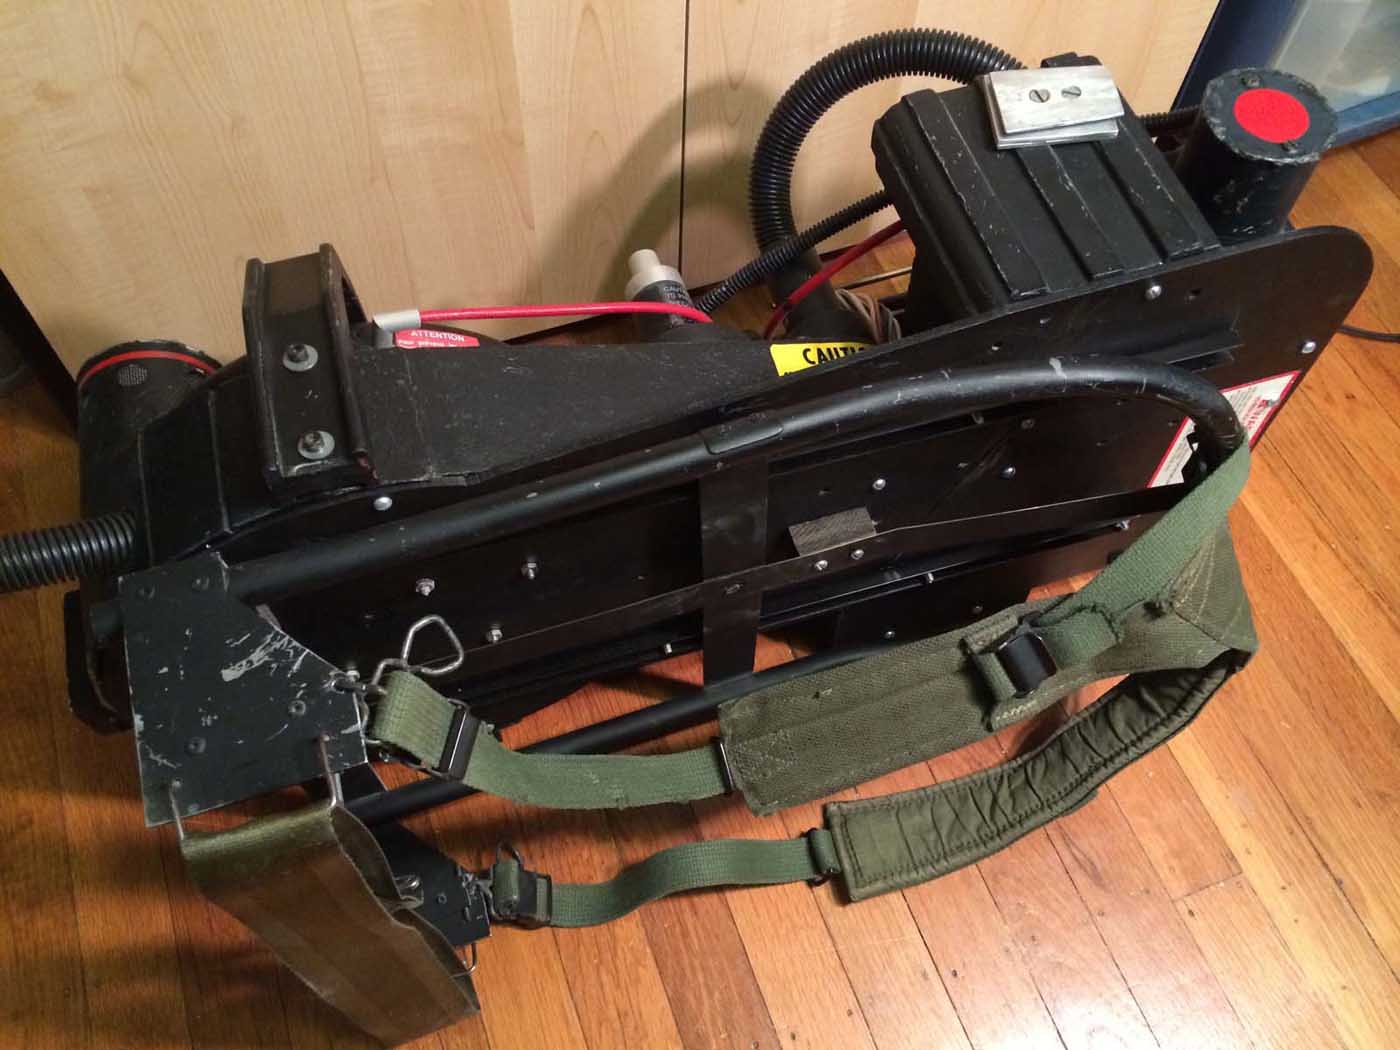
Around 2015 my friend Patrick Benton gave me his spare Alice pack replica frame, which is much easier on my shoulders than the one Bryan scratch-built in 1984 using a conduit bender, aluminum bits and his rivet gun. Also at that time I replaced my creaky analog power cell circuit with a row of LEDs driven by a Teensy Arduino board. Some day I hope to consolidate all of my power to a single, rechargeable battery.
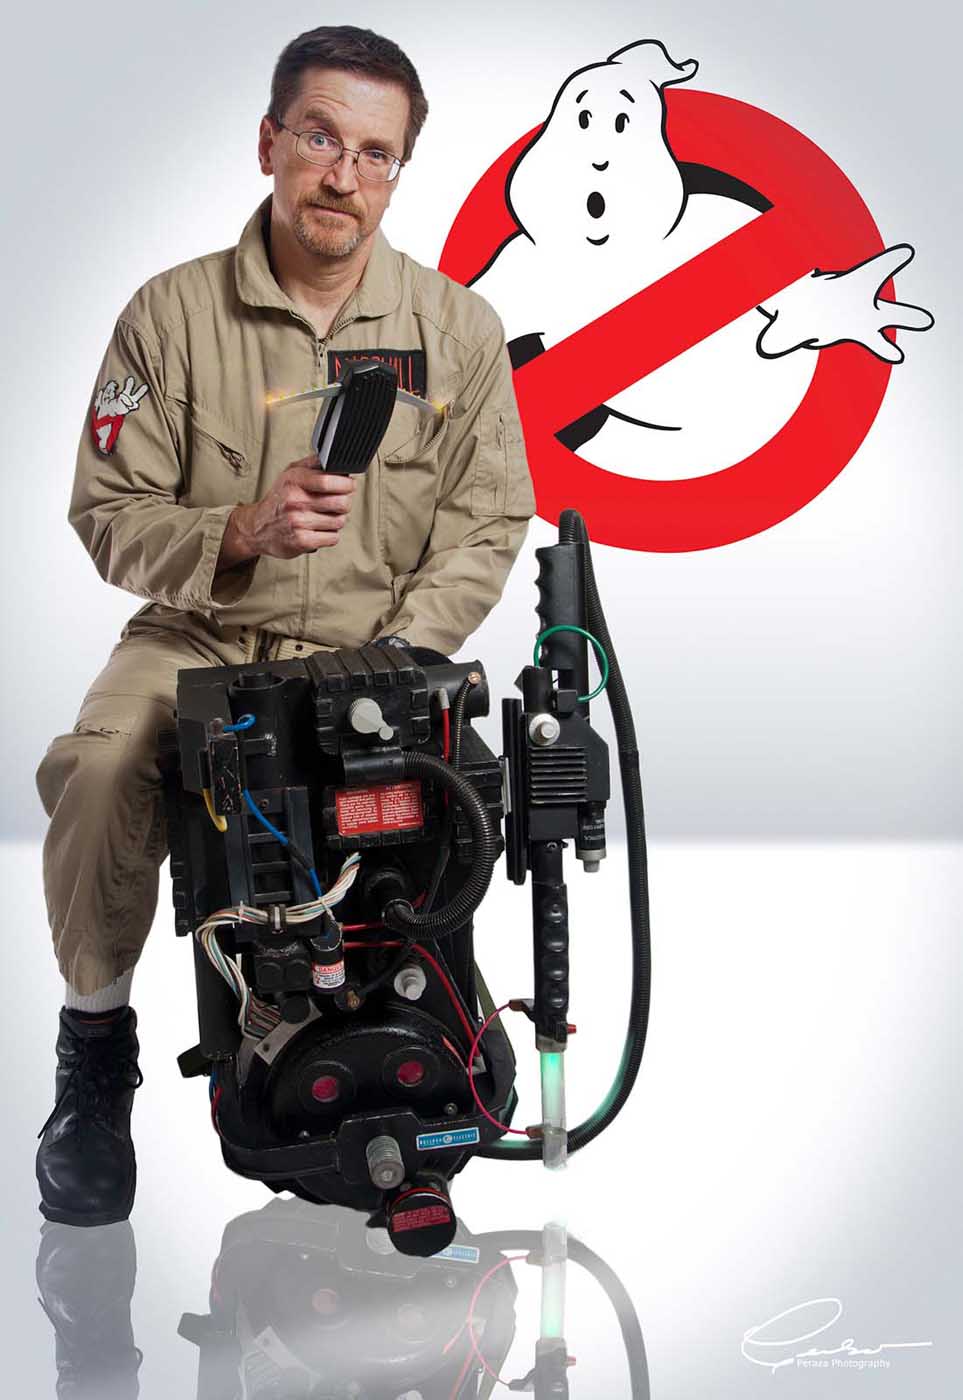
37 years later I still enjoy gearing up for conventions, screenings, and other occasions.
bryan's proton pack
Bryan’s pack has been subject to some different upgrades. His pack retains the original wood construction we built in 1984. He added a flash to the tip of his wand. He acquired a real Alice pack frame in the late 80s, and added some real Clippards around that time, too.